
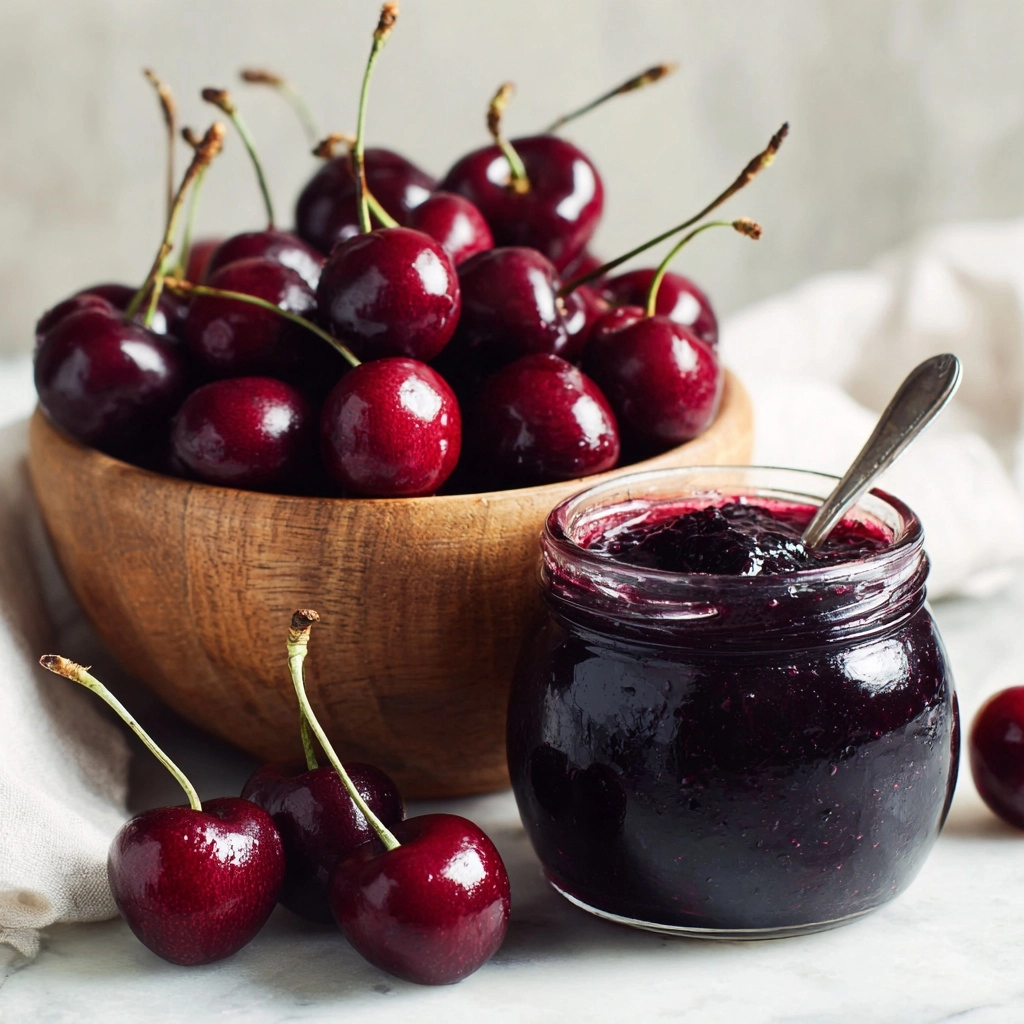
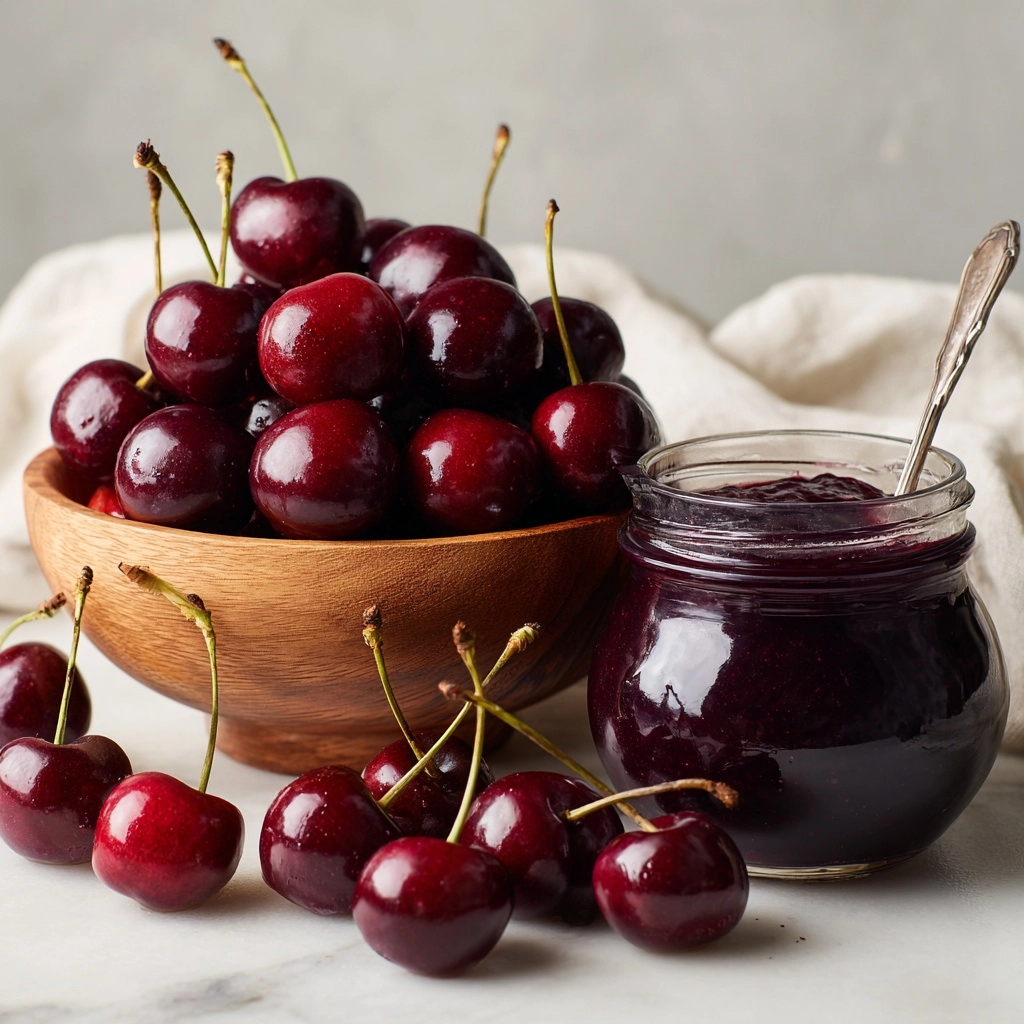
If you’ve ever wanted to make your own delightful fruit spread without the fuss of big batches, this Small Batch Cherry Jam Recipe is going to become your new best friend in the kitchen. Bursting with fresh cherry flavor and just the right balance of sweetness and tartness, this jam is incredibly simple to prepare and requires no pectin. Whether you’re a seasoned jam maker or a curious newbie, this recipe offers a cozy, hands-on way to capture the vibrant taste of cherries in just about 35 minutes. Get ready to spread a little joy on your toast, yogurt, or desserts with this perfectly portioned homemade treat.
Ingredients You’ll Need
One of the best parts about this Small Batch Cherry Jam Recipe is how few ingredients you need, each chosen to enhance the cherries’ natural sweetness and texture. These simple basics come together harmoniously to create a vibrant, jammy treat that’s both wholesome and delicious.
- 2 cups fresh or frozen cherries, pitted and halved: The star of the show, bringing rich color and juicy flavor that makes every spoonful memorable.
- 1 cup granulated sugar: Sweetens the jam perfectly while helping it set to that ideal spreadable consistency.
- 1 tablespoon lemon juice: Adds brightness and balances the sweetness, while also helping the jam thicken naturally.
- ½ teaspoon vanilla extract (optional): Gives a subtle warmth and depth to the jam’s flavor, but feel free to skip if you prefer pure cherry taste.
- Pinch of salt: Enhances all the flavors and rounds out the jam beautifully.
How to Make Small Batch Cherry Jam Recipe
Step 1: Combine Ingredients in a Saucepan
Start by placing your cherries, sugar, lemon juice, and a pinch of salt into a medium saucepan. Stir everything gently over medium heat. The sugar will slowly dissolve, and the cherries will begin to release their luscious juices, creating a vibrant base for your jam. This process usually takes about 5 to 7 minutes, and the sweet aroma filling your kitchen will make the wait worthwhile.
Step 2: Bring to a Boil and Simmer
Once the sugar is dissolved and the fruit juices have mingled, crank the heat just enough to bring the mixture to a gentle boil. Then reduce the heat so the jam simmers steadily. This slow simmer is where the magic happens as the cherries soften and start to break down, thickening the mixture. Stir frequently and use the back of a spoon or a potato masher to gently mash the cherries, helping to release even more flavor and achieve a lovely chunky texture.
Step 3: Test and Finish the Jam
After 20 to 25 minutes of simmering and mashing, it’s time to check your jam’s consistency. Spoon a little onto a chilled plate and push it with your finger—if the surface wrinkles slightly, your jam is ready. Remove the pan from heat, then stir in the optional vanilla extract for a gentle hint of warmth. Let the jam cool a bit before transferring it to a clean jar or airtight container. Pop it in the refrigerator, and you’re all set to enjoy fresh, homemade cherry jam whenever the craving hits.
How to Serve Small Batch Cherry Jam Recipe
Garnishes
This cherry jam is a canvas for creativity when it comes to garnishing. Fresh mint leaves or a light sprinkle of grated lemon zest on top can add a refreshing contrast. If you like a bit of texture, a few chopped toasted almonds or a dash of cinnamon powder work wonderfully to elevate the flavor experience.
Side Dishes
The versatility of this Small Batch Cherry Jam Recipe shines brightest when paired with a variety of sides. Spread it across warm, buttered toast for breakfast, dollop it onto vanilla yogurt for a delightful snack, or use it to complement a cheese board featuring creamy brie or sharp cheddar. It also makes an incredible topping for pancakes and waffles, adding a fresh fruity pop.
Creative Ways to Present
Thinking beyond the usual? Use this cherry jam as a layering ingredient in parfaits or swirl it into homemade ice cream or cheesecake batter. You can even glaze roasted meats or brush it onto grilled sandwiches for a sweet-tart twist. Presenting the jam in small, charming jars tied with twine makes it a perfect homemade gift idea for friends and family.
Make Ahead and Storage
Storing Leftovers
Your Small Batch Cherry Jam Recipe will keep wonderfully in the refrigerator for 2 to 3 weeks when stored in a clean, airtight container. Make sure the jar is properly sealed to maintain freshness and prevent any unwanted odors. This timeframe means you can enjoy multiple breakfasts or snacks without any rush.
Freezing
If you’d like to extend the life of your cherry jam even further, freezing is an excellent option. Transfer the jam to a freezer-safe container, leaving a bit of space for expansion. When you’re ready to enjoy it, thaw the jam overnight in the refrigerator for a smooth, fresh-tasting result, ready to brighten up your meals at any time.
Reheating
Reheating your Small Batch Cherry Jam Recipe is straightforward. Warm it gently in a microwave-safe bowl or on the stove over low heat, stirring occasionally. This brings back that freshly cooked charm and makes it easy to spread or drizzle over your favorite foods. Just avoid overheating, as it may affect the texture.
FAQs
Do I need to use fresh cherries, or can I use frozen?
Both fresh and frozen cherries work beautifully in this recipe. Frozen cherries are incredibly convenient and just as flavorful, plus they often streamline the preparation process since they’re usually already pitted or halved. Just be sure to thaw them slightly before starting.
Can I add pectin to this Small Batch Cherry Jam Recipe?
You absolutely can! While the recipe is designed to thicken naturally without pectin, adding about ½ tablespoon can give your jam a firmer texture. This is especially helpful if you prefer a jelly-like consistency over a spread with fruit chunks.
How can I tell when the jam is done cooking?
The best way is the classic wrinkle test: place a spoonful of jam on a chilled plate and push it gently with your finger. If the surface wrinkles and doesn’t run, your jam has set nicely. If it’s too runny, keep simmering and test again every few minutes.
Is this jam recipe vegan and gluten-free?
Yes! This Small Batch Cherry Jam Recipe is naturally vegan and gluten-free since it uses only fruit, sugar, lemon juice, and optional vanilla extract. It’s a safe and delicious option for a wide range of dietary preferences.
Can I process the jam for longer storage?
Definitely. For longer shelf life, you can process the jars in a boiling water bath for about 10 minutes. Be sure to follow proper canning guidelines to ensure your jars seal correctly and keep the jam safe for several months.
Final Thoughts
Making your own Small Batch Cherry Jam Recipe is one of those simple kitchen joys that fills your home with warmth and the irresistible scent of fresh fruit. It’s an easy, satisfying way to capture the essence of cherries at their peak and enjoy them anytime you want. Whether spread on toast or used as an ingredient in your favorite dishes, this jam is sure to become a beloved staple. Give it a try—you won’t regret turning fresh cherries into pure jam magic.
Print
Small Batch Cherry Jam Recipe
- Prep Time: 10 minutes
- Cook Time: 25 minutes
- Total Time: 35 minutes
- Yield: 1 cup
- Category: Condiment
- Method: Stovetop
- Cuisine: American
- Diet: Vegan, Gluten Free
Description
A simple and delicious small batch cherry jam recipe made with fresh or frozen cherries, sugar, and lemon juice. This easy stovetop recipe requires no pectin and yields a flavorful, naturally thickened jam perfect for toast, yogurt, and desserts.
Ingredients
Ingredients
- 2 cups fresh or frozen cherries, pitted and halved
- 1 cup granulated sugar
- 1 tablespoon lemon juice
- ½ teaspoon vanilla extract (optional)
- Pinch of salt
Instructions
- Combine ingredients: In a medium saucepan, combine the cherries, sugar, lemon juice, and a pinch of salt.
- Dissolve sugar and release juices: Stir over medium heat until the sugar dissolves and the cherries begin to release their juices, about 5 to 7 minutes.
- Simmer the mixture: Bring the mixture to a gentle boil, then reduce heat to maintain a simmer. Cook for 20 to 25 minutes, stirring frequently and mashing the cherries with the back of a spoon or potato masher as they soften.
- Check consistency: Continue cooking until the jam thickens. Test by placing a spoonful on a chilled plate—if it wrinkles slightly when pushed, it’s ready.
- Add vanilla and cool: Remove from heat, stir in vanilla extract if using, let cool slightly, then transfer to a clean jar or airtight container.
- Store: Refrigerate and use within 2 to 3 weeks. For longer storage, process in a water bath for 10 minutes following canning guidelines.
Notes
- No pectin is needed, but you can add ½ tablespoon for a firmer set.
- This jam is perfect for toast, yogurt, or layering in desserts.
- For longer shelf life, use water bath canning for 10 minutes following safe canning procedures.

