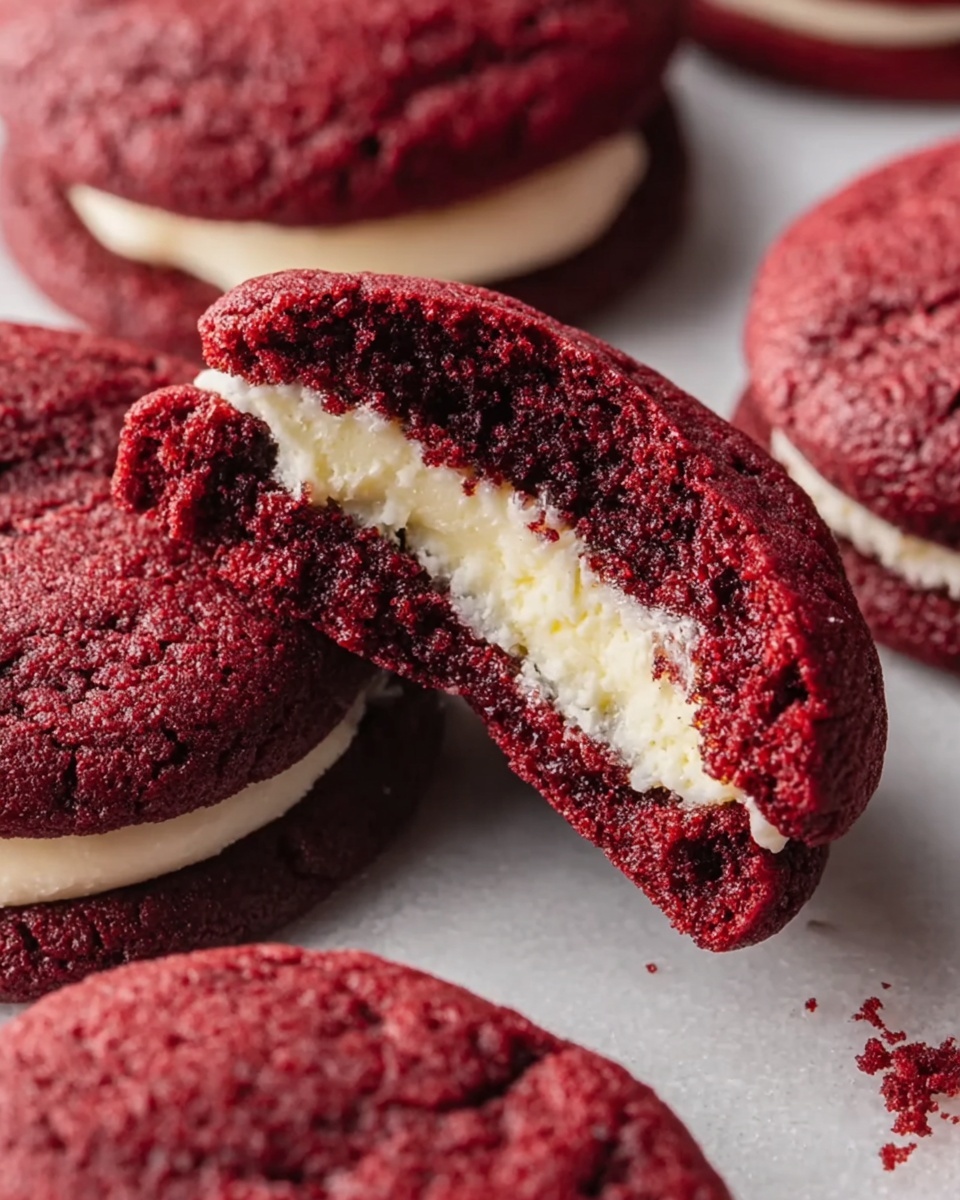
If you’ve been on the lookout for a dessert that brings together rich and indulgent flavors with a wow-worthy presentation, the Red Velvet Cheesecake Stuffed Cookies Recipe is the ultimate treat you need to try. Imagine biting into a soft, fudgy red velvet cookie that hides a luscious, creamy cheesecake surprise right in the center. It’s a dessert that’s as delightful to make as it is to eat, striking a perfect balance between classic southern charm and a playful twist that will have everyone asking for seconds. Whether you’re baking for a special occasion or a cozy night in, this recipe is pure magic and one of my absolute favorites to share.
Ingredients You’ll Need
Gathering your ingredients is the first step to this fantastic creation. The simplicity of each component allows the flavors to shine, and every element plays a crucial role in achieving that perfect texture, taste, and vibrant red hue.
- All-purpose flour, 2 ½ cups: Provides the sturdy yet tender base for the cookie dough.
- Cocoa powder, 1 tbsp: Adds just a subtle chocolate depth to the cinnamon-like red velvet profile.
- Baking soda, 1 tsp: Helps the cookies rise beautifully and ensures a soft crumb.
- Salt, ¼ tsp: Balances sweetness and enhances all the flavors.
- Unsalted butter, 1 cup (softened): For that rich, melt-in-your-mouth cookie texture.
- Granulated sugar, 1 cup: Sweetens the dough while contributing to the cookie’s tender bite.
- Large egg, 1: Binds everything together and adds moisture.
- Vanilla extract, 2 tsp (divided): Infuses both the cookie and filling with warm sweetness.
- Red food coloring, 2 tbsp (gel or liquid): Gives that signature red velvet color that wows visually.
- Vinegar, 1 tsp (optional): Enhances the red color for that true velvet look and adds subtle tang.
- Cream cheese, 8 oz (softened): The star of the filling, creating a luscious, creamy center.
- Powdered sugar, ½ cup: Sweetens and smooths the cheesecake filling perfectly.
- All-purpose flour, 1 tbsp: Stabilizes the filling so it stays intact inside the cookie while baking.
How to Make Red Velvet Cheesecake Stuffed Cookies Recipe
Step 1: Whip Up the Cheesecake Filling
Start by creating the dreamy cheesecake filling that will be the jewel inside your cookies. Beat your softened cream cheese until it’s smooth and creamy—no lumps here! Then fold in the powdered sugar, vanilla extract, and a tablespoon of flour. This mixture thickens and sweetens the filling, making it perfect for stuffing. Scoop it into small tablespoon-sized balls and pop them on a parchment-lined sheet before chilling in the freezer for at least 30 minutes. This step is crucial to keep that creamy center intact during baking.
Step 2: Mix the Red Velvet Cookie Dough
While the filling chills, get your dough ready. In one bowl, whisk the dry ingredients: flour, cocoa powder, baking soda, and salt. Then, in a large bowl, cream the softened butter and granulated sugar until fluffy and light—this is where the cookie gets its tender crumb. Add in the egg, vanilla extract, red food coloring, and the optional vinegar to deepen that red color. Gradually mix the dry ingredients into the wet until the dough comes together, thick and slightly sticky, perfect for wrapping around that chilled cheesecake.
Step 3: Assemble Your Cookies
Preheat your oven to 350 degrees Fahrenheit (175 degrees Celsius). Take about two tablespoons of red velvet dough, flatten it into a disc, and place a frozen cheesecake ball right in the center. Carefully fold the dough over the filling, sealing it entirely, then roll it into a smooth ball. Arrange your stuffed cookie balls on a parchment-lined baking sheet, making sure they’re spaced about two inches apart to give them room to spread and puff up.
Step 4: Bake to Perfection
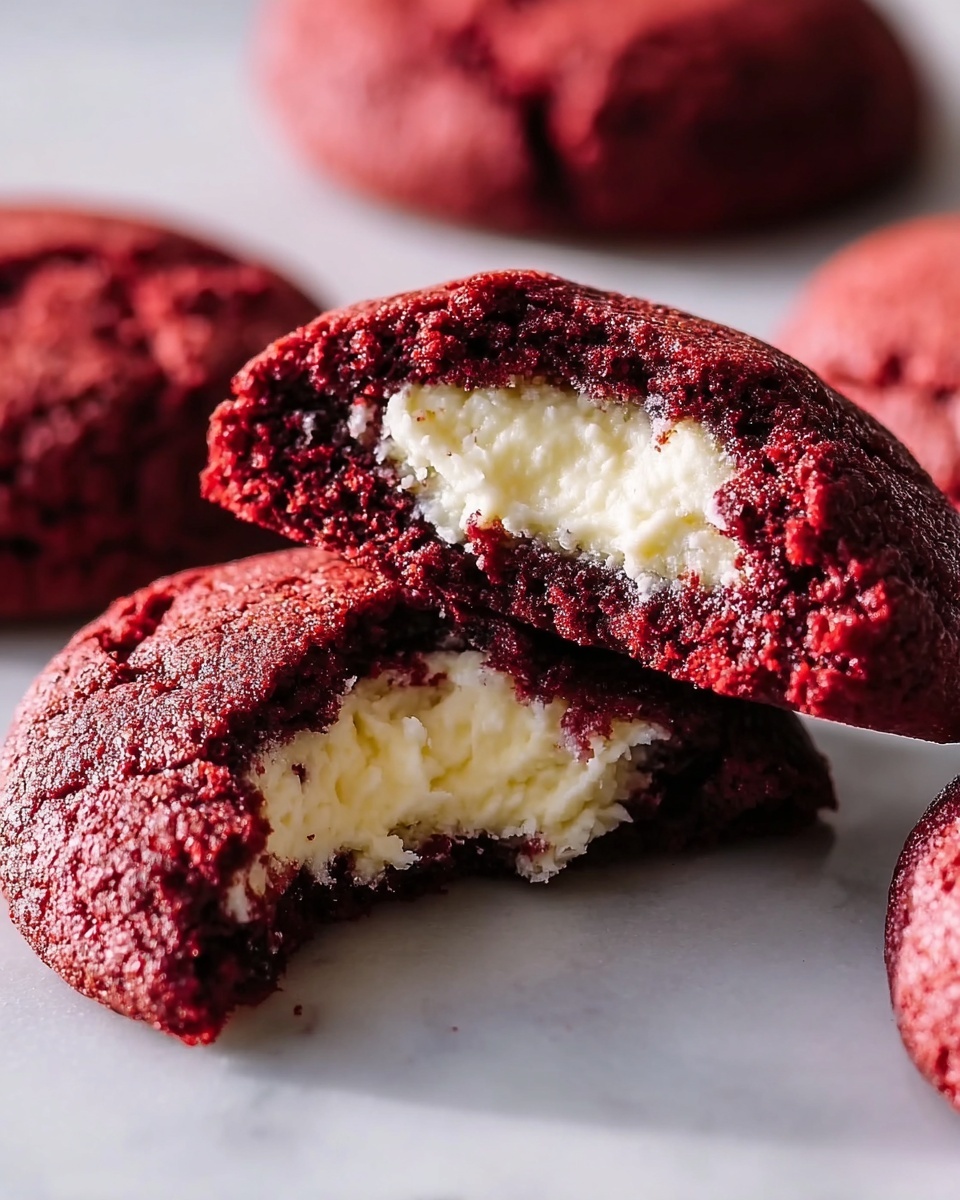
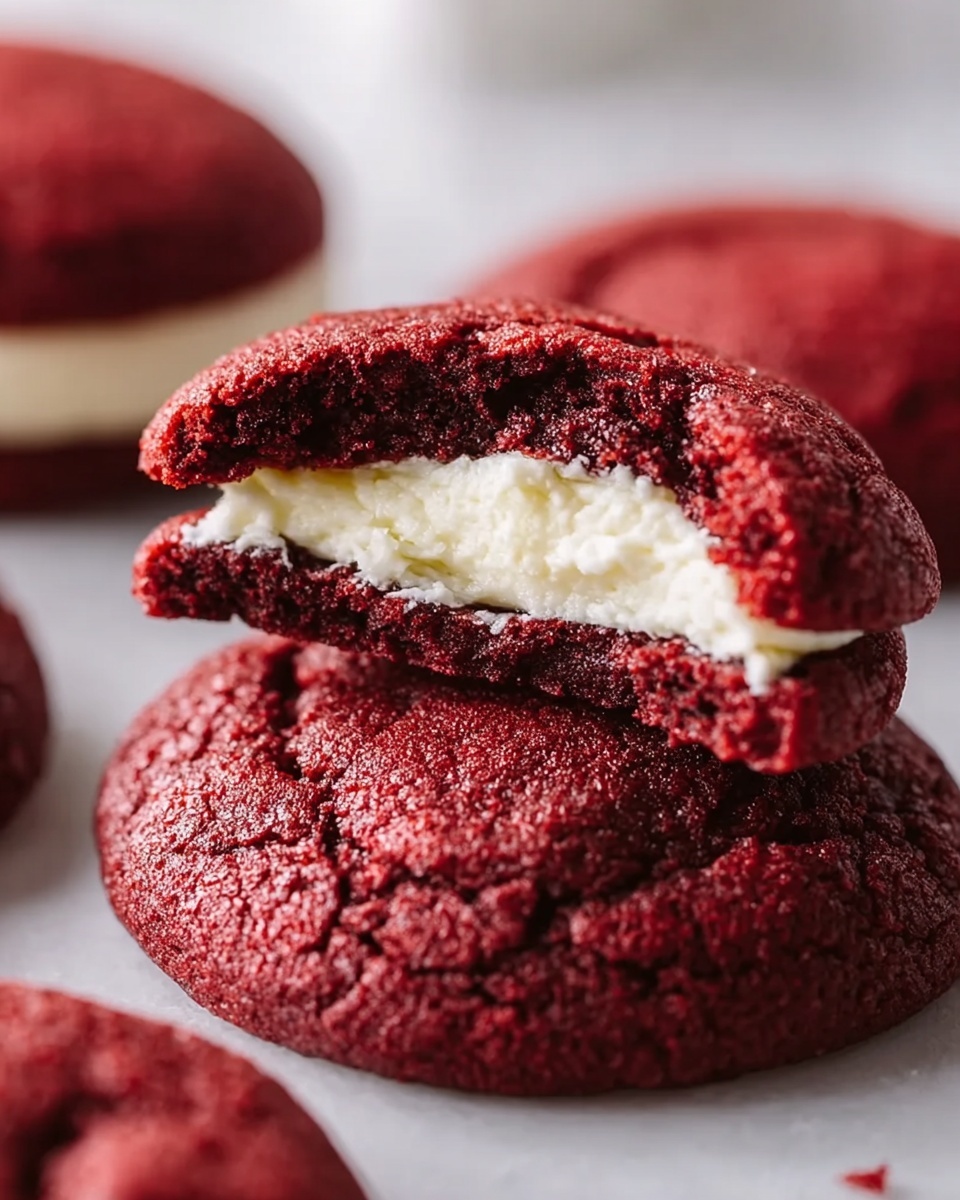
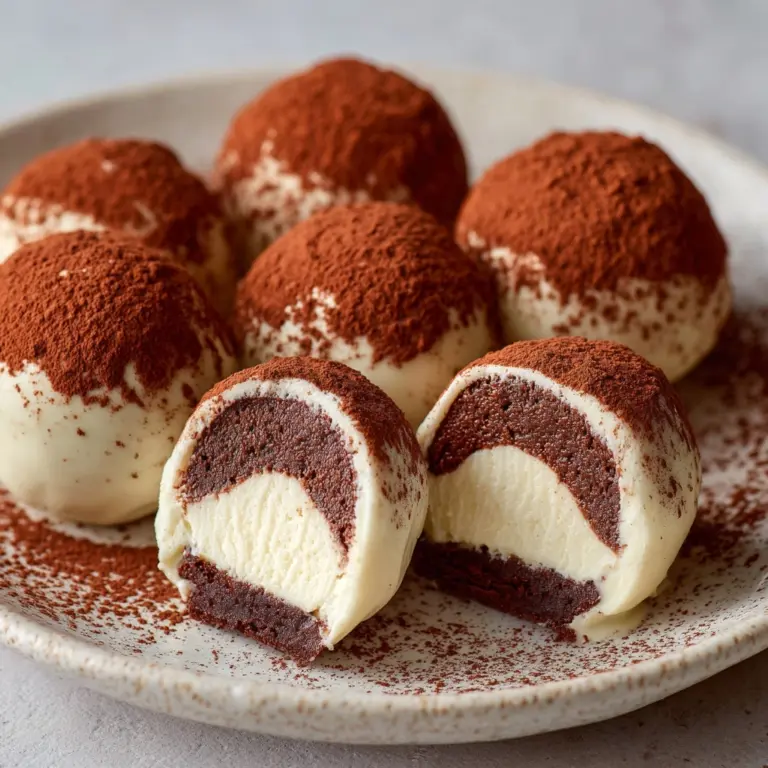
Bake your cookies for 10 to 12 minutes. You’ll know they’re ready when the edges look set but the tops still show those classic slight cracks. Resist the urge to overbake—softness is key here. Let them cool on the baking sheet for about five minutes so they firm up just enough, then transfer them to a wire rack to cool completely. This resting time helps the cheesecake center settle to creamy, gooey perfection under that velvet exterior.
Step 5: Enjoy Your Masterpiece
Once fully cooled, these cookies are ready to dazzle! Each bite bursts with the perfect contrast: a tender red velvet cookie wrapping around a smooth and indulgent cheesecake core. The Red Velvet Cheesecake Stuffed Cookies Recipe is an incredible crowd-pleaser that tastes as luxurious as it looks.
How to Serve Red Velvet Cheesecake Stuffed Cookies Recipe
Garnishes
To elevate presentation and add extra flavor layers, dust your cookies lightly with powdered sugar or drizzle them with white chocolate. A sprinkle of finely crushed freeze-dried raspberries or edible gold dust can also add a festive pop. These little touches make serving these cookies feel especially celebratory.
Side Dishes
Pairing these cookies with a side can turn them into a full dessert experience. Fresh berries, a dollop of whipped cream, or even a scoop of vanilla bean ice cream complement the richness perfectly. For drinks, serve with a cold glass of milk, coffee, or even a creamy hot chocolate to balance sweetness with warmth.
Creative Ways to Present
Try arranging these stuffed cookies on a tiered dessert stand for a party, or package them individually in pretty cellophane bags tied with a ribbon for gifts. Another fun idea is to serve them warm with a side of fruit coulis, turning your Red Velvet Cheesecake Stuffed Cookies Recipe into an elegant dessert centerpiece that will impress every guest.
Make Ahead and Storage
Storing Leftovers
If you have leftovers (which is unlikely, but just in case!), store your cookies in an airtight container at room temperature for up to two days. For longer freshness, keep them refrigerated; just bring them to room temperature before serving for the best texture and flavor.
Freezing
These cookies freeze beautifully. Freeze the assembled cookie dough balls before baking or the baked cookies after cooling. Wrap them tightly in plastic wrap and place them in a freezer-safe bag or container. Frozen dough balls can be baked straight from the freezer with an additional minute or two added to the baking time.
Reheating
To enjoy these cookies as if fresh from the oven, gently warm them in a preheated oven at 300 degrees Fahrenheit for about 5 minutes. Microwaving is quicker but can make the cookie a bit softer. The warmed cheesecake filling becomes perfectly gooey and irresistible again, making every bite freshly delightful.
FAQs
Can I use regular chocolate instead of cocoa powder in the cookie dough?
For this Red Velvet Cheesecake Stuffed Cookies Recipe, cocoa powder is essential as it provides the signature subtle chocolate flavor without changing the cookie’s moisture balance. Using regular chocolate could alter the texture and intensity of the cookie.
What if I don’t have red food coloring? Can I skip it?
The red food coloring gives the cookies their classic red velvet look, which is part of the fun and appeal of this recipe. Without it, you will still have tasty cheesecake-stuffed cookies but they won’t have that vibrant, festive appearance.
Is vinegar really necessary in the dough?
Vinegar is optional but highly recommended if you want to enhance the red color and give your cookies the slight tang that balances sweetness and enriches that classic red velvet flavor.
Can I make the cheesecake filling without the flour?
The tablespoon of flour helps stabilize the cheesecake filling during baking so it doesn’t ooze out of the cookies. Omitting it might result in a runnier filling, so it’s best to keep it for perfect texture and neat cookies.
How large should the stuffed cookies be?
Each cookie dough ball should be about two tablespoons before adding the cheesecake filling, and the cheesecake filling balls about one tablespoon. This size balance ensures the cookies bake evenly with a gooey center without overpowering the cookie itself.
Final Thoughts
This Red Velvet Cheesecake Stuffed Cookies Recipe is one of those special desserts that turns an ordinary cookie into a spectacular treat. I encourage you to dive into the process and delight in the magic of soft red velvet balancing with silky cheesecake filling—it’s pure joy in every bite. Whether for holiday gatherings, gifts, or simply to brighten your day, these cookies are guaranteed to make smiles and create lasting memories around your kitchen table.
Print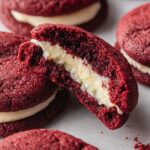
Red Velvet Cheesecake Stuffed Cookies Recipe
- Prep Time: 30 minutes
- Cook Time: 12 minutes
- Total Time: 42 minutes
- Yield: 18 cookies
- Category: Dessert
- Method: Baking
- Cuisine: American
Description
These Red Velvet Cheesecake Stuffed Cookies combine the rich, velvety flavor of red velvet cookie dough with a luscious, creamy cheesecake center. Perfectly soft cookies encase a smooth cheesecake filling, creating an indulgent treat that is as visually stunning as it is delicious. Ideal for special occasions or satisfying a sweet tooth with a unique twist on classic cookies.
Ingredients
Cheesecake Filling
- 8 oz cream cheese, softened
- ½ cup powdered sugar
- 1 tsp vanilla extract
- 1 tbsp all-purpose flour
Red Velvet Cookie Dough
- 2 ½ cups all-purpose flour
- 1 tbsp cocoa powder
- 1 tsp baking soda
- ¼ tsp salt
- 1 cup unsalted butter, softened
- 1 cup granulated sugar
- 1 large egg
- 1 tsp vanilla extract
- 2 tbsp red food coloring (gel or liquid)
- 1 tsp vinegar (optional, enhances color)
Instructions
- Prepare the Cheesecake Filling: In a medium mixing bowl, beat the softened cream cheese until smooth and creamy. Add the powdered sugar, vanilla extract, and flour, and beat until well combined. Scoop the cheesecake mixture into small balls, about 1 tablespoon each, and place them on a parchment-lined baking sheet. Freeze for at least 30 minutes, or until firm.
- Make the Red Velvet Cookie Dough: In a medium bowl, whisk together the flour, cocoa powder, baking soda, and salt. In a separate large mixing bowl, cream the softened butter and granulated sugar until light and fluffy. Add the egg, vanilla extract, red food coloring, and vinegar, mixing until well incorporated. Gradually add the dry ingredients to the wet ingredients and mix until the dough comes together. The dough should be thick and slightly sticky.
- Assemble the Stuffed Cookies: Preheat your oven to 350°F (175°C). Scoop about 2 tablespoons of the red velvet cookie dough and flatten it into a small disc in your hand. Place a frozen cheesecake ball in the center and carefully fold the edges of the cookie dough around the cheesecake, sealing it completely. Roll the dough into a ball. Place the cookie dough balls on a parchment-lined baking sheet, spacing them about 2 inches apart.
- Bake the Cookies: Bake for 10-12 minutes, or until the edges are set and the tops of the cookies look slightly cracked. Let the cookies cool on the baking sheet for 5 minutes before transferring them to a wire rack to cool completely.
- Serve and Enjoy: Enjoy the cookies once they have cooled. The cheesecake filling will be creamy and indulgent, contrasting perfectly with the soft red velvet cookie exterior.
Notes
- Freezing the cheesecake filling balls is essential to prevent the filling from leaking out during baking.
- Use gel food coloring for a more vibrant red without altering the dough’s consistency.
- Allow cookies to cool completely to let the cheesecake filling set nicely.
- Store cookies in an airtight container and refrigerate to keep the cheesecake filling fresh.
- Vinegar is optional but helps enhance the red velvet color without affecting the taste.


