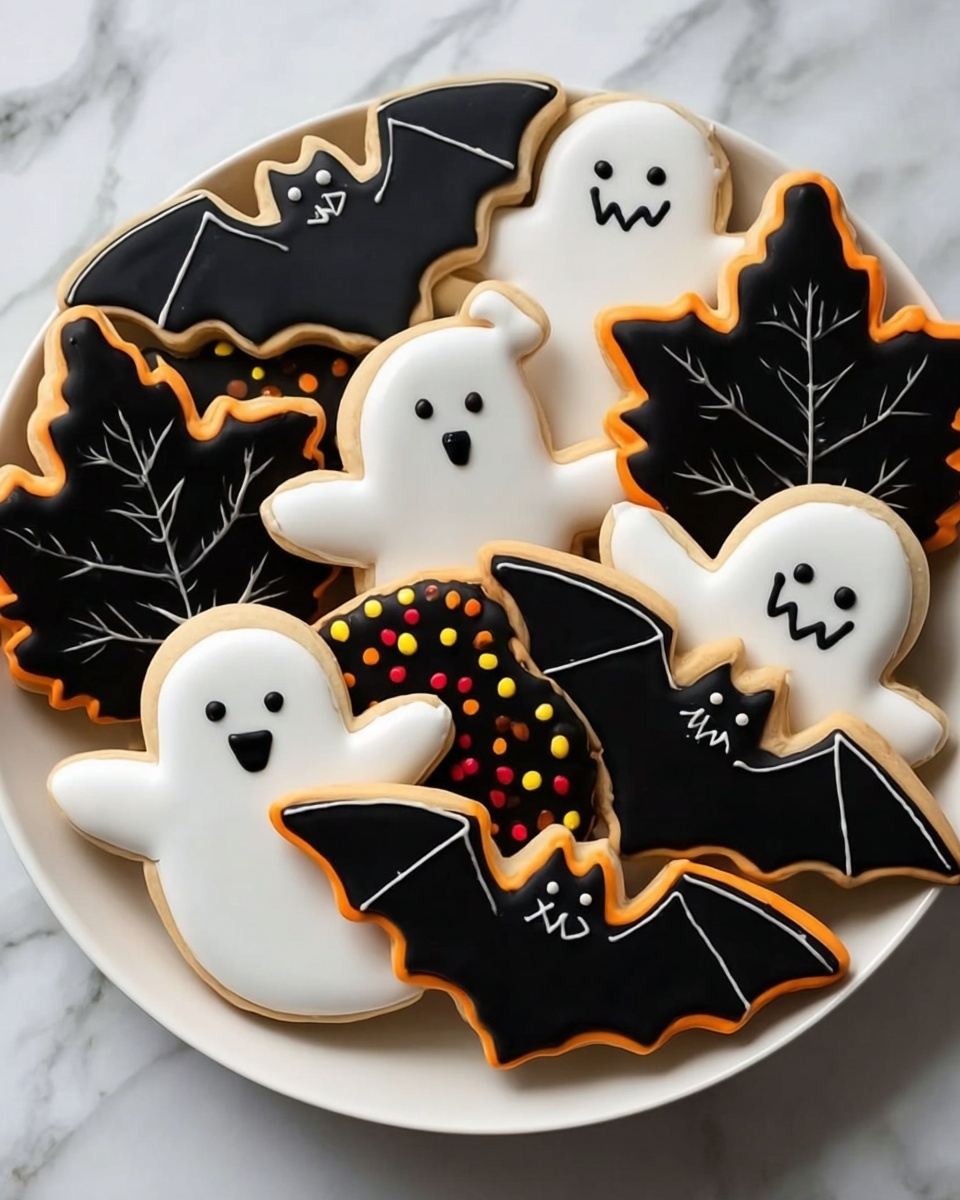
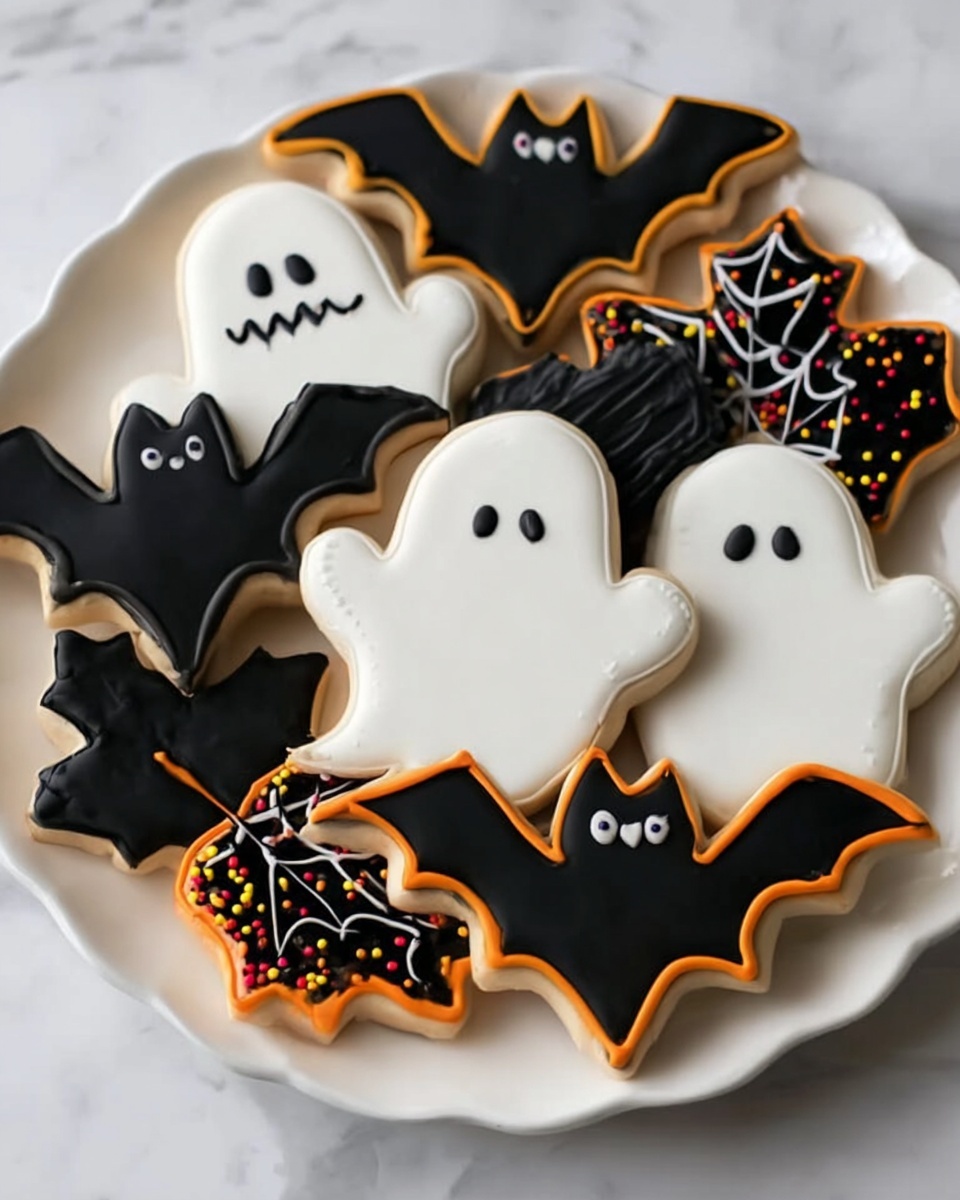
If you are searching for a festive and delightful way to celebrate the spooky season, this Halloween Royal Icing Cookies Recipe is exactly what you need. These cookies combine a buttery, soft base with the smooth and vibrant royal icing that lets your creativity run wild. Perfect for parties or sharing with family, this recipe brings a magical touch to your Halloween treats, making them as fun to decorate as they are to eat.
Ingredients You’ll Need
Simple, quality ingredients are the secret to making truly delicious Halloween Royal Icing Cookies. Each ingredient plays an important role in the taste, texture, and texture—whether it’s creating a tender dough or a glossy icing perfect for spooky decorations.
- Unsalted butter (1 cup, chilled): Gives the cookies a rich, creamy flavor and tender crumb.
- Granulated sugar (1 cup): Adds just the right sweetness and helps with cookie texture.
- Whole egg (1) and egg yolk (1): Provide moisture and richness, helping bind the dough.
- Vanilla extract (2 tsp): Enhances the overall flavor with a warm, inviting note.
- Salt (1 tsp): Balances sweetness and deepens flavor profile.
- All-purpose flour (3 cups + 2 tbsp): Creates the structure for your perfect cookies.
- Egg whites (4): The base for your royal icing, giving it that perfect smooth, glossy finish.
- Powdered sugar (2 lbs): Sweetens and thickens the icing to the perfect consistency.
- Butter emulsion (½ tsp) and almond emulsion (¼ tsp): Add subtle, sophisticated flavor notes to your icing.
- Water (as needed): Helps you adjust icing to the perfect texture.
- Gel food coloring (orange and black): Bring your Halloween themes to life with vivid, intense colors.
- Halloween candy skulls and sprinkles: Fun embellishments that add character and festive flair to your designs.
How to Make Halloween Royal Icing Cookies Recipe
Step 1: Prepare the Cookie Dough
Start by chilling your unsalted butter to ensure it blends perfectly with the sugar. Cream the butter and granulated sugar together until light and fluffy—this is key to a tender cookie. Then, mix in the whole egg, egg yolk, and vanilla extract, making sure everything is well incorporated. Finally, sift in the flour and salt and mix just until combined to avoid overworking the dough. Wrap your dough and chill it in the fridge for at least 30 minutes to make it easier to handle.
Step 2: Roll and Cut the Cookies
Once your dough is chilled, roll it out evenly on a lightly floured surface to about ¼ inch thickness. Use your favorite Halloween-themed cookie cutters, like coffins, pumpkins, or ghosts, to create festive shapes. Place the cutouts on parchment-lined baking sheets, spacing them slightly apart to keep from merging as they bake.
Step 3: Bake the Cookies
Bake your cookies at 350°F (175°C) for about 10 minutes or until edges just begin to turn golden. Allow the cookies to cool completely on wire racks before decorating—this keeps the icing smooth and prevents melting or sliding.
Step 4: Make the Royal Icing
While the cookies cool, prepare the royal icing by beating the egg whites until foamy. Gradually add powdered sugar, then flavor with the butter and almond emulsions along with vanilla extract for a richer taste. Adjust the texture with water: thicker for outlining, thinner for flooding. Divide your icing and tint with gel food colors—orange and black make the perfect Halloween palette.
Step 5: Decorate Your Cookies
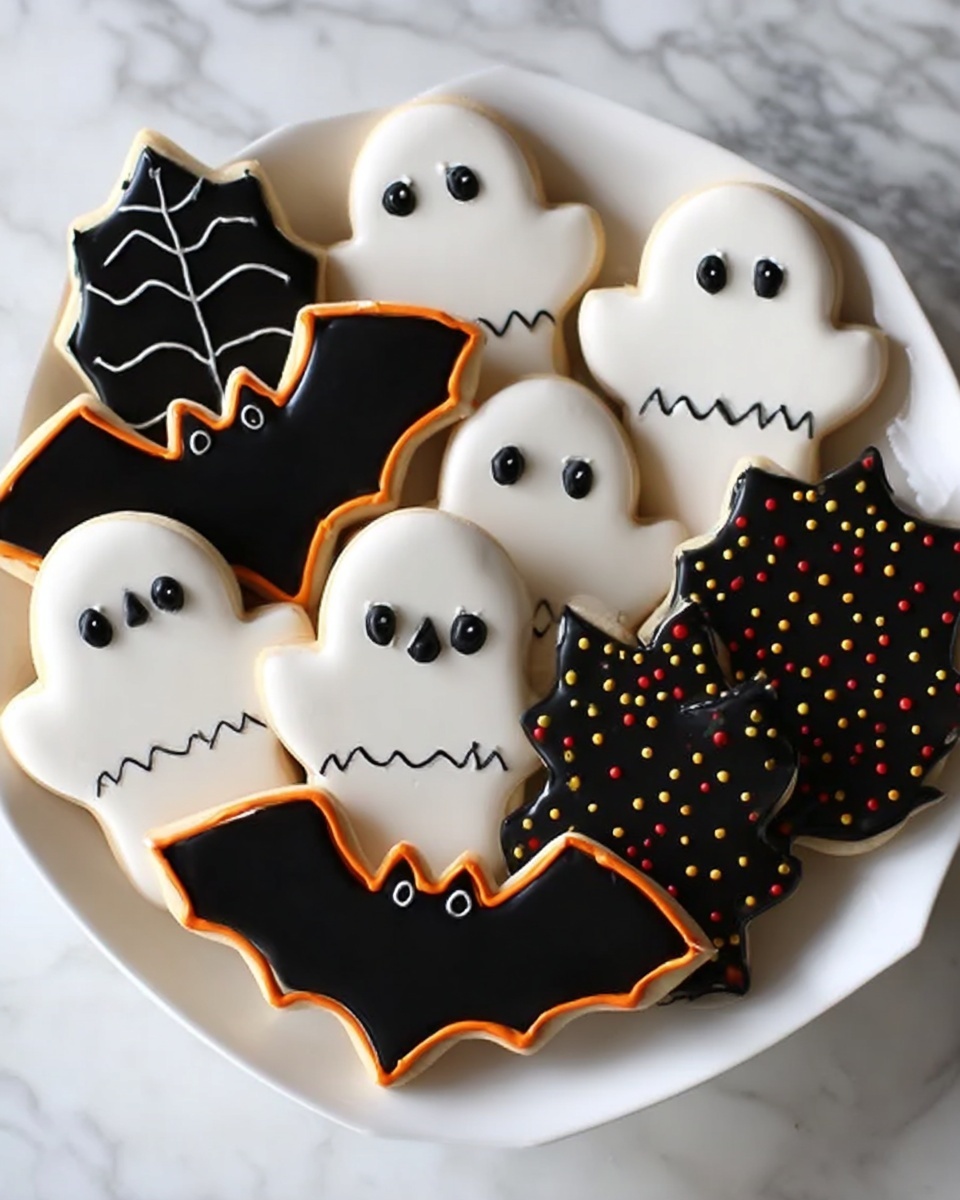
Use piping bags fitted with fine tips to outline your cookies with thicker black icing. Flood the interiors with the thinned orange or black icing for cauldron and coffin designs. While the icing is still wet, press candy skulls on coffin cookies and add sprinkles to the cauldrons for playful details. Let the icing dry completely, ideally overnight, to set your masterpiece.
How to Serve Halloween Royal Icing Cookies Recipe
Garnishes
Adding final touches like edible glitter, mini candy pieces, or even a subtle dust of cocoa powder can amp up the spooky factor. Halloween candy skulls and vibrant sprinkles not only add texture but also invite guests into a festive experience that’s as charming as it is tasty.
Side Dishes
Pair these cookies with warm autumn comforts—think cinnamon-spiced hot chocolate or a steaming cup of chai tea. These beverages complement the sweetness while enhancing the cozy Halloween vibe.
Creative Ways to Present
Arrange your decorated cookies on a rustic wooden board or a vintage tray lined with black lace for an eerie elegance. For parties, placing each cookie on a custom Halloween napkin or wrapping them in clear bags tied with orange and black ribbons makes for a perfectly festive favor or centerpiece.
Make Ahead and Storage
Storing Leftovers
You can keep your decorated cookies fresh by storing them in an airtight container at room temperature, layered between parchment paper to prevent sticking. Proper storage preserves their crisp edges and vibrant icing for up to a week.
Freezing
If you want to prepare in advance, freeze undecorated cookies in a single layer on a baking sheet; once frozen, transfer them to a sealed container. Royal icing cookies freeze best after fully drying so that the icing maintains its texture when thawed.
Reheating
Since these cookies are best enjoyed at room temperature, gently thaw frozen cookies without reheating to maintain their delightful texture and icing integrity. Avoid microwaving as this can cause the icing to melt and lose its design.
FAQs
Can I use powdered egg whites instead of fresh egg whites for the royal icing?
Absolutely! Powdered egg whites are a safe and convenient alternative. Just rehydrate according to package instructions before using, and your royal icing will turn out just as glossy and smooth.
How long does royal icing take to dry?
Royal icing typically needs several hours to dry completely, but for best results, allow your decorated cookies to rest overnight to harden fully before stacking or packaging.
Is it okay to substitute almond emulsion with almond extract?
Yes, almond extract can be used but use it sparingly because it tends to be stronger than emulsion. Start with a smaller amount and adjust to taste for that perfect subtle nutty note.
Can I prepare the dough ahead of time?
Definitely! The dough can be made and refrigerated for up to 2 days before rolling and baking, making it easier to manage your Halloween baking schedule.
What if I don’t have gel food coloring?
You can use liquid food coloring but keep in mind it may thin your icing and create less vibrant colors. Gel colors are preferred for intensity and maintaining icing consistency in the Halloween Royal Icing Cookies Recipe.
Final Thoughts
I cannot recommend this Halloween Royal Icing Cookies Recipe enough for anyone eager to add a touch of homemade magic to their holiday celebrations. With its perfect balance of buttery cookies and beautifully customizable icing, it makes Halloween decorating fun and approachable. Gather your ingredients, get creative, and enjoy every delicious bite of these festive treats!
Print
Halloween Royal Icing Cookies Recipe
- Prep Time: 1h 30m
- Cook Time: 10m
- Total Time: 1h 40m
- Yield: 24-30 decorated cookies
- Category: Dessert
- Method: Baking
- Cuisine: American
Description
Halloween Royal Icing Cookies are festive, buttery sugar cookies decorated with smooth royal icing in vibrant Halloween colors. Perfect for spooky celebrations, these cookies use a classic butter cookie base and a silky royal icing flavored with vanilla and almond emulsions to create bright orange and black designs. Decorate with themed candy skulls and sprinkles for a fun, eye-catching treat that’s perfect for parties or gifting.
Ingredients
Cookie Dough
- 1 cup (226 g) unsalted butter (chilled)
- 1 cup (200 g) granulated sugar
- 1 whole egg
- 1 egg yolk
- 2 tsp vanilla extract
- 1 tsp salt
- 3 cups + 2 tbsp (375 g) all-purpose flour
Royal Icing
- 4 egg whites
- 2 lbs powdered sugar
- 1 tsp vanilla extract
- ½ tsp butter emulsion (or butter flavoring)
- ¼ tsp almond emulsion (or almond extract)
- Water (as needed)
- Gel food coloring (orange and black)
Decorations
- Halloween candy skulls (for coffin cookies)
- Sprinkles (for cauldron cookies)
Instructions
- Prepare the Cookie Dough: In a large mixing bowl, cream the chilled unsalted butter and granulated sugar together until light and fluffy. Add the egg, egg yolk, and vanilla extract, mixing until combined. Stir in the salt, then gradually add the flour, mixing just until the dough comes together. Wrap the dough in plastic wrap and chill in the refrigerator for at least 1 hour to firm up.
- Roll and Cut Cookies: Preheat your oven to 350°F (175°C). On a lightly floured surface, roll out the chilled dough to about 1/4 inch thickness. Use Halloween-themed cookie cutters like coffins and cauldrons to cut out shapes. Transfer cookies to parchment-lined baking sheets.
- Bake the Cookies: Bake the cookies in the preheated oven for 8-12 minutes or until the edges are slightly golden. Remove from the oven and let them cool completely on wire racks before decorating.
- Make the Royal Icing: In a large bowl, whisk the egg whites until frothy. Gradually sift in the powdered sugar while mixing at low speed. Add vanilla extract, butter emulsion, and almond emulsion. Adjust the consistency with water, adding a few drops at a time, to achieve a smooth, pipeable icing. Divide the icing into separate bowls and tint with gel food coloring—one orange and one black.
- Decorate the Cookies: Using piping bags or brushes, decorate the cooled cookies with the colored royal icing. For coffin cookies, pipe a black outline and fill with orange icing, then add Halloween candy skulls on top for detail. For cauldron cookies, use black icing as the base and decorate with colorful sprinkles for a bubbling effect. Allow icing to dry completely, ideally overnight, to set.
Notes
- Ensure the butter is well chilled before making the dough to prevent spreading during baking.
- Use fresh egg whites for royal icing to ensure the best consistency.
- If concerned about raw eggs in royal icing, use pasteurized egg whites or meringue powder as a safe alternative.
- Gel food coloring provides vibrant colors without thinning the icing.
- Allow the icing sufficient time to dry to avoid smudging decorations.
- Store decorated cookies in an airtight container at room temperature for up to one week.