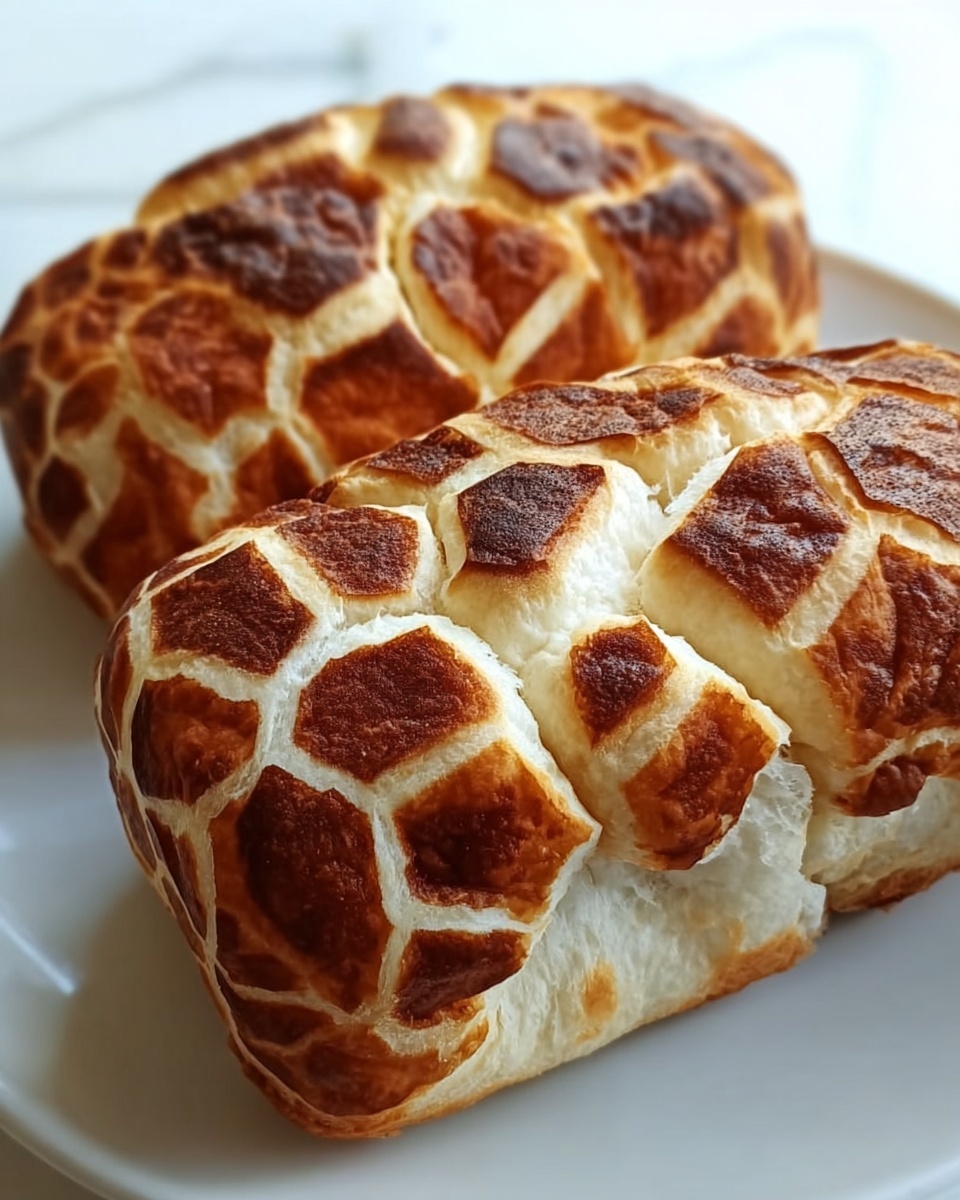
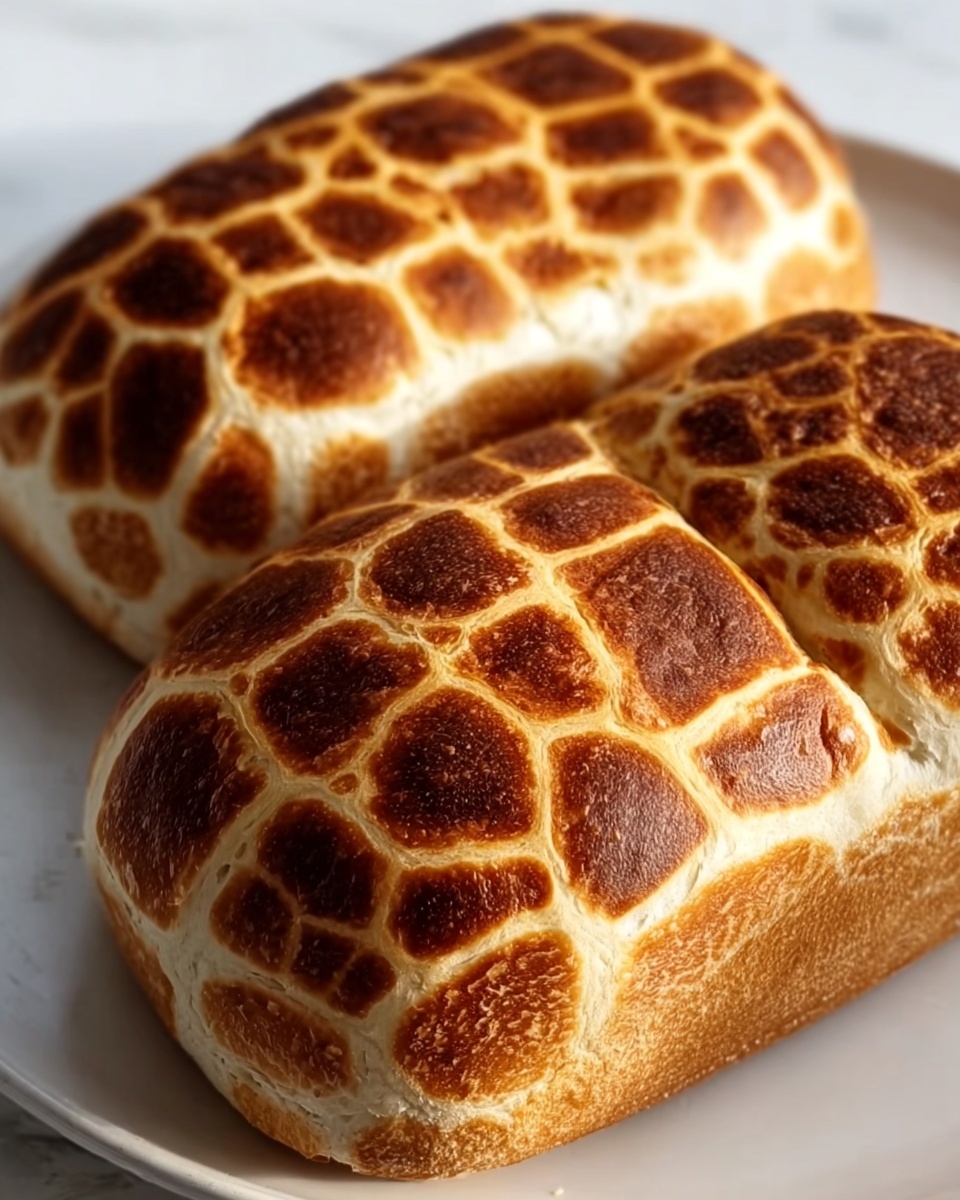
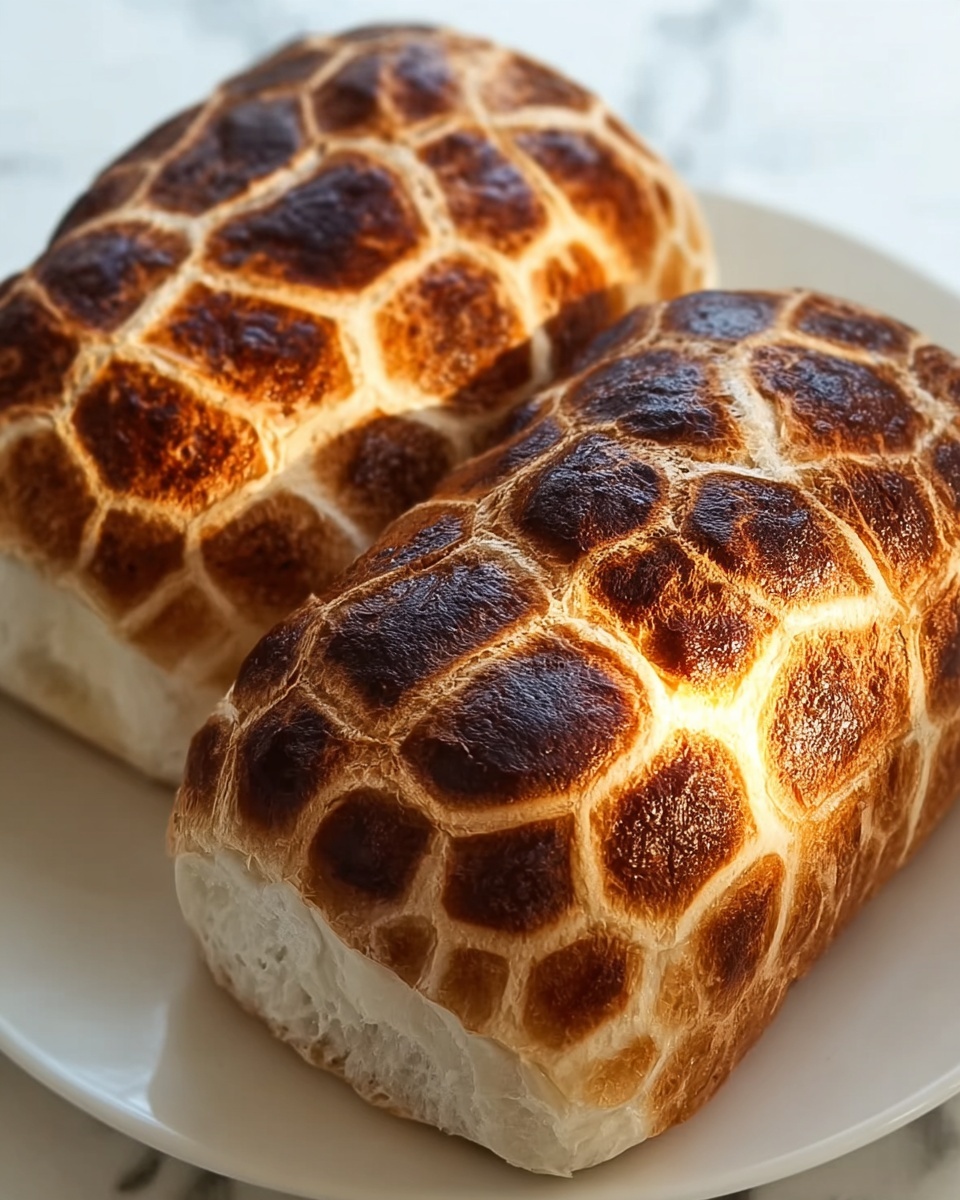
If you have a craving for something both crunchy and irresistibly flavorful, this Easy Tiger Bread Recipe for a Crunchy, Crave-Worthy Snack Recipe is exactly what you need. With its signature crackled crust and soft, chewy inside, tiger bread is more than just a loaf—it’s a sensory experience. The unique topping made with rice flour creates that famously beautiful pattern while giving each bite a satisfying crunch that begs for just one more slice. Whether you’re a seasoned baker or just starting to explore bread making, this recipe offers a straightforward, rewarding way to bring a bakery favorite to your own kitchen.
Ingredients You’ll Need
Simple ingredients with important roles come together to create the fantastic texture and flavor of this tiger bread. Each component is carefully chosen to ensure an authentic and delicious result, from the chewy crumb to the crackly topping.
- Bread flour: A must for creating that perfect chewy texture that holds up well to the unique topping.
- Sugar: Adds a touch of sweetness and helps with fermentation, ensuring a good rise.
- Salt: Enhances flavor and strengthens the dough’s gluten structure.
- Instant yeast: Ensures your bread rises beautifully without long waiting times.
- Warm water: Activates the yeast for a great rise and provides moisture to the dough.
- Vegetable oil: Adds moisture and richness, keeping the bread tender.
- Rice flour: Gives the unique crackled finish that makes Easy Tiger Bread so special.
- Sugar (for topping): Balances the savory notes with a hint of sweetness, enhancing the crust’s flavor.
- Salt (for topping): Rounds out the flavors in the crackle mixture for depth.
- Vegetable oil (for topping): Adds richness and helps the topping adhere nicely to the dough.
- Instant yeast (for topping): A touch added to make sure the topping develops that lovely texture during baking.
How to Make Easy Tiger Bread Recipe for a Crunchy, Crave-Worthy Snack Recipe
Step 1: Prepare the Dough
Begin by whisking together bread flour, sugar, salt, and instant yeast in a large bowl. Slowly add the warm water and vegetable oil, mixing until a rough dough forms. Knead this dough for about 8 to 10 minutes until it’s smooth and elastic. This vigorous kneading creates the gluten network responsible for that perfect chewy bite.
Step 2: First Rise
Place your dough in an oiled bowl and cover it with a clean cloth or plastic wrap. Let it rise in a warm spot for about an hour, or until it has doubled in size. This step is crucial for developing flavor and lightness inside the bread.
Step 3: Make the Topping
While the dough rises, prepare your signature tiger bread topping. In a separate bowl, combine rice flour, sugar, salt, instant yeast, vegetable oil, and warm water. Stir until the mixture turns into a thick, spreadable paste. The rice flour is what creates the iconic crackled crust once baked.
Step 4: Shape the Loaf
Once your dough has doubled, gently punch it down and shape it into a round or oval loaf. Place it on a parchment-lined baking tray or in a loaf tin. This shaping helps create the right form for the bread’s texture and crust to develop properly during baking.
Step 5: Apply the Topping
Spoon the rice flour paste generously over the top of the shaped dough. Spread it evenly but gently; this layer will dry and crack during baking to form the iconic tiger bread pattern.
Step 6: Second Rise and Bake
Allow the topped dough to rise again for 30 minutes, letting that topping settle and the bread prepare for the oven. Preheat your oven to 375°F (190°C), then bake your loaf for about 30 minutes until the crust turns a beautiful golden brown and the topping crisply cracks. Cool the bread on a rack to let the flavors develop fully.
How to Serve Easy Tiger Bread Recipe for a Crunchy, Crave-Worthy Snack Recipe
Garnishes
This bread’s natural crunch and flavor shine on their own, but you can add a little something extra by serving it with creamy butter or a drizzle of honey. Fresh herbs like rosemary or thyme sprinkled on a slice alongside soft cheese create lovely complementary zest.
Side Dishes
Easy Tiger Bread pairs wonderfully with soups and salads. Think hearty tomato soup or a crisp green salad—its crusty exterior is perfect for dipping and scooping, making every bite a satisfying experience.
Creative Ways to Present
Try serving your tiger bread sliced thick alongside a charcuterie board or spread with flavored cream cheeses. You can even use it for sandwiches, where the crunchy texture adds a delightful twist to your favorite fillings.
Make Ahead and Storage
Storing Leftovers
To keep your tiger bread fresh, store it in a paper bag or wrapped loosely in a kitchen towel at room temperature. This helps maintain the crust’s crunch without trapping too much moisture, which would soften it.
Freezing
If you’d like to save some for later, slice your cooled loaf and freeze it in an airtight bag. This way, you can take out just what you need without thawing the entire loaf. It freezes well for up to a month without losing quality.
Reheating
To bring back that irresistible crunch after storing, reheat slices in a toaster or warm them in an oven at 350°F (175°C) for 5 to 7 minutes. This refreshes the texture and highlights the bread’s delicious aroma all over again.
FAQs
What makes tiger bread different from regular bread?
The star of tiger bread is its unique topping made from rice flour paste, which cracks and crisps up during baking, creating the signature tiger-like pattern on the crust. This contrasts beautifully with the soft, chewy interior.
Can I use all-purpose flour instead of bread flour?
While all-purpose flour can work, bread flour is preferred because its higher protein content develops more gluten, resulting in the chewy texture that tiger bread is known for.
Is instant yeast necessary for this recipe?
Yes, instant yeast helps the dough rise faster and more reliably, which is especially helpful for beginners or when you want a quicker baking process.
Can I make the topping without yeast?
The small amount of yeast in the topping aids in texture development and helps it crackle properly. Omitting it might result in a less distinct crust.
How long does the bread stay fresh?
Stored properly at room temperature, tiger bread stays fresh for about 2 to 3 days. For longer storage, freezing is recommended.
Final Thoughts
If you’re ready to experience one of the most satisfying crunchy breads you’ll ever bake, this Easy Tiger Bread Recipe for a Crunchy, Crave-Worthy Snack Recipe should be your next kitchen adventure. It’s a delight to make, share, and savor any time of day. Give it a try, and watch how this simple recipe turns into your new favorite snack that friends and family will ask for again and again.
Print
Easy Tiger Bread Recipe for a Crunchy, Crave-Worthy Snack Recipe
- Prep Time: 15 minutes
- Cook Time: 30 minutes
- Total Time: 1 hour 45 minutes
- Yield: 12 slices
- Category: Bread
- Method: Baking
- Cuisine: British
Description
This Easy Tiger Bread recipe delivers a crunchy, crave-worthy snack with its signature crackled crust and soft, chewy interior. Using bread flour for texture and a unique rice flour paste topping, this recipe creates an authentic tiger bread that’s perfect as a snack or sandwich base.
Ingredients
Dough
- 3 cups Bread flour
- 2 tablespoons Sugar
- 1 teaspoon Salt
- 1 packet Instant yeast (about 2 1/4 teaspoons)
- 1.5 cups Warm water
- 2 tablespoons Vegetable oil
Topping
- 0.5 cup Rice flour
- 0.5 cup Warm water
- 1 tablespoon Sugar
- 1 teaspoon Salt
- 2 tablespoons Vegetable oil
- 1 teaspoon Instant yeast
Instructions
- Prepare the Dough: In a large mixing bowl, combine bread flour, sugar, salt, and instant yeast. Gradually add the 1.5 cups of warm water and vegetable oil. Mix until you form a sticky dough. Knead for about 8-10 minutes until smooth and elastic.
- First Rise: Place the dough in a lightly oiled bowl, cover with a damp cloth or plastic wrap, and let it rise in a warm place until doubled in size, approximately 1 hour.
- Prepare the Topping Paste: While the dough rises, mix the rice flour, warm water, sugar, salt, vegetable oil, and instant yeast in a small bowl until you get a smooth, thick batter. Set aside to activate the yeast and thicken further.
- Shape the Dough: Once the dough has risen, punch it down to release air bubbles. Shape it into a loaf or round shape depending on preference, and place it on a baking tray lined with parchment paper.
- Apply the Topping: Spread the rice flour paste evenly over the shaped dough. The paste will create the distinctive crackled crust when baked.
- Second Rise: Cover the dough with a cloth and let it rise for another 30 minutes to 45 minutes, allowing the topping to set and the dough to puff slightly.
- Bake the Bread: Preheat the oven to 375°F (190°C). Bake the bread for about 25 to 30 minutes or until the crust is golden brown and crackled. The bottom should sound hollow when tapped.
- Cool and Serve: Remove the bread from the oven and cool it on a wire rack before slicing to preserve the crust’s crunchiness. Slice into 12 pieces and enjoy your crunchy tiger bread snack.
Notes
- Using bread flour is essential for the chewy texture of the bread.
- Rice flour in the topping ensures the characteristic crackled crust.
- Make sure water is warm, not hot, to activate yeast without killing it.
- You can store leftovers in an airtight container for up to 2 days; re-crisp in the oven before serving.
- For a softer crust, cover the bread loosely with foil during the last 10 minutes of baking.


