
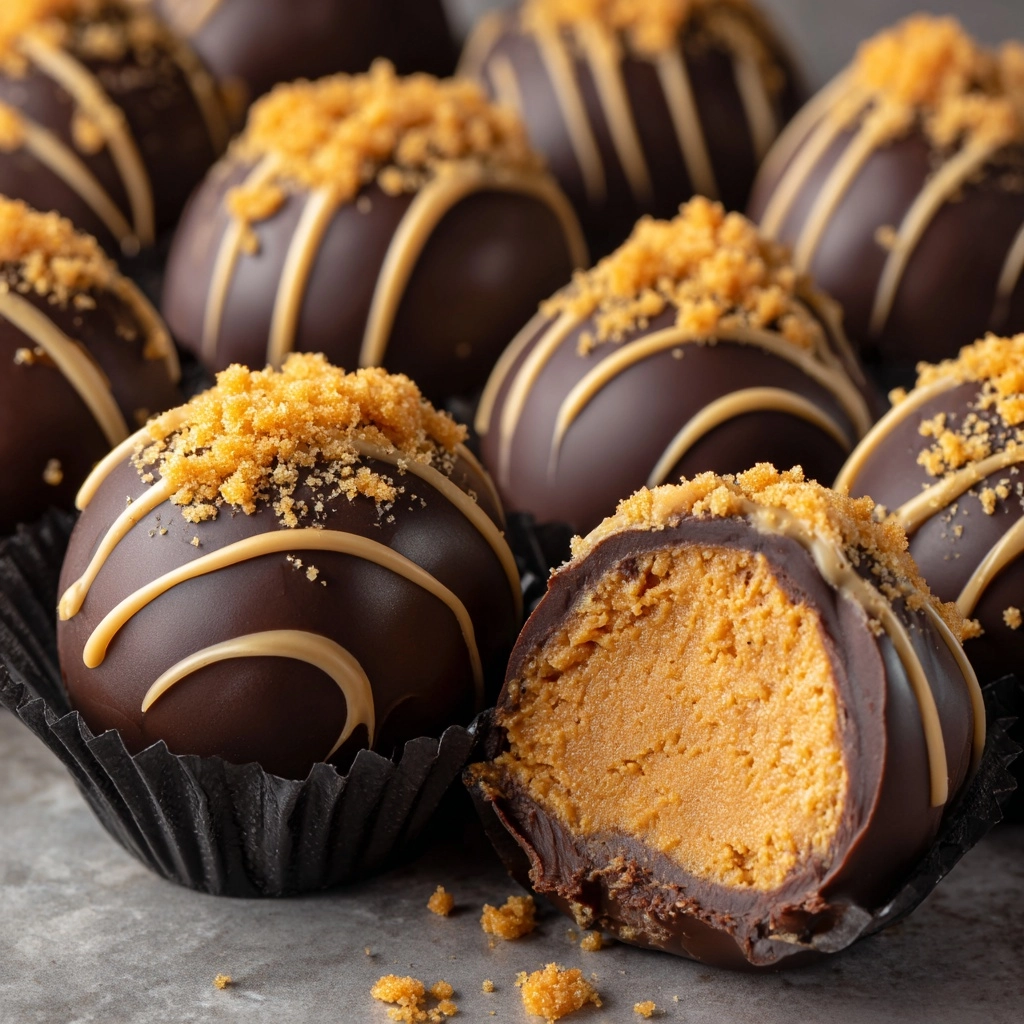
If you’ve ever dreamed of a bite-sized treat packed with the perfect balance of creamy peanut butter, crunchy candy, and rich chocolate, then this Butterfinger Balls Recipe is made just for you. It’s a delightful no-bake dessert that brings together the nostalgic crunch of Butterfinger candy bars with the silky smoothness of melted chocolate, creating irresistible little bites of happiness. Whether you’re preparing treats for a party or just craving a sweet snack, these buttery, chocolatey balls will quickly become a beloved recipe in your collection.
Ingredients You’ll Need
Getting started with this Butterfinger Balls Recipe is a breeze because it calls for simple, everyday ingredients that come together to create something truly magical. Each component plays a crucial role in ensuring every bite delivers the right texture, flavor, and sweetness.
- Creamy peanut butter: Provides a smooth, nutty base that holds everything together and adds richness.
- Unsalted butter (softened): Adds creaminess and helps the dough bind perfectly without overpowering the flavor.
- Powdered sugar: Sweetens the mixture and gives a dusted finish that balances the saltiness of peanut butter.
- Crushed Butterfinger candy bars: Offers that signature crunchy texture and buttery, crispy candy flavor we all love.
- Semi-sweet or milk chocolate chips: Used to coat the balls, giving them a luscious, melt-in-your-mouth shell.
- Coconut oil or shortening (optional): Helps smooth and thin the chocolate for even dipping and a glossy finish.
How to Make Butterfinger Balls Recipe
Step 1: Combine the peanut butter and butter
Start by placing the creamy peanut butter and softened unsalted butter into a large mixing bowl. Use a sturdy spoon or an electric mixer to blend these two until you get a smooth, creamy consistency with no lumps. This creates the luscious base that will hold your Butterfinger Balls together.
Step 2: Mix in powdered sugar
Slowly add the powdered sugar to your peanut butter-butter mixture, stirring gradually to avoid a floury cloud. The sugar will thicken the dough into a scoopable, firm dough that’s sweet but perfectly balanced with the peanut butter’s natural saltiness.
Step 3: Fold in the crushed Butterfinger pieces
Gently fold in the crushed Butterfinger candy bars, ensuring they’re evenly distributed throughout the dough. This step adds that amazing crunchy texture and that irresistible candy flavor in every bite. Make sure not to overmix, or your candies might lose some crunch.
Step 4: Shape into balls and chill
Using your hands or a small cookie scoop, roll the dough into 1-inch balls. Place them carefully on a parchment-lined baking sheet. Pop the tray into the freezer for about 30 minutes to let them firm up. This chilling step is essential to keep their shape during the chocolate coating.
Step 5: Melt the chocolate
While your peanut butter balls chill, melt the chocolate chips in a microwave-safe bowl. Heat in 30-second bursts, stirring well between each interval. For an extra smooth and glossy finish, add a tablespoon of coconut oil or shortening if you have it on hand. This makes dipping a dream.
Step 6: Coat and set
Once the balls are firm, use a fork or toothpick to dip each one into the melted chocolate, letting any excess drip off before placing them back on the parchment paper. After all are coated, transfer the tray to the refrigerator and let the chocolate harden for 20 to 30 minutes. And just like that, your Butterfinger Balls are ready to enjoy!
How to Serve Butterfinger Balls Recipe
Garnishes
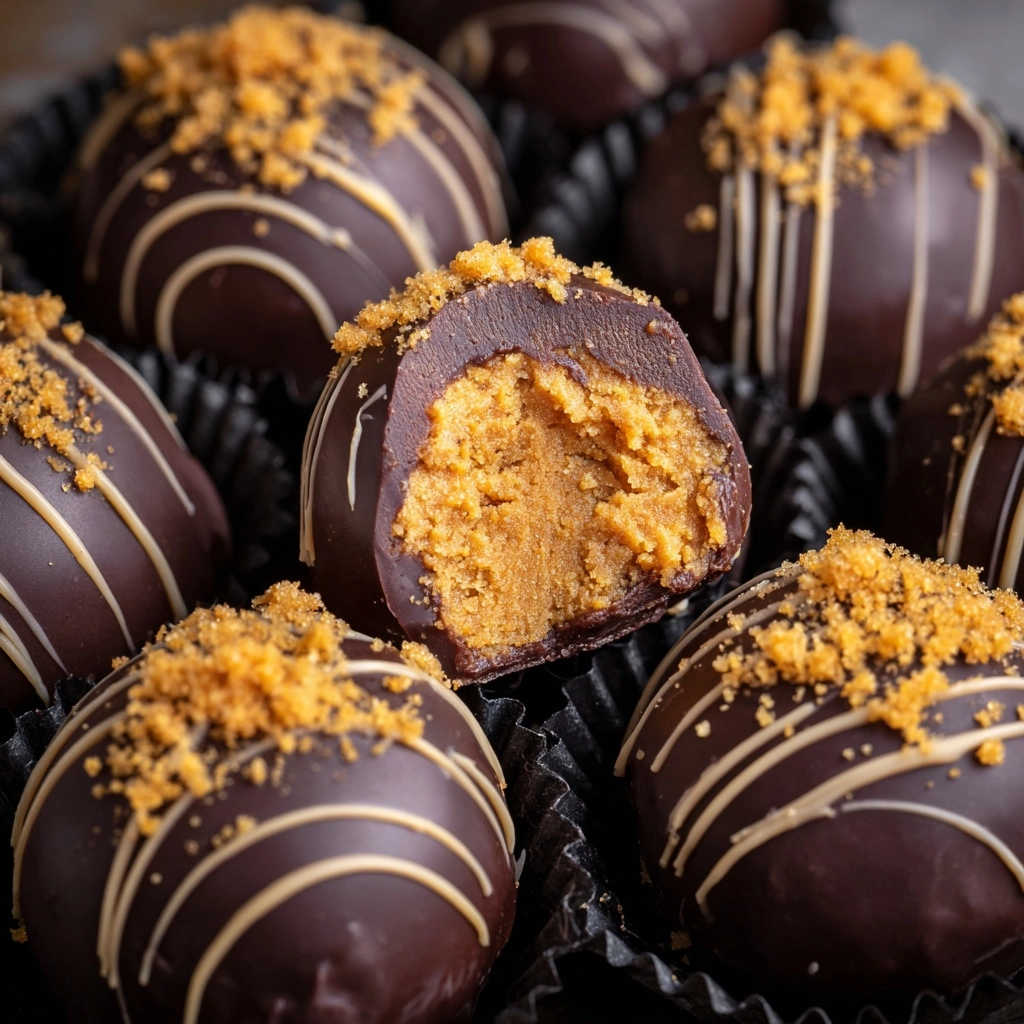
To elevate your Butterfinger Balls Recipe, consider a light drizzle of white chocolate over the top for a pretty contrast or sprinkle a few crushed Butterfinger pieces on each ball to add an extra crunch and a gorgeous finish. A pinch of sea salt can also brighten the flavors if you like that sweet-salty combo.
Side Dishes
These Butterfinger Balls shine on their own, but if you want to pair them, think about serving alongside fresh berries or a simple fruit salad to cut through the richness. A cold glass of milk or a cup of coffee makes the perfect companion too, balancing the sweetness beautifully.
Creative Ways to Present
For parties, arrange the Butterfinger Balls on a decorative platter lined with doilies or in mini cupcake liners to keep them neat and fancy. You can also create a themed dessert board featuring nuts, chocolates, and candies for an interactive dessert experience that will wow your guests.
Make Ahead and Storage
Storing Leftovers
If you have any Butterfinger Balls left after the festivities, store them in an airtight container in the refrigerator. They keep beautifully for up to a week without losing their flavor or texture—perfect for nibbling on whenever a craving strikes.
Freezing
You can freeze Butterfinger Balls for longer storage, up to two months. Just place them in a single layer on a parchment-lined tray until frozen, then transfer to a freezer-safe container or bag. This way, you have a ready-made sweet treat anytime you want, no mess involved.
Reheating
These no-bake treats are best enjoyed chilled or at room temperature. If you prefer them slightly softer, let them sit out for 10 to 15 minutes before eating. Avoid microwaving as it may melt the chocolate coating and change the texture.
FAQs
Can I use crunchy peanut butter instead of creamy?
Absolutely! Using crunchy peanut butter will add an extra layer of texture that complements the Butterfinger candy pieces perfectly. Feel free to experiment and see which version you prefer.
Do I have to use Butterfinger candy bars, or can I try other candy?
Butterfinger pieces are the star of this recipe and give a unique crunch and flavor, but you could swap them with similar crispy candy bars like Heath or Twix for a delicious twist.
Is it okay to skip the coconut oil in the chocolate coating?
Yes, skipping the coconut oil is fine; the chocolate may just be a bit thicker and less glossy. However, adding coconut oil helps the chocolate coat more easily and gives a shiny finish.
Can I make these gluten-free?
This recipe is naturally gluten-free as long as the chocolate chips and Butterfinger bars you use are certified gluten-free. Always check packaging if gluten sensitivity is a concern.
How long do Butterfinger Balls last outside the fridge?
At room temperature, these treats might get too soft and the chocolate could melt within a couple of hours. It’s best to serve them chilled or at room temp for a short time only to keep them firm and enjoyable.
Final Thoughts
There is truly nothing like the joy of biting into these irresistibly crunchy, creamy, chocolate-coated Butterfinger Balls. Whether you’re treating yourself or sharing with loved ones, this Butterfinger Balls Recipe is guaranteed to bring happiness with every bite. I can’t wait for you to try it and make it your own favorite sweet tradition.
Print
Butterfinger Balls Recipe
- Prep Time: 20 minutes
- Cook Time: 0 minutes
- Total Time: 50 minutes
- Yield: 24 balls
- Category: Dessert
- Method: No-Cook
- Cuisine: American
- Diet: Vegetarian
Description
Butterfinger Balls are a delightful no-bake treat combining creamy peanut butter, crushed Butterfinger candy bars, and a decadent chocolate coating. These bite-sized sweets are perfect for dessert or as a delicious snack, featuring a perfect balance of sweet, nutty, and crunchy textures that can be enjoyed chilled or at room temperature.
Ingredients
Base
- 1 cup creamy peanut butter
- 1/2 cup unsalted butter, softened
- 2 1/2 cups powdered sugar
- 1 1/2 cups crushed Butterfinger candy bars (about 6 fun-size bars)
Coating
- 12 oz semi-sweet or milk chocolate chips
- 1 tablespoon coconut oil or shortening (optional, for smoother coating)
Instructions
- Prepare the dough: In a large mixing bowl, combine the creamy peanut butter and softened unsalted butter together. Mix thoroughly until the mixture is smooth and creamy, ensuring the butter fully incorporates with the peanut butter for an even base.
- Add powdered sugar: Gradually sift in the powdered sugar while mixing continuously. This will thicken the mixture into a dense dough-like consistency, suitable for shaping into balls.
- Mix in crushed candy: Fold the crushed Butterfinger candy bars into the dough, distributing them evenly throughout to provide bursts of crunch and flavor in every bite.
- Form balls and chill: Roll the mixture into uniform 1-inch diameter balls. Place the balls onto a baking sheet lined with parchment paper to prevent sticking. Freeze the tray for 30 minutes to allow the balls to firm up and hold their shape during coating.
- Melt chocolate coating: In a microwave-safe bowl, melt the chocolate chips together with the optional coconut oil or shortening in 30-second increments. Stir well between each interval until the chocolate is completely smooth and fluid, ideal for dipping.
- Coat the balls: Using a fork or toothpick, dip each chilled ball into the melted chocolate. Allow excess chocolate to drip off before placing the coated balls back onto the parchment-lined sheet. This ensures an even chocolate shell around each ball.
- Set and chill: Refrigerate the coated balls for 20 to 30 minutes until the chocolate hardens and sets completely. Once set, the butterfinger balls are ready to be served chilled or at room temperature for the best flavor experience.
Notes
- Store butterfinger balls in the refrigerator for up to 1 week or freeze for up to 2 months to maintain freshness.
- For extra crunch, try using crunchy peanut butter instead of creamy.
- Decorate by drizzling with melted white chocolate or sprinkling additional crushed Butterfinger pieces on top for visual appeal and enhanced texture.
