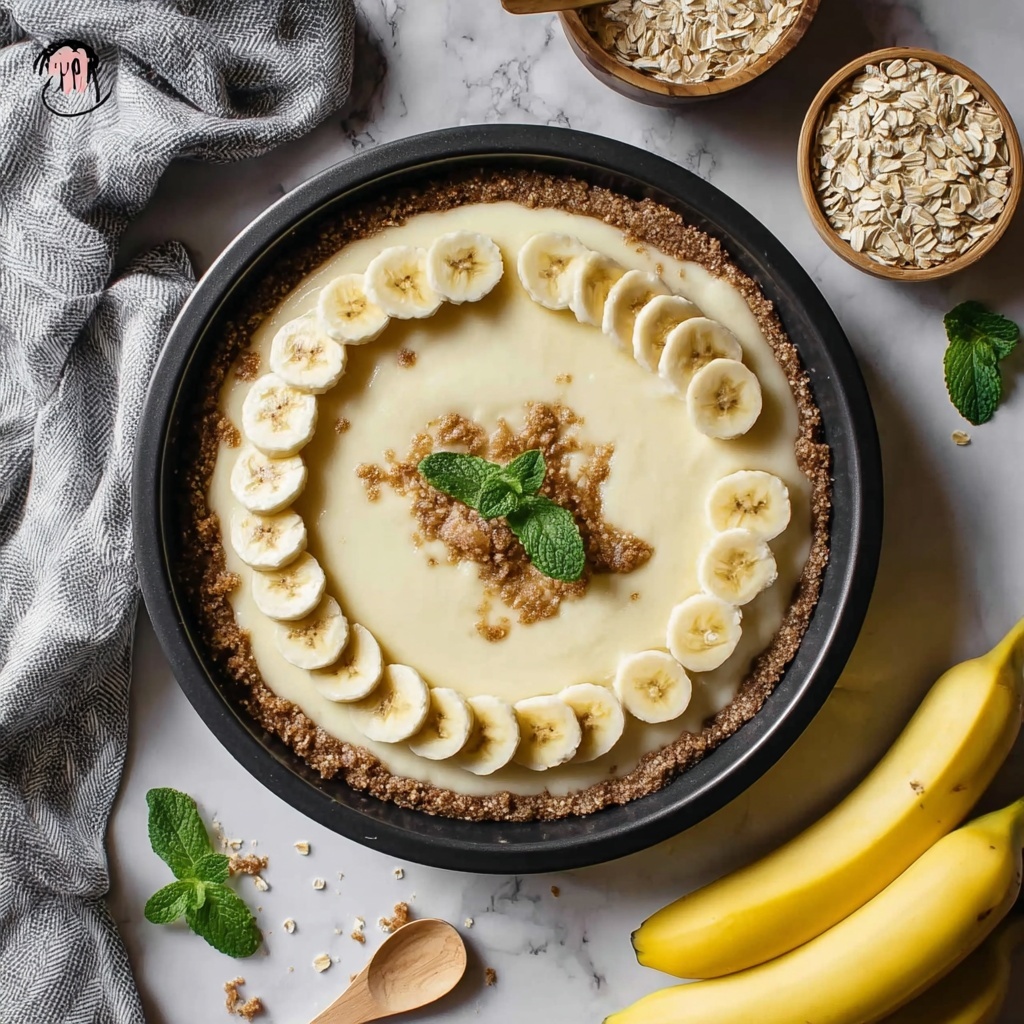
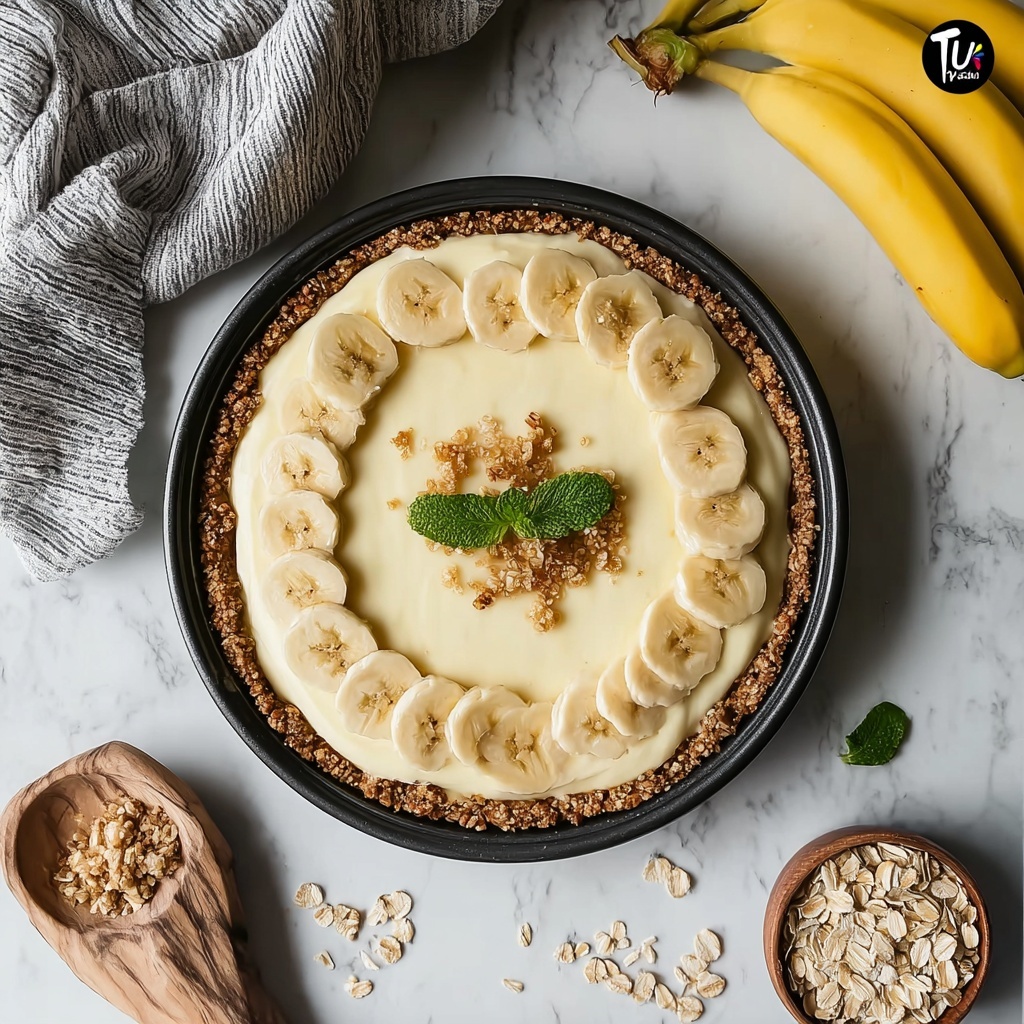
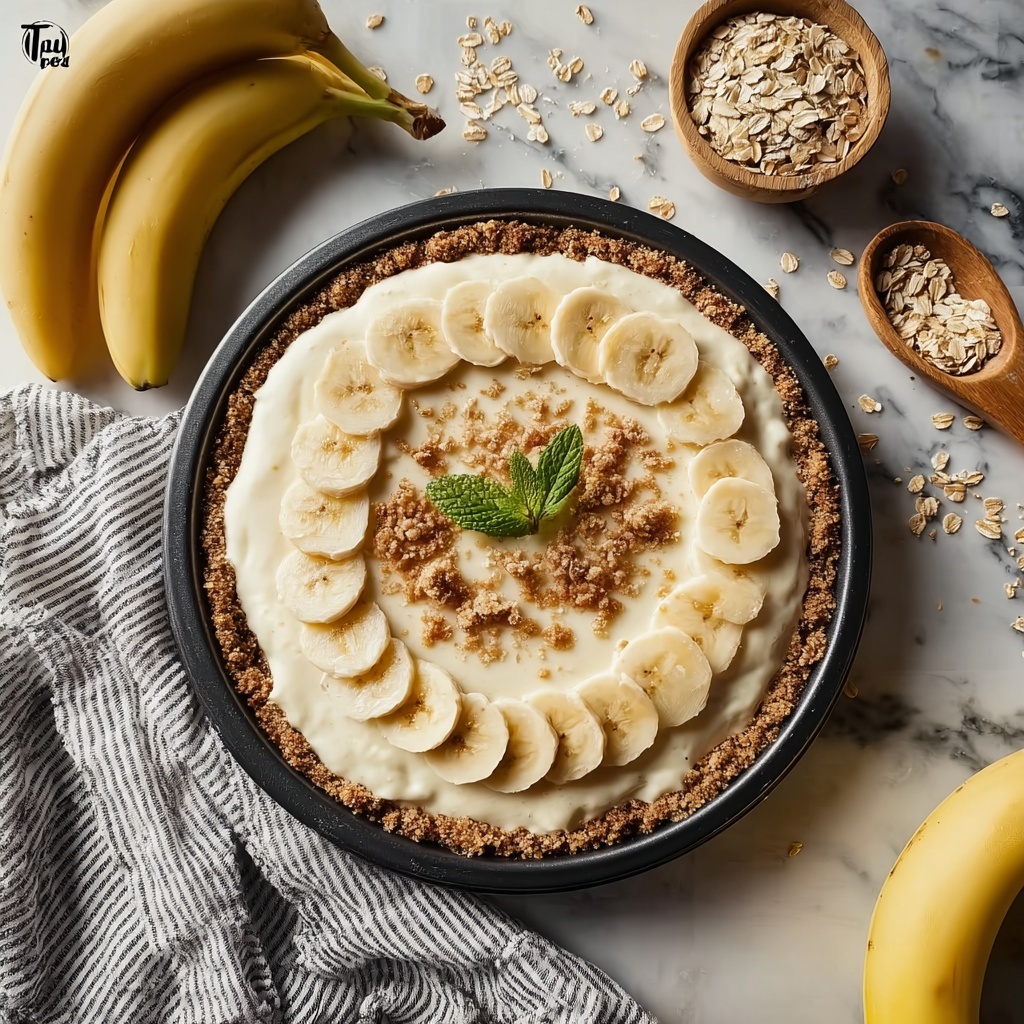
If you’re on the hunt for a dessert that feels like a warm hug with every bite, look no further than this Banana Pudding Cheesecake Recipe. It effortlessly combines the creamy richness of cheesecake with the nostalgic sweetness of banana pudding and vanilla wafers, creating a dessert that’s both comforting and elegantly indulgent. Whether you’re serving it at a family gathering or just treating yourself, this recipe is sure to become a cherished favorite in your collection.
Ingredients You’ll Need
What’s truly wonderful about this Banana Pudding Cheesecake Recipe is how straightforward and accessible the ingredients are. Each one plays a vital role, contributing to the silky texture, balanced sweetness, and that unmistakable classic flavor everyone loves.
- Vanilla wafer crumbs: These form a crisp, sweet crust that perfectly complements the creamy filling.
- Unsalted butter, melted: Binds the wafer crumbs and adds richness to the base.
- Ripe bananas, mashed: Bring natural sweetness and moisture, infusing the cheesecake with banana flavor.
- Cream cheese, softened: The heart of the cheesecake, delivering that signature smooth and tangy creaminess.
- Granulated sugar: Sweetens the filling just enough without overpowering the bananas.
- Vanilla extract: Enhances the overall flavor, adding warm, floral notes.
- Salt: Balances sweetness and deepens flavors subtly.
- Large eggs: Provide structure and help create the dense yet fluffy texture.
- Sour cream: Adds tanginess and moisture to keep the cheesecake luscious.
- Heavy cream: Contributes to a creamy, smooth consistency.
- All-purpose flour: Stabilizes the batter for the perfect bake.
- Milk: Lightens the batter and ensures a tender crumb.
How to Make Banana Pudding Cheesecake Recipe
Step 1: Prepare Your Pan and Crust
Start by preheating your oven to 325°F (165°C) and greasing a 9-inch springform pan—this ensures your cheesecake won’t stick when it’s time to serve. In a bowl, mix the vanilla wafer crumbs with melted butter until every crumb is coated and holds together. Press this mixture firmly and evenly into the bottom of your pan to create the base.
Step 2: Bake and Cool the Crust
Bake the crust for 10 minutes to set it and develop a slight crunch that contrasts beautifully with the creamy filling. Once baked, let the crust cool so it’s ready to support the cheesecake batter without becoming soggy.
Step 3: Mix the Cream Cheese and Bananas
In a large bowl, beat the softened cream cheese until smooth—this step is crucial for that velvety cheesecake texture. Next, fold in your mashed ripe bananas, sugar, vanilla extract, and salt, combining everything until the mixture is perfectly smooth with a lovely banana aroma.
Step 4: Add Eggs and Dairy
Add the eggs to the mixture one at a time, beating well after each addition to incorporate air and ensure an even texture. Then stir in the sour cream, heavy cream, flour, and milk until your batter becomes silky and lump-free. This blend balances richness and lightness wonderfully.
Step 5: Bake in a Water Bath
Pour the batter over your prepared crust in the springform pan. To avoid cracks and ensure even baking, place the pan in a larger baking dish and fill it halfway with hot water, creating a water bath that gently cooks the cheesecake. Bake for 1 hour and 30 minutes until the center is just slightly jiggly—this means it’s perfectly set but still creamy inside.
Step 6: Cool and Chill
Turn off the oven and leave the cheesecake inside with the door slightly open for 1 hour—this slow cooling prevents cracks. Then, transfer the cheesecake to the fridge for at least 4 hours, preferably overnight, allowing it to fully set and develop the best texture and flavor.
Step 7: Serve Carefully
When it’s time to enjoy, carefully remove the springform pan’s side. Slice your banana pudding cheesecake to your preferred size and get ready for all the compliments heading your way.
How to Serve Banana Pudding Cheesecake Recipe
Garnishes
A touch of garnish can elevate the presentation and flavor of your Banana Pudding Cheesecake Recipe. Try topping slices with fresh banana slices, a dollop of whipped cream, or even a sprinkle of crushed vanilla wafers for added texture and that extra wow factor.
Side Dishes
This cheesecake shines on its own, but if you want to get fancy, serve it alongside fresh berries or a drizzle of caramel sauce. A simple cup of strong coffee or tea also pairs wonderfully, helping to balance the dessert’s creamy sweetness.
Creative Ways to Present
For a fun twist, serve individual portions of this banana pudding cheesecake in small glass jars or dessert cups layered with extra wafers and bananas. It’s an eye-catching way to enjoy your dessert and perfect for entertaining guests with style.
Make Ahead and Storage
Storing Leftovers
Wrap leftover Banana Pudding Cheesecake Recipe slices tightly with plastic wrap or store in an airtight container in the fridge. It stays fresh for about 3 to 5 days, making it a sweet treat you can enjoy over several days.
Freezing
You can freeze cheesecake successfully to extend its life. Wrap slices individually in plastic wrap followed by aluminum foil to prevent freezer burn. When properly stored, it can last up to 2 months in the freezer without losing quality.
Reheating
This cheesecake is best enjoyed chilled, so reheating isn’t usually necessary. If you prefer a slightly softer texture, let slices sit at room temperature for 10-15 minutes before serving.
FAQs
Can I use less sugar in this Banana Pudding Cheesecake Recipe?
Absolutely! You can reduce the sugar slightly if you prefer a less sweet dessert, but keep in mind that the bananas and wafer crust add natural sweetness that balances the flavor beautifully.
Is it necessary to bake the cheesecake in a water bath?
While not absolutely required, baking in a water bath helps the cheesecake cook evenly and prevents cracks by maintaining moisture around the pan. It’s definitely worth the extra step for a smooth, flawless result.
Can I substitute the vanilla wafer crumbs for something else?
Yes! Graham cracker crumbs or even crushed digestive biscuits can work well as alternatives, each giving a slightly different flavor and texture to the crust. Just adjust the butter amount if necessary to keep the crust cohesive.
Do I have to use ripe bananas?
Ripe bananas are key because they’re sweeter and softer, which infuses the cheesecake with great flavor and moisture. Using underripe bananas won’t provide the same sweet taste or texture.
How long should I refrigerate the cheesecake before serving?
For the best texture and flavor, refrigerate for at least 4 hours, but overnight chilling is ideal. This allows the flavors to meld and the cheesecake to fully set, making slicing neat and easy.
Final Thoughts
This Banana Pudding Cheesecake Recipe is truly a delightful blend of two classic desserts in one irresistible package. It’s inviting, rich, and surprisingly easy to make, perfect for both special occasions and everyday indulgences. I can’t wait for you to try it and watch it become a new favorite at your dessert table.
Print
Banana Pudding Cheesecake Recipe
- Prep Time: 0h 30m
- Cook Time: 1h 30m
- Total Time: 2h 0m plus chilling time
- Yield: 8 to 10 servings
- Category: Dessert
- Method: Baking
- Cuisine: American
Description
This luscious Banana Pudding Cheesecake combines creamy cheesecake with the nostalgic flavors of banana pudding and a crunchy vanilla wafer crust. Perfectly baked in a water bath to achieve a smooth, velvety texture, this dessert offers a delightful twist on traditional cheesecake that’s great for any occasion.
Ingredients
Crust
- 2 cups vanilla wafer crumbs
- 1/3 cup unsalted butter, melted
Filling
- 3 ripe bananas, mashed
- 24 oz cream cheese, softened
- 1 cup granulated sugar
- 1 teaspoon vanilla extract
- 1/4 teaspoon salt
- 4 large eggs
- 1/2 cup sour cream
- 1/2 cup heavy cream
- 1/2 cup all-purpose flour
- 1/2 cup milk
Instructions
- Prepare the oven and pan: Preheat your oven to 325°F (165°C) and grease a 9-inch springform pan to prevent sticking.
- Make the crust mixture: In a bowl, mix the vanilla wafer crumbs with melted butter until combined and crumbly.
- Form the crust: Press the crumb mixture evenly onto the bottom of the prepared springform pan to create a firm base.
- Bake the crust: Bake the crust in the preheated oven for 10 minutes, then remove and allow it to cool completely.
- Beat cream cheese: In a large bowl, beat the softened cream cheese until smooth and creamy to avoid lumps in the filling.
- Add bananas and flavorings: Mix mashed bananas, sugar, vanilla extract, and salt into the cream cheese until well combined.
- Incorporate eggs: Add eggs one at a time, mixing thoroughly after each to maintain smoothness.
- Add remaining wet and dry ingredients: Stir in sour cream, heavy cream, flour, and milk until the batter is homogeneous and smooth.
- Pour filling: Pour the cheesecake filling over the cooled crust in the springform pan, spreading evenly.
- Prepare water bath: Place the springform pan inside a larger baking dish and fill the larger dish with hot water halfway up the sides of the springform pan to prevent cracking during baking.
- Bake the cheesecake: Bake in the water bath for 1 hour and 30 minutes or until the center is slightly jiggly but mostly set.
- Cool in oven: Turn off the oven and leave the cheesecake inside with the door slightly open for 1 hour to cool gradually and prevent cracking.
- Chill the cheesecake: Remove from the oven and refrigerate for at least 4 hours, preferably overnight, to allow it to fully set.
- Remove from pan and slice: Carefully release the springform pan sides and slice the banana pudding cheesecake for serving.
- Serve and enjoy: Plate the cheesecake and enjoy this creamy, flavorful dessert!
Notes
- Using a water bath ensures a smooth, crack-free cheesecake by providing gentle, even heat.
- For best flavor and texture, chill the cheesecake overnight before serving.
- Ensure bananas are ripe for maximum sweetness and flavor.
- Softened cream cheese is crucial for a smooth batter; leave it at room temperature before preparing.
- If you do not have a springform pan, use a regular cake pan and line it with parchment paper for easier removal.

