
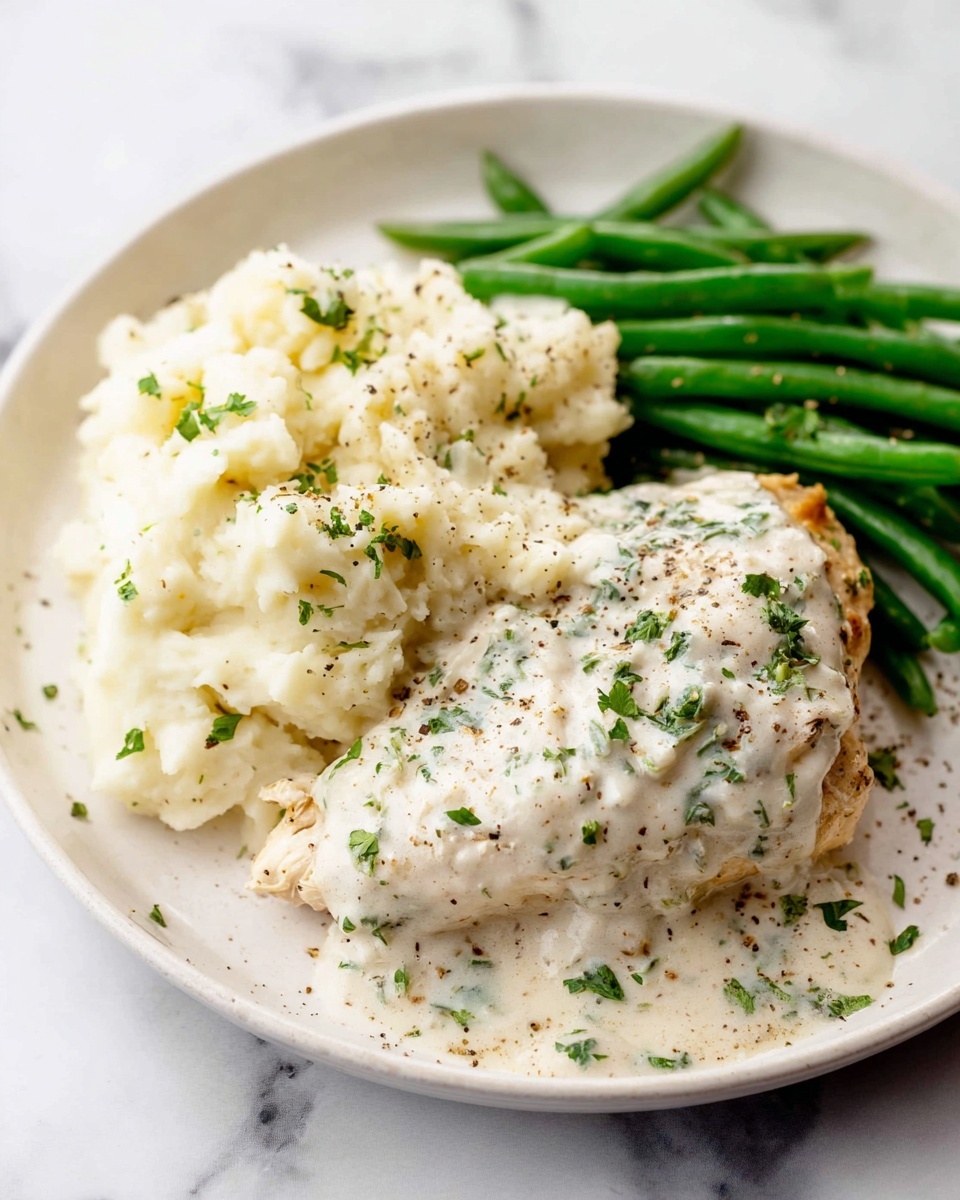
If you are looking for a dish that combines simplicity, elegance, and incredible flavor, this Baked White Wine Chicken Breasts Recipe is an absolute winner. Tender, juicy chicken breasts are baked to perfection in a luscious sauce made with dry white wine, creamy heavy cream, and savory seasonings, then finished with a golden sprinkle of parmesan and fresh parsley. Perfect for busy weeknights or impressing guests, this recipe transforms basic ingredients into a meal that feels indulgent yet approachable.
Ingredients You’ll Need
Every great dish starts with quality ingredients, and this recipe is no exception. Each item plays a special role in building layers of flavor, creaminess, and texture that make this baked chicken so memorable.
- 2 pounds boneless skinless chicken breasts: Opt for evenly sized breasts to ensure consistent cooking and juicy results.
- 1/2 teaspoon garlic powder: Adds a warm, mellow garlic essence that complements the fresh garlic.
- 1 teaspoon Italian seasoning (divided): Brings a fragrant blend of herbs that enhances the overall profile of the dish.
- Salt & pepper (to taste): Essential for seasoning both the chicken and sauce, elevating every bite.
- 1/3 cup freshly grated parmesan cheese: Provides a nutty, salty finishing touch that melts beautifully on top.
- 1 tablespoon finely chopped fresh parsley: Adds a bright, fresh note that balances the creamy sauce.
- 1 cup heavy/whipping cream: Creates the rich and silky base of the sauce, making it irresistible.
- 1/4 cup chicken broth: Adds depth and savory umami to the sauce without overpowering.
- 1/4 cup dry white wine: The star ingredient that lends subtle acidity and complexity to the dish.
- 3/4 tablespoon cornstarch: Helps thicken the sauce to the perfect consistency.
- 2 cloves garlic (minced): Pours in an aromatic punch that freshens the sauce.
How to Make Baked White Wine Chicken Breasts Recipe
Step 1: Preheat and Prepare
First, set your oven to 400°F and position the rack in the top third of the oven. This setup encourages even baking and browning of the chicken.
Step 2: Season the Chicken
Arrange the chicken breasts side by side in a 9×13 baking dish. Sprinkle evenly with garlic powder, half of the Italian seasoning, and salt and pepper to taste. This initial seasoning builds a savory foundation for the dish.
Step 3: Whisk Together the Sauce
In a medium bowl, combine the heavy cream, chicken broth, white wine, cornstarch, minced garlic, remaining Italian seasoning, and 1/4 teaspoon salt. Whisk until the cornstarch is fully dissolved and the mixture is smooth. This sauce will gently cook alongside the chicken, infusing it with flavor and keeping it moist.
Step 4: Pour and Bake
Carefully pour the prepared sauce evenly around the chicken breasts in the baking dish. Place the dish uncovered in the preheated oven and bake for 30 to 35 minutes or until the chicken reaches an internal temperature of 165°F. Since oven temperatures and chicken thickness vary, start checking around 25 minutes to prevent overcooking.
Step 5: Finish with Cheese and Parsley
Once baked, remove the dish from the oven and stir the sauce gently. Spoon the sauce generously over the chicken, then sprinkle the grated parmesan cheese and chopped fresh parsley on top. Allow the chicken to rest for five minutes to lock in juices before serving. Taste and adjust seasoning with additional salt and pepper as desired.
How to Serve Baked White Wine Chicken Breasts Recipe
Garnishes
The simple addition of freshly chopped parsley and parmesan cheese not only adds color but also brightens the creamy richness of the dish. For a little extra elegance, a twist of lemon zest or a few baby arugula leaves make stunning and flavorful garnishes.
Side Dishes
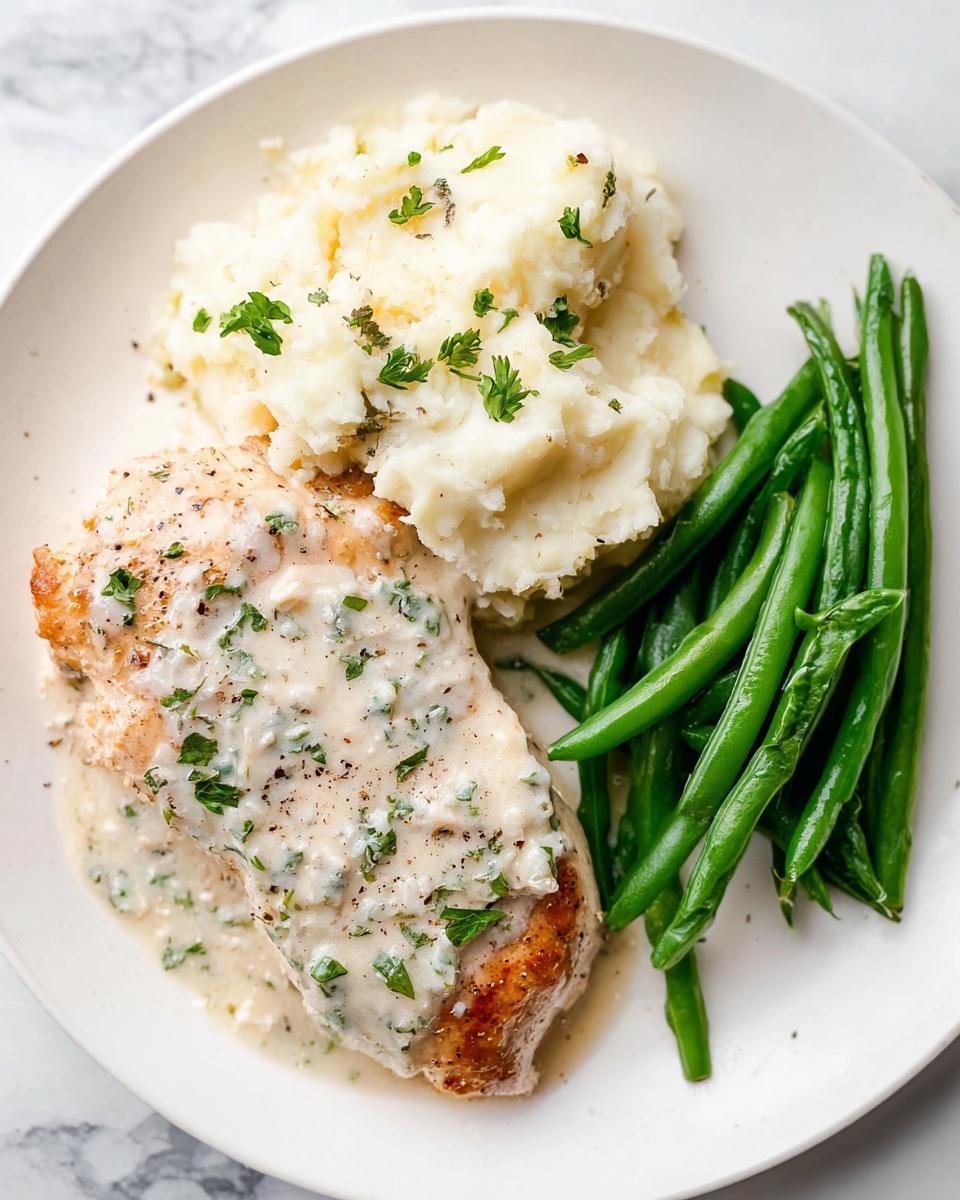
This baked white wine chicken pairs beautifully with light, fresh sides like steamed asparagus, garlic sautéed green beans, or a crisp mixed greens salad. For a more comforting meal, creamy mashed potatoes or buttery garlic bread absorb the delicious sauce perfectly.
Creative Ways to Present
Try serving the chicken breasts sliced against the grain, fanning them out on a warmed plate for easy sharing. Drizzle extra sauce over the chicken and sides for that restaurant-quality touch. You can also plate the chicken atop a bed of fluffy rice or buttered noodles to soak up every drop of the luscious sauce.
Make Ahead and Storage
Storing Leftovers
After enjoying your meal, transfer any leftover chicken and sauce into an airtight container and refrigerate. Properly stored, leftovers will stay fresh for 3 to 4 days, making them perfect for quick lunches or dinners.
Freezing
This dish freezes well if you want to prepare in bulk. Place the chicken breasts and sauce in a freezer-safe container or heavy-duty freezer bag, removing as much air as possible. Label and freeze for up to 2 months. Thaw overnight in the refrigerator before reheating.
Reheating
To reheat, gently warm the chicken and sauce on the stovetop over low heat or in the microwave, stirring occasionally to ensure the sauce stays creamy and the chicken heats evenly. Add a splash of chicken broth or cream if the sauce appears too thick.
FAQs
Can I use other types of wine for the sauce?
Dry white wines like Sauvignon Blanc or Pinot Grigio work best because they add acidity without overwhelming sweetness. Avoid cooking wines or overly sweet varieties as they can alter the flavor balance.
Is it okay to use chicken thighs instead of breasts?
Absolutely! Boneless skinless thighs can be used and may add extra juiciness. Just reduce the baking time slightly as thighs often cook faster than breasts.
What can I substitute for heavy cream?
If you want a lighter version, half-and-half or whole milk can be used, but the sauce will be less rich and thicker cornstarch or a flour slurry may be needed to achieve the same consistency.
How can I tell when the chicken is perfectly cooked?
The safest method is using an instant-read thermometer—165°F is the ideal internal temperature. If you don’t have one, cut into the thickest part and ensure the juices run clear with no visible pinkness.
Can I prepare this dish ahead of time and bake it later?
Yes! You can assemble the chicken and sauce in the baking dish, cover tightly, and refrigerate for up to 24 hours before baking. Bring to room temperature before placing it in the oven for even cooking.
Final Thoughts
There is something truly satisfying about a chicken recipe that feels both comforting and sophisticated without a complicated process, and this Baked White Wine Chicken Breasts Recipe delivers just that. Whether you’re feeding family on a busy weeknight or hosting a casual dinner, this dish promises hearty flavors and creamy decadence that everyone will love. I encourage you to give it a try — once you do, it just might become your go-to chicken dinner that everyone asks for again and again!
Print
Baked White Wine Chicken Breasts Recipe
- Prep Time: 10 minutes
- Cook Time: 30 minutes
- Total Time: 40 minutes
- Yield: 4 servings
- Category: Main Course
- Method: Baking
- Cuisine: American
Description
This Baked White Wine Chicken Breasts recipe features tender, juicy chicken breasts baked in a creamy white wine sauce infused with garlic, Italian seasoning, and parmesan cheese. Quick to prepare and oven-baked to perfection, it’s a flavorful and elegant dish perfect for weeknight dinners or special occasions.
Ingredients
Chicken
- 2 pounds boneless skinless chicken breasts (about 4 breasts, roughly 8 oz each)
- 1/2 teaspoon garlic powder
- 1/2 teaspoon Italian seasoning
- Salt & pepper to taste
Sauce
- 1 cup heavy/whipping cream
- 1/4 cup chicken broth
- 1/4 cup dry white wine
- 3/4 tablespoon cornstarch
- 2 cloves garlic, minced
- 1/2 teaspoon Italian seasoning
- 1/4 teaspoon salt
Topping
- 1/3 cup freshly grated parmesan cheese
- 1 tablespoon finely chopped fresh parsley
Instructions
- Preheat the oven: Preheat your oven to 400°F (205°C) and position the rack in the top third of the oven to ensure even cooking and browning.
- Prepare the chicken: Arrange the chicken breasts side by side in a 9×13 inch baking dish. Season each breast evenly with garlic powder, Italian seasoning, and salt and pepper to taste.
- Make the sauce: In a medium-sized bowl, whisk together the heavy cream, chicken broth, dry white wine, cornstarch, minced garlic, Italian seasoning, and salt until fully combined and smooth.
- Combine sauce and chicken: Pour the prepared sauce evenly around the chicken breasts in the baking dish, ensuring the chicken is surrounded but not fully submerged.
- Bake the chicken: Place the baking dish uncovered in the oven and bake for 30 to 35 minutes, or until the chicken reaches an internal temperature of 165°F (74°C). Since oven temperatures and chicken thickness vary, check for doneness early to prevent overcooking.
- Finish and serve: Remove the dish from the oven, stir the sauce around the chicken gently, then spoon some of the sauce over the breasts. Sprinkle freshly grated parmesan cheese and chopped parsley on top. Let the chicken rest for 5 minutes before slicing or serving. Adjust seasoning with more salt and pepper if desired.
Notes
- Use full-fat heavy or whipping cream for the best rich and creamy sauce texture.
- Dry white wine like Sauvignon Blanc or Pinot Grigio works well for this recipe.
- Ensure chicken breasts are of even thickness for uniform cooking; you can gently pound them if needed.
- Resting the chicken after baking helps retain juices for a moist result.
- For a gluten-free version, verify the cornstarch and broth are certified gluten-free.
- Leftover chicken can be stored in an airtight container in the refrigerator for up to 3 days.


