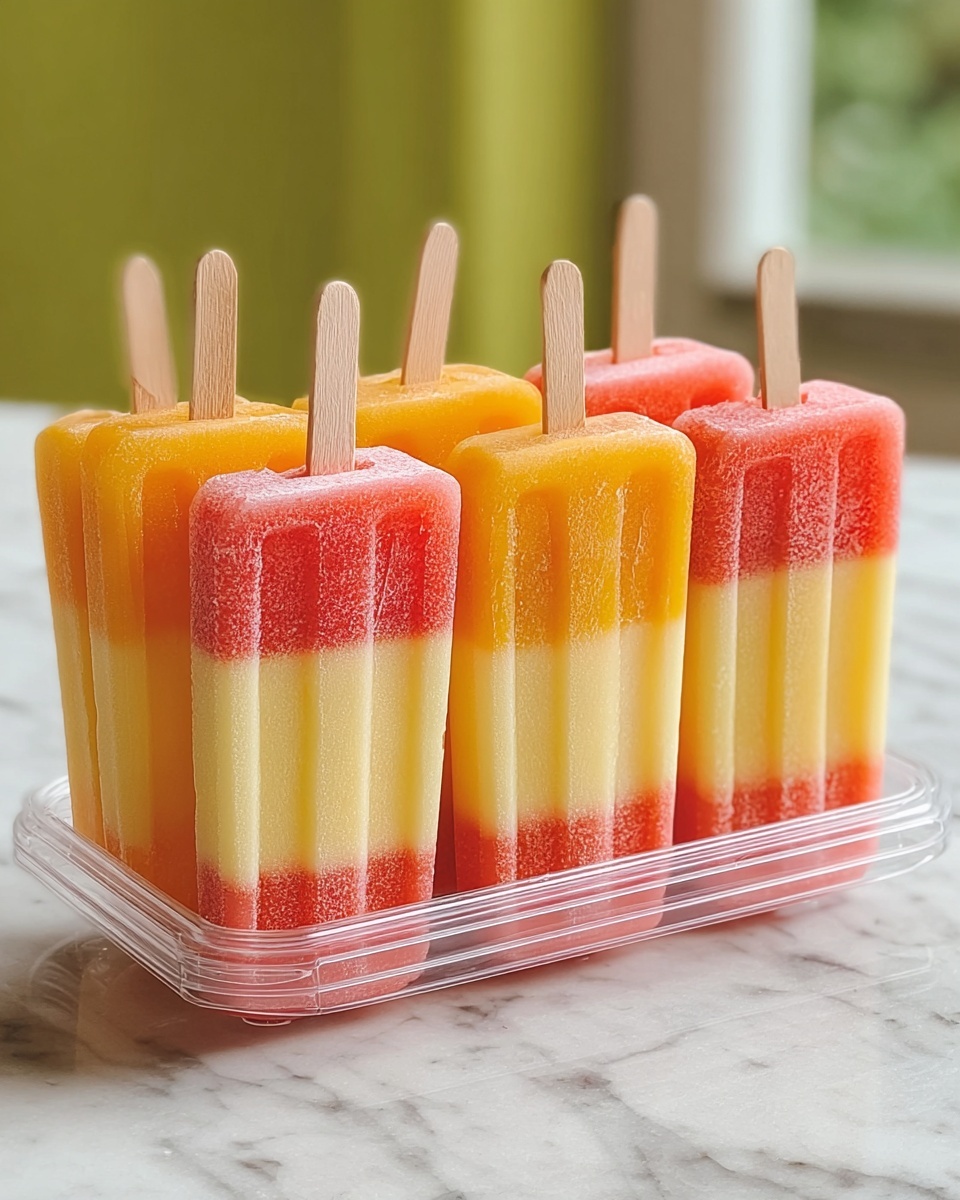
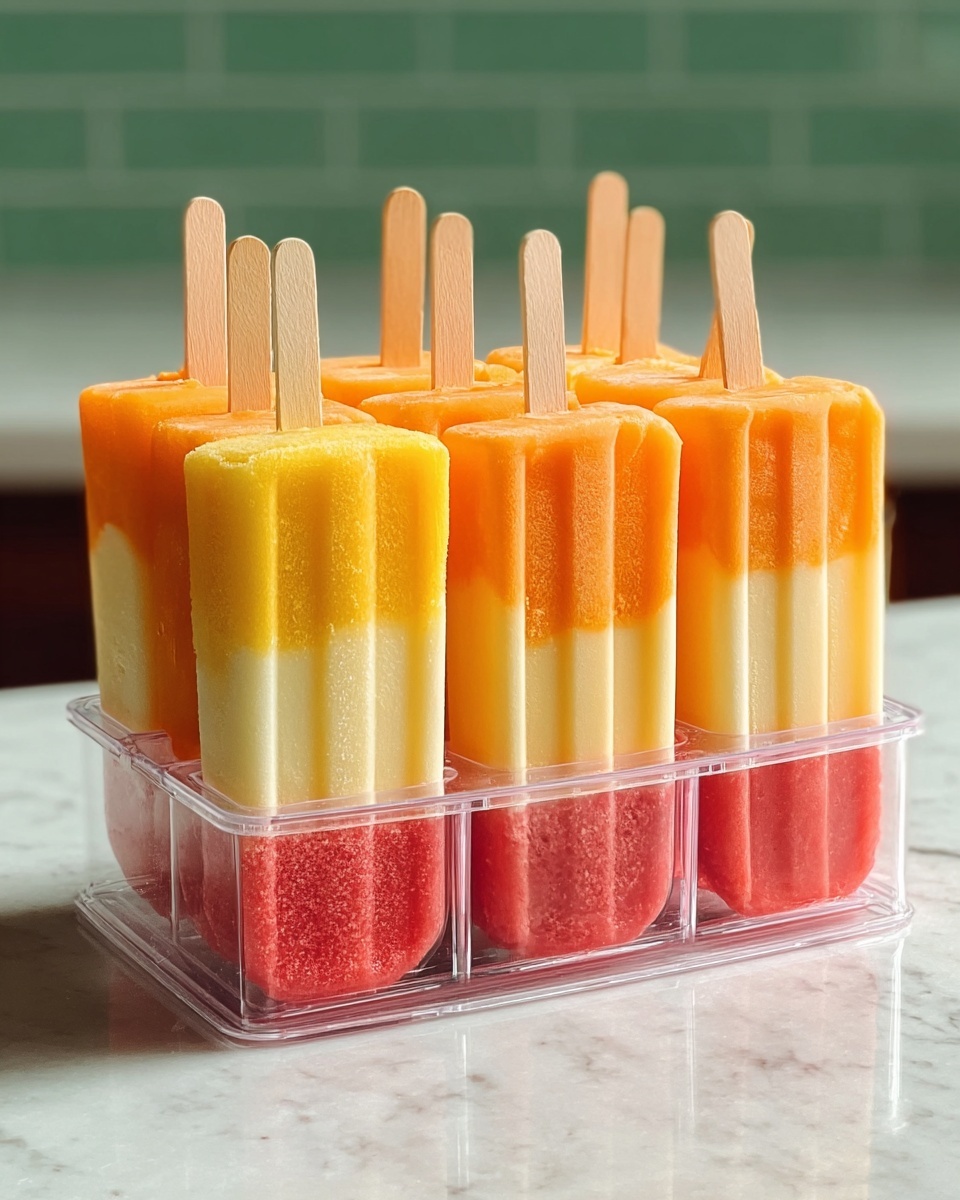
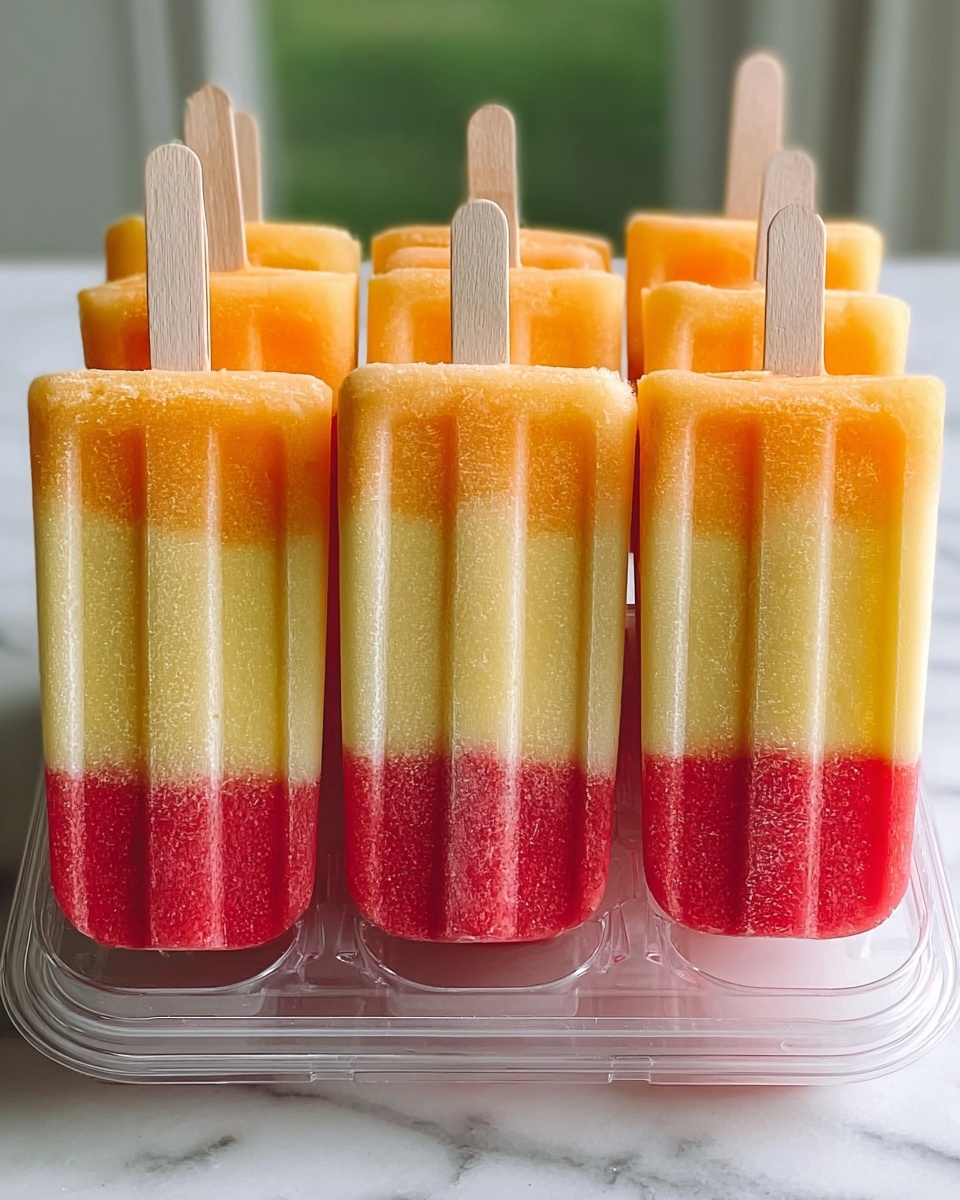
If you’re craving something cool, vibrant, and naturally sweet, look no further than this Fruit Popsicles: A Refreshing and Healthy Treat for All Ages Recipe. Bursting with fresh fruit flavors and naturally sweetened for a guilt-free indulgence, these popsicles are the perfect way to stay refreshed on a warm day. Whether you’re serving them for a family gathering or simply treating yourself, this recipe combines simple ingredients into a delightful, colorful frozen treat everyone will adore.
Ingredients You’ll Need
The beauty of this recipe lies in its simplicity and the wholesome ingredients that work together to create irresistible texture, flavor, and color. Each element plays a pivotal role in balancing sweetness and freshness with a satisfying chill.
- 2 cups mixed fresh fruit: Choose vibrant berries, kiwi, and mango for a burst of natural sweetness and eye-catching colors.
- 1/4 cup honey or agave nectar: A natural sweetener that complements the fruit without overpowering its flavor.
- 1/4 cup water: Helps blend the ingredients into a smooth consistency and keeps the popsicles light.
- Popsicle molds: Essential for shaping your frozen treat into fun and easy-to-handle portions.
- Popsicle sticks: Needed for conveniently holding your delicious creation when it’s time to enjoy.
How to Make Fruit Popsicles: A Refreshing and Healthy Treat for All Ages Recipe
Step 1: Prepare the Fruit
Begin by thoroughly washing your fresh fruit. Then chop the fruit into small, manageable pieces to ensure everything blends easily and evenly. This step unlocks the natural flavors and brightens the colors in your final popsicles.
Step 2: Blend Ingredients
Place the chopped fruit, honey (or agave nectar), and water into a blender. Blend everything until you achieve a smooth, vibrant mixture. This not only combines the flavors but also gives the popsicles a lovely, even texture.
Step 3: Fill Molds and Insert Sticks
Pour your blended fruit mixture carefully into your popsicle molds, filling each one nearly to the top. Insert popsicle sticks in the center of each mold — this will help you hold the popsicles once frozen.
Step 4: Freeze Until Firm
Place the filled molds in the freezer for at least four hours or until completely solid. Patience is key here since the chilling process is what transforms your mixture into a refreshing frozen treat.
Step 5: Enjoy Your Popsicles
When it’s time to enjoy your popsicles, run the molds under warm water for just a few seconds to loosen them, then gently pull the popsicles out. Revel in the vibrant, juicy flavors with every bite!
How to Serve Fruit Popsicles: A Refreshing and Healthy Treat for All Ages Recipe
Garnishes
Sprinkle fresh mint leaves or edible flowers on the serving plate to elevate the popsicles’ presentation. A little zest of lime or lemon peel over the top can also enhance the fruity brightness, making the presentation as exciting as the flavors.
Side Dishes
Pair these fruit popsicles with light, summery sides like a fresh green salad tossed with citrus vinaigrette or a bowl of chilled fruit salad. Their natural sweetness nicely complements these refreshing sides without overwhelming the palate.
Creative Ways to Present
For parties, serve the popsicles in clear glasses filled with crushed ice to keep them chilled while looking elegant. Another fun idea is to layer different fruit purees and freeze them in stages for colorful, striped popsicles that will wow your guests.
Make Ahead and Storage
Storing Leftovers
If you find yourself with any extra fruit popsicles, keep them covered and stored in the freezer. Using airtight containers or a ziplock bag will prevent freezer burn and preserve their fresh flavors for days.
Freezing
These popsicles freeze beautifully for up to two weeks. Be sure to keep them upright in the freezer to maintain their shape and avoid any melting or refreezing that could affect the texture.
Reheating
Reheating doesn’t apply here since these are meant to be enjoyed frozen. If you need to soften them slightly for easier eating, let them sit at room temperature for a few minutes rather than using heat, so the fresh flavors stay intact.
FAQs
Can I use frozen fruit instead of fresh fruit?
Absolutely! Frozen fruit can be a great substitute, especially if certain fruits are out of season. Just thaw slightly before blending for smooth consistency.
Is there a way to make these popsicles sugar-free?
Yes, you can omit the honey or agave nectar if your fruit is naturally very sweet. Alternatively, try using a small amount of pureed banana to add natural sweetness without added sugar.
How many popsicles does this recipe make?
This Fruit Popsicles: A Refreshing and Healthy Treat for All Ages Recipe yields about six popsicles, perfect for a small group or family.
Can I add yogurt for a creamier texture?
Of course! Mixing in some plain or flavored yogurt before freezing adds creaminess and a tangy twist, making your popsicles reminiscent of frozen fruit yogurts.
What if I don’t have popsicle molds?
No worries! You can use small paper cups and insert sticks or spoons as handles. Just make sure to cover them to avoid freezer odors.
Final Thoughts
There’s something truly special about these Fruit Popsicles: A Refreshing and Healthy Treat for All Ages Recipe that brings joy with every bite. They’re simple, natural, and bursting with summer freshness—the perfect cool-down snack for everyone you love. I can’t wait for you to whip up your own batch and share the delight of these vibrant, healthy popsicles with friends and family!
Print
Fruit Popsicles: A Refreshing and Healthy Treat for All Ages Recipe
- Prep Time: 10 minutes
- Cook Time: 0 minutes
- Total Time: 4 hours 10 minutes
- Yield: 6 popsicles
- Category: Dessert
- Method: No-Cook
- Cuisine: American
- Diet: Gluten Free
Description
These homemade fruit popsicles are a refreshing and healthy treat perfect for all ages. Made with fresh mixed fruits, a touch of natural sweetener, and water, they offer a deliciously cool way to enjoy real fruit flavors on a hot day.
Ingredients
Fruits
- 2 cups mixed fresh fruit (such as berries, kiwi, and mango)
Sweetener
- 1/4 cup honey or agave nectar
Additional
- 1/4 cup water
- Popsicle molds
- Popsicle sticks
Instructions
- Prepare Fruit: Wash and chop the fruit into small pieces to make blending easier and ensure a smooth texture.
- Blend Ingredients: In a blender, combine the chopped fruit, honey or agave nectar, and water. Blend until the mixture is smooth and well combined.
- Fill Molds: Pour the blended fruit mixture into popsicle molds evenly. Insert popsicle sticks into each mold to prepare for freezing.
- Freeze: Place the molds in the freezer and freeze for at least 4 hours, or until the popsicles are fully solidified.
- Unmold and Serve: To release the popsicles, run the molds under warm water for a few seconds and gently pull out the popsicles. Enjoy your refreshing homemade fruit popsicles!
Notes
- You can use any seasonal fruit you prefer or have on hand.
- For a creamier texture, consider adding yogurt or coconut milk to the blend.
- Adjust sweetness to your liking by modifying the amount of honey or agave nectar.
- Ensure the mold is completely frozen before attempting to remove the popsicles to avoid breakage.
- Great for kids’ snacks, summer parties, and a healthy alternative to store-bought frozen treats.

