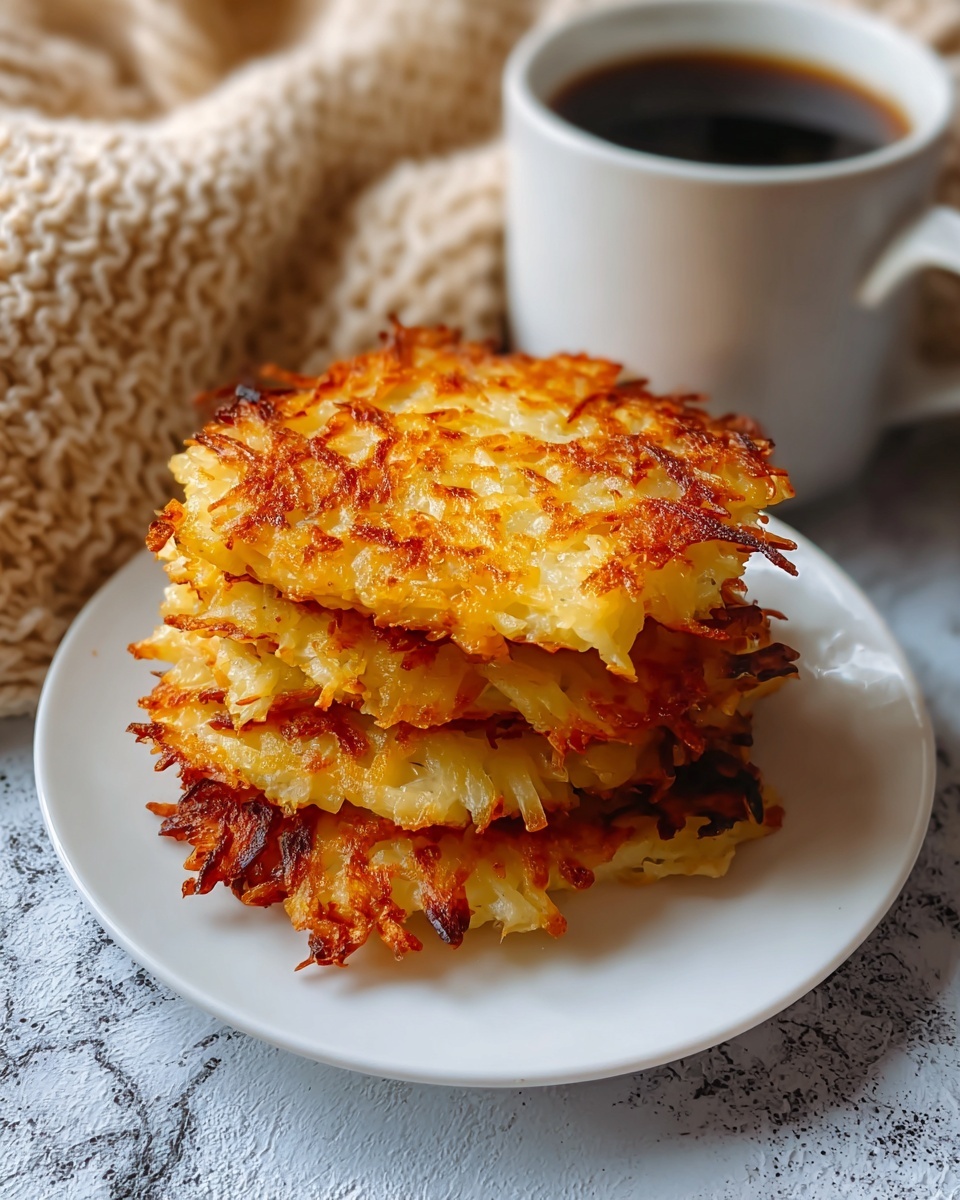
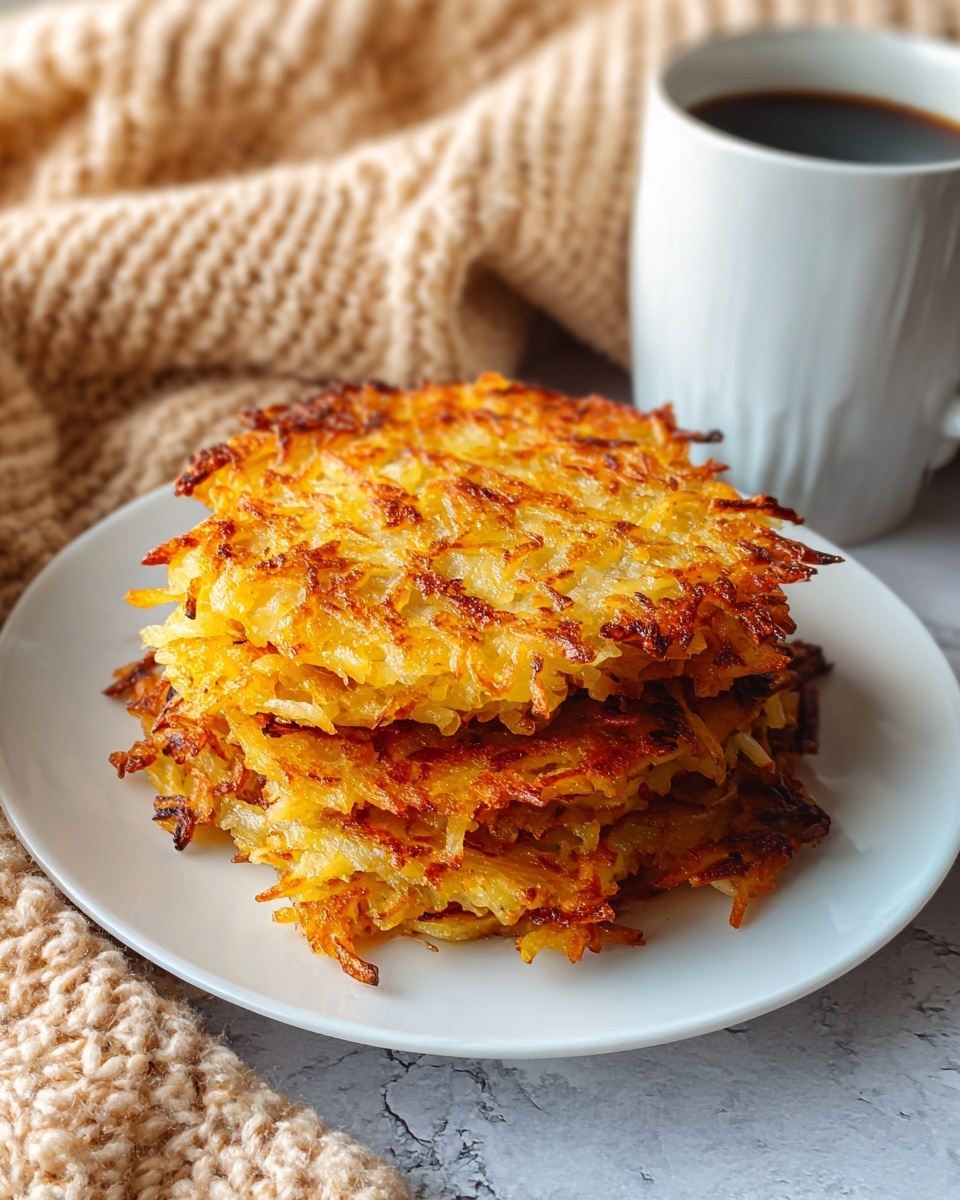
If you love the crispy, golden goodness of hash browns but crave a fun twist on the classic, this Wafflemaker Hash Browns Recipe is about to become your new favorite breakfast hack. Imagine perfectly cooked, cheesy hash browns with a delightful waffle pattern that adds extra crunch and holds all the delicious flavors together. It’s an effortless way to elevate your morning routine or surprise brunch guests with a playful presentation that delivers all the comforts of traditional hash browns with a crisp edge that only a wafflemaker can bring.

Ingredients You’ll Need
The beauty of this Wafflemaker Hash Browns Recipe lies in its simplicity. Each ingredient is carefully chosen to enhance the texture, taste, and aroma, making your homemade hash browns irresistibly savory and full of character.
- Shredded Potatoes: Use about 2 cups of russet potatoes, which are perfect for that fluffy interior and sturdy exterior.
- Shredded Cheddar Cheese: A full cup adds gooey richness and a sharp depth of flavor that melts beautifully.
- Chopped Onions: Just a quarter cup brings a subtle sweetness and bite to balance the dish.
- Garlic Powder: Half a teaspoon enhances the savory notes without overpowering the potatoes.
- Salt: Half a teaspoon is essential to bring out the natural flavors and season every bite.
- Black Pepper: A quarter teaspoon adds a gentle heat that complements the cheese and onions perfectly.
How to Make Wafflemaker Hash Browns Recipe
Step 1: Preheat Your Waffle Maker
Start by heating your waffle maker to its highest setting. It needs to be nice and hot to create that golden brown, crispy exterior that makes these hash browns extra special.
Step 2: Combine the Ingredients
In a large mixing bowl, toss together the shredded potatoes, cheddar cheese, chopped onions, garlic powder, salt, and black pepper. Mixing everything evenly ensures every bite bursts with flavor and texture.
Step 3: Grease the Waffle Iron
Lightly grease your waffle iron with a little oil or non-stick spray. This step is key to preventing those perfectly formed hash browns from sticking, so they come out clean and crisp every time.
Step 4: Add the Mixture to the Waffle Maker
Scoop about half a cup of the potato mixture into the center of the waffle iron. Spread it out gently but evenly across the surface, ensuring the entire grid is covered for even cooking.
Step 5: Cook Until Crispy and Golden
Close the waffle maker and cook for 5 to 7 minutes. During this time, the magic happens as the cheese melts, and the potatoes transform into a beautifully crisp waffle-shaped hash brown.
Step 6: Remove and Cool Slightly
Carefully remove your hash browns with a spatula once they’re golden and crispy. Let them cool for a minute or two to set their shape but keep that irresistible crunch.
Step 7: Serve Hot and Enjoy
These hash browns are best enjoyed warm. Serve immediately with your favorite dipping sauce or toppings to complete the experience.
How to Serve Wafflemaker Hash Browns Recipe
Garnishes
To elevate this Wafflemaker Hash Browns Recipe even more, consider garnishing with a sprinkle of fresh chives, a dollop of sour cream, or a handful of crispy bacon bits. These toppings add exciting layers of flavor and a splash of color that make every bite feel indulgent.
Side Dishes
Pair your waffle hash browns with some classic breakfast staples like scrambled eggs, fluffy pancakes, or sautéed veggies. The crispy texture and gooey cheese make them a fantastic complement to almost any morning plate.
Creative Ways to Present
Try stacking multiple waffle hash browns with layers of avocado, fried egg, or smoked salmon between them for a fun breakfast sandwich. You can also slice them into wedges and serve with a medley of dipping sauces such as spicy ketchup, creamy aioli, or tangy salsa.
Make Ahead and Storage
Storing Leftovers
If you find yourself with leftovers from your Wafflemaker Hash Browns Recipe, simply store them in an airtight container in the refrigerator. They will stay fresh for up to 3 days, making it easy to enjoy a quick snack or side later on.
Freezing
For longer storage, freeze your waffle hash browns by placing them on a baking sheet to freeze individually before transferring to a freezer bag. They’ll keep well for up to a month, retaining their flavor and crispiness once reheated.
Reheating
Reheat leftover hash browns in the oven or toaster oven at 375°F until warmed through and crispy again. Avoid microwaving if you want to keep that signature crunch intact, as microwaves tend to make them soggy.
FAQs
Can I use frozen shredded potatoes for this recipe?
Absolutely! Just make sure to thaw and squeeze out any excess moisture before mixing with the other ingredients to keep your hash browns crispy.
What type of cheese works best in this recipe?
Cheddar is a classic choice for its sharp flavor and meltability, but feel free to experiment with mozzarella, pepper jack, or even a cheese blend to suit your taste.
Do I need to parboil the potatoes before shredding?
Nope! This recipe uses raw shredded potatoes. Just ensure they’re drained of any excess moisture to avoid soggy results in your waffle maker.
How can I make these hash browns vegan?
Simply omit the cheese or substitute with vegan cheese alternatives, and they’ll still turn out delicious with all that crispy goodness.
Can I add other vegetables or spices?
Definitely! Feel free to add diced peppers, jalapeños, or herbs like parsley and thyme to customize the flavor profile to your liking.
Final Thoughts
This Wafflemaker Hash Browns Recipe is more than just breakfast; it’s a joyful way to bring a new twist to an old favorite. Whether you’re enjoying them for a leisurely weekend brunch or impressing friends with a creative dish, these crispy, cheesy waffles of potato goodness never fail to delight. So don’t hesitate — fire up that waffle maker and dig in!
Print
Wafflemaker Hash Browns Recipe
- Prep Time: 5 minutes
- Cook Time: 7 minutes
- Total Time: 12 minutes
- Yield: 4 servings
- Category: Breakfast
- Method: Waffle Iron
- Cuisine: American
Description
These crispy and golden Wafflemaker Hash Browns are a delightful twist on the classic breakfast favorite. Made with shredded potatoes, cheddar cheese, and seasoned with onions and garlic powder, they are cooked to perfection in a waffle iron for a unique texture and crunch. Ready in under 10 minutes, they make a quick and tasty side dish or snack that’s perfect for any meal.
Ingredients
Hash Browns Mixture
- 2 cups shredded potatoes (about 2 medium russet potatoes)
- 1 cup shredded cheddar cheese
- ¼ cup chopped onions
- ½ teaspoon garlic powder
- ½ teaspoon salt
- ¼ teaspoon black pepper
Instructions
- Preheat the Waffle Maker: Heat your waffle maker to its highest setting to ensure crispy and evenly cooked hash browns.
- Mix Ingredients: In a mixing bowl, combine the shredded potatoes, shredded cheddar cheese, chopped onions, garlic powder, salt, and black pepper. Stir until all ingredients are well incorporated.
- Grease the Waffle Iron: Lightly grease the waffle iron using a non-stick spray or a brush with oil to prevent sticking.
- Cook the Hash Browns: Scoop about ½ cup of the potato mixture into the waffle iron, spreading it evenly across the surface for uniform cooking.
- Close and Cook: Close the waffle iron and cook the hash browns for 5 to 7 minutes, or until they are golden brown and crispy on the outside.
- Remove and Cool Slightly: Carefully remove the hash browns from the waffle maker and let them cool for a minute or two to allow them to set and become crispier.
- Serve: Serve the wafflemaker hash browns hot with your favorite dipping sauce or toppings such as sour cream, ketchup, or fresh herbs.
Notes
- You can substitute cheddar cheese with any other cheese of your preference for a different flavor profile.
- For extra crispiness, press the mixture firmly into the waffle maker before cooking.
- Make sure the potatoes are well drained and not overly wet to avoid soggy hash browns.
- These hash browns can be kept warm in a low oven for up to 20 minutes before serving.

