
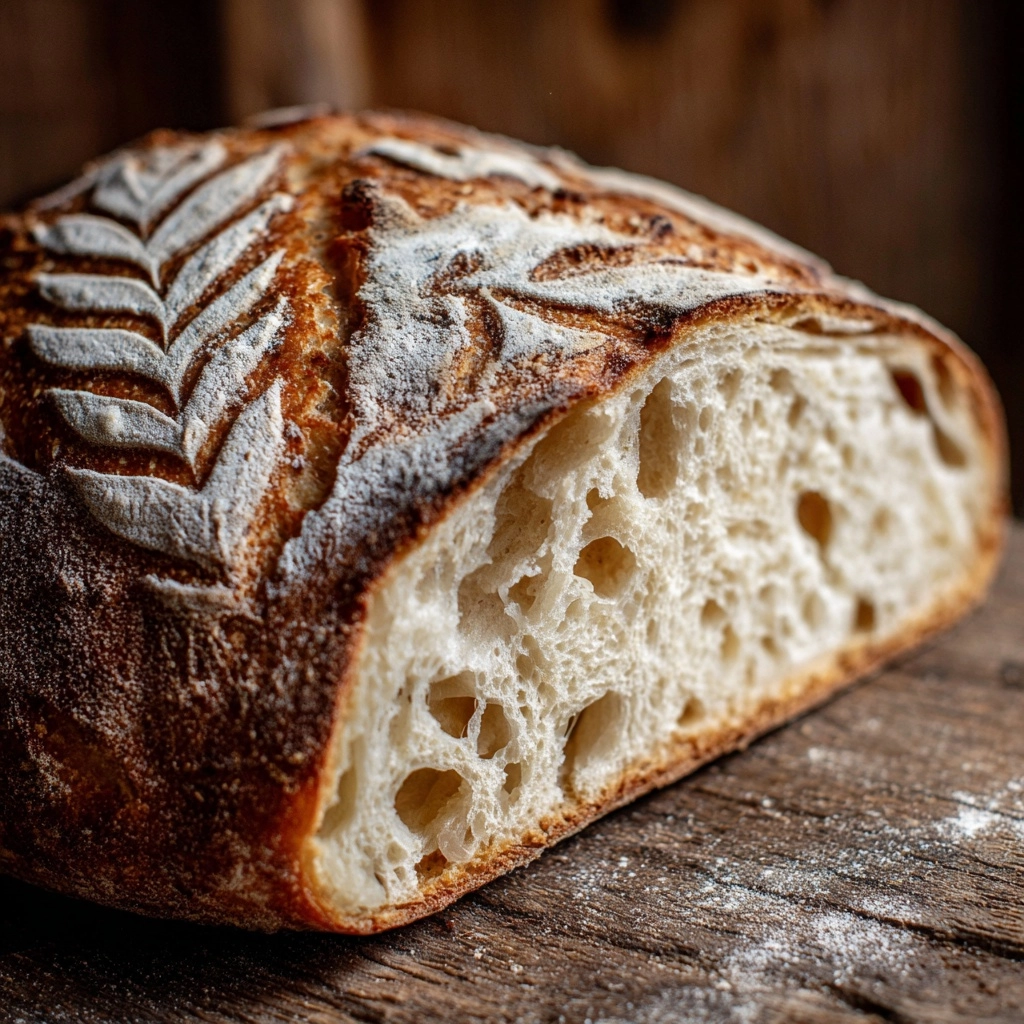
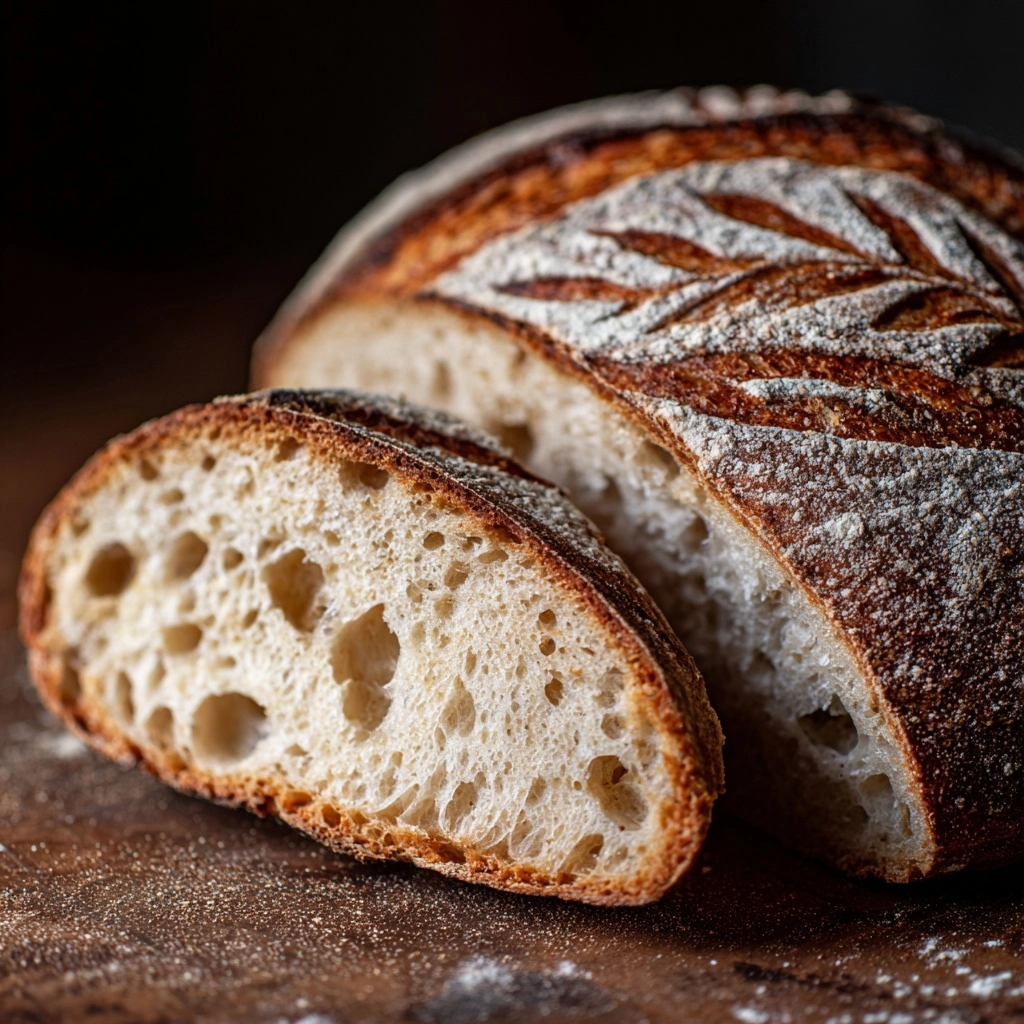
If you’ve ever dreamed of baking your own tangy, beautifully risen loaves right at home, a Sourdough Starter is the magical ingredient that kickstarts your journey! This lively, bubbling mixture harnesses the power of wild yeast and beneficial bacteria to unlock a whole new world of crave-worthy breads, pancakes, and more. Best of all, the process is mesmerizing and surprisingly simple—just flour, water, and a little daily attention. Get ready to experience the joy (and addictive aroma) of your very own Sourdough Starter rising and thriving on your countertop.
Ingredients You’ll Need
-
Day 1:
- 1 cup (120g) whole wheat flour
- 1/2 cup (120ml) filtered water
Day 2:
- 1/2 cup (60g) all-purpose flour
- 1/4 cup (60ml) filtered water
Days 3-7:
- 1/2 cup all-purpose flour
- 1/4 cup filtered water
How to Make Sourdough Starter
Step 1: Mix Flour and Water (Day 1)
Start your Sourdough Starter by combining 1 cup of whole wheat flour with 1/2 cup of filtered water in a clean glass jar or container. Stir with energy to fully hydrate the flour, scrape down the sides, and loosely cover the jar with a lid or clean cloth—this keeps out dust but lets your starter breathe. Set it somewhere cozy at room temperature, ideally around 70 to 75 degrees Fahrenheit.
Step 2: First Feeding (Day 2)
The next day, sneak a peek—you might notice a few bubbles, or maybe not yet (don’t worry, both are normal!). Discard about half the mixture to prevent overflow and concentrate the wild yeast. Now, feed your Sourdough Starter with 1/2 cup all-purpose flour and 1/4 cup filtered water. Stir thoroughly to incorporate air, scrape down the sides, and cover loosely again.
Step 3: Daily Feedings (Days 3–7)
Each day for the next 5 days, repeat the process: discard half of your Sourdough Starter, feed with 1/2 cup all-purpose flour and 1/4 cup filtered water, mix well, and cover loosely. Around day 4 or 5, the magic usually happens—the mixture becomes delightfully bubbly, rises and falls predictably, and develops that characteristic tangy aroma.
Step 4: Ready to Use
By day 6 or 7, if your Sourdough Starter is bubbly, doubles in volume a few hours after feeding, and smells pleasantly sour (but not pungent or off), congratulations! It’s officially ready for all your baking adventures. If it’s not quite there, don’t fret—just keep up with daily feedings until it comes alive.
Step 5: Maintenance for Long-Term Baking
Once it’s active, feed your Sourdough Starter weekly if storing in the fridge, or continue daily feedings if you’re baking often and keep it at room temperature. Always discard before feeding to avoid overflow and keep those wild yeasts thriving.
How to Serve Sourdough Starter
Garnishes
While Sourdough Starter itself is an ingredient, using it in doughs opens a world of rustic garnishes. Try topping your dough with seeds—poppy, sesame, or sunflower—for extra crunch and flavor. A sprinkle of coarse salt and fresh rosemary over your loaves also brings fantastic aroma and pizzazz.
Side Dishes
Freshly baked sourdough breads made from your Sourdough Starter are practically begging for great company. Think creamy herbed butters, sharp cheeses, olive tapenade, or homemade soups. A breadbasket star like this works wonders alongside salads and hearty stews as well.
Creative Ways to Present
Don’t stop at loaves—let your Sourdough Starter inspire you! Whip up fluffy pancakes, crisp crackers, or pillowy focaccia. Offer samplers at brunch with different jams or dips, or serve bite-sized bread rounds as a base for bruschetta or crostini. The possibilities are as boundless as your imagination.
Make Ahead and Storage
Storing Leftovers
An active Sourdough Starter is happiest in the refrigerator if you’re not baking every day. Just transfer it to a clean jar, loosely cover, and pop it in the fridge. Keep it strong and active with a weekly feed of flour and water, discarding excess as needed.
Freezing
If you want to really hit pause, you can freeze your Sourdough Starter! Place a portion in a freezer-safe jar or zip-top bag, label it with the date, and freeze for up to 3 months. When you’re ready to bake again, thaw, feed, and watch it spring back to life.
Reheating
Sourdough Starter doesn’t technically need reheating, but after fridge or freezer storage, give it a couple of room-temperature feedings to reawaken its bubbling magic. Wait for it to double in volume with vigor before baking your next loaf.
FAQs
Why do I have to discard half of my Sourdough Starter before feeding?
This step helps maintain a manageable amount of starter while keeping the wild yeast strong and active. Too much starter with too little food can lead to sluggish fermentation and off flavors!
What if I forgot to feed my Sourdough Starter for a day?
Missed a feeding? No need to panic! Give it a good feeding as soon as you remember. If it smells unpleasant or develops mold, start over. Otherwise, the wild yeast can usually recover just fine.
Can I use a different type Basics
Absolutely! After kickstarting with whole wheat flour, you can switch to all-purpose, bread, or even rye flour as you continue daily feedings. Each one brings its own subtle flavor and personality to your Sourdough Starter.
How do I know if my Sourdough Starter is ready to use?
Look for a flurry of bubbles, a rise and fall pattern after feeding, and a beautifully tangy, clean aroma. If it doubles in size in 4 to 6 hours at room temperature, it’s ready for bread baking bliss.
Can I share my Sourdough Starter with friends?
Yes! Sourdough Starter is a gift that keeps on giving. Just scoop some into a clean jar and share instructions for daily feeding. It’s a wonderful way to spread the joy (and flavor!) of homemade sourdough.
Final Thoughts
Building your own Sourdough Starter is like making a delicious new friend in the kitchen—one that rewards you with mouthwatering breads and endless baking possibilities. Give it a try and let this lively jar of magic become the heart of your home baking adventures!
Print
Sourdough Starter Recipe
- Prep Time: 10 minutes per day
- Cook Time: 0 minutes
- Total Time: 7 days (active time: approx. 70 minutes over 7 days)
- Yield: About 1 cup of active starter
- Category: Basics
- Method: Fermenting
- Cuisine: American
- Diet: Vegan
Description
Learn how to make your own sourdough starter at home with this easy step-by-step guide. Cultivate wild yeast to create a flavorful base for all your sourdough bread recipes.
Ingredients
Day 1:
- 1 cup (120g) whole wheat flour
- 1/2 cup (120ml) filtered water
Day 2:
- 1/2 cup (60g) all-purpose flour
- 1/4 cup (60ml) filtered water
Days 3-7:
- 1/2 cup all-purpose flour
- 1/4 cup filtered water
Instructions
- Day 1: In a clean jar, mix whole wheat flour and water. Cover and let rest.
- Day 2: Discard half, then feed with flour and water. Stir well and cover.
- Days 3-7: Repeat feeding process. Starter should be ready by day 6 or 7.
- To maintain: Store in the fridge and feed weekly, or continue daily feedings.
Notes
- Use filtered water to avoid inhibiting yeast.
- Switch to all-purpose flour after day 1.
- Always discard before feeding.
Nutrition
- Serving Size: 1 tablespoon
- Calories: 25
- Sugar: 0g
- Sodium: 1mg
- Fat: 0g
- Saturated Fat: 0g
- Unsaturated Fat: 0g
- Trans Fat: 0g
- Carbohydrates: 6g
- Fiber: 0.5g
- Protein: 1g
- Cholesterol: 0mg


