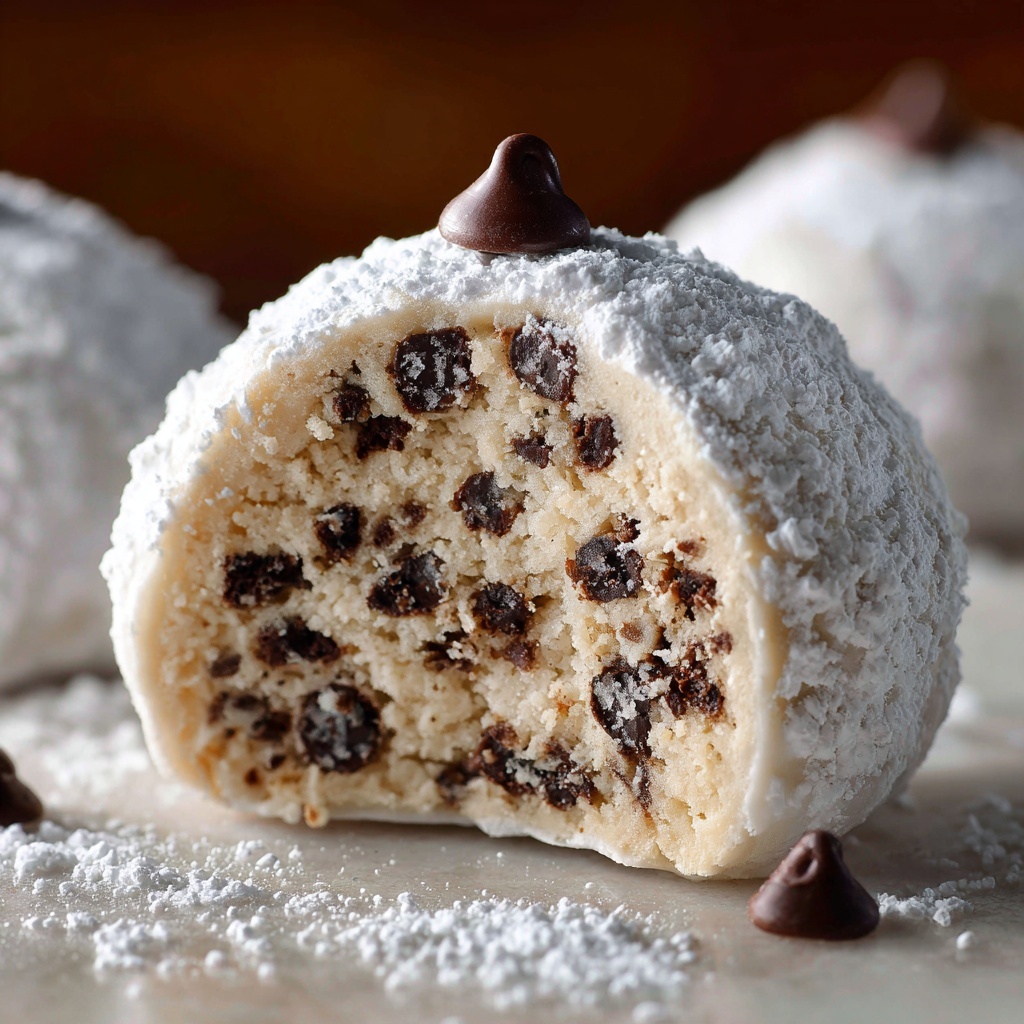
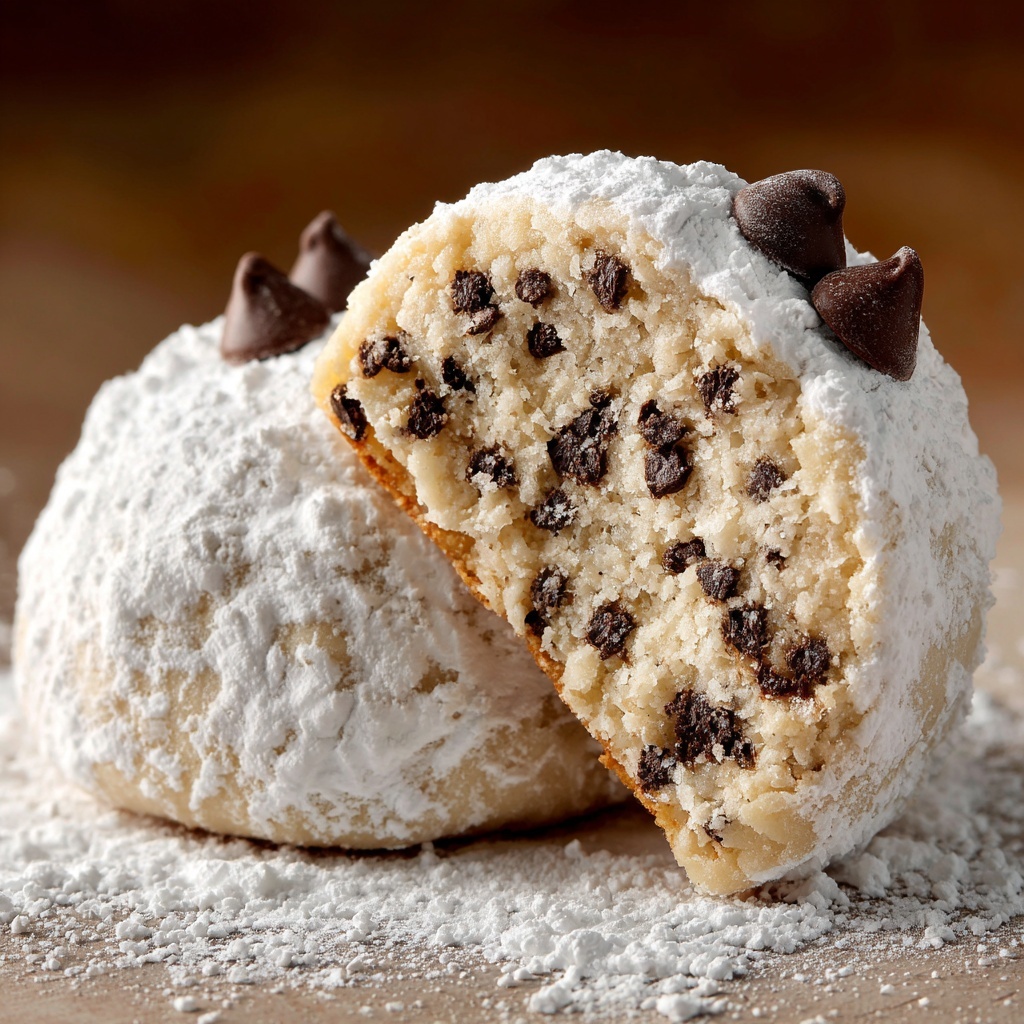
If you’re on the hunt for a cookie that feels like a warm hug on a cold day, the Melt-in-Your-Mouth Peanut Butter Chocolate Chip Snowball Cookies Recipe is an absolute must-try. These cookies combine the creaminess of peanut butter with irresistible mini chocolate chips, all wrapped in a delicate snowball exterior dusted with powdered sugar. Their tender, crumbly texture is so enchanting, each bite simply dissolves in your mouth, making them perfect for holiday baking, gifting, or simply indulging yourself. It’s a cozy, sweet treat that feels like a little celebration with every single cookie.
Ingredients You’ll Need
Gathering these simple, wholesome ingredients is the easy start to creating your melt-in-your-mouth delight. Each component plays a special role, from the creamy butter and peanut butter that build richness and softness, to the powdered sugar that creates that signature snowy look and gentle sweetness in every bite.
- 1/2 cup unsalted butter, softened: Provides a creamy base and tender crumb for the cookies.
- 1/2 cup creamy peanut butter: Adds rich, nutty flavor and luscious moisture.
- 1/4 cup powdered sugar (plus more for rolling): Sweetens and creates the iconic snowball coating.
- 1 teaspoon vanilla extract: Boosts flavor with its warm, aromatic sweetness.
- 1 cup all-purpose flour: The structure that holds your cookies together.
- 1/4 teaspoon salt: Enhances and balances the sweetness while uplifting flavors.
- 1/2 cup mini chocolate chips: Chocolate bursts that make each bite more exciting and delightful.
How to Make Melt-in-Your-Mouth Peanut Butter Chocolate Chip Snowball Cookies Recipe
Step 1: Preheat and Prepare
Start by preheating your oven to 350°F (175°C). Line a baking sheet with parchment paper to ensure your cookies bake evenly and come off the tray effortlessly. This prep step sets the stage for perfectly baked cookies with minimal cleanup.
Step 2: Cream the Butters and Powdered Sugar
In a large bowl, beat together the softened butter, creamy peanut butter, and powdered sugar until the mixture turns light and fluffy. This process incorporates air, giving the cookies their tender, melt-in-your-mouth texture that makes this recipe so special.
Step 3: Add Vanilla Extract
Stir in the vanilla extract for a warm, aromatic depth that enhances the peanut butter’s natural flavor, making your cookies smell irresistible.
Step 4: Combine Dry Ingredients
Mix the all-purpose flour and salt into your wet mixture until the dough is soft and just combined. This careful mixing ensures your cookies will be tender without being dense.
Step 5: Fold in Mini Chocolate Chips
Gently fold in the mini chocolate chips to distribute those delightful chocolate nuggets throughout every cookie, adding bursts of sweetness in every bite.
Step 6: Shape the Cookies
Scoop and roll the dough into 1-inch balls, placing them on your prepared baking sheet about an inch apart. This spacing allows for even baking and that perfect shape.
Step 7: Bake to Perfection
Bake your cookies for 10 to 12 minutes until the bottoms are just turning lightly golden. This timing helps retain the soft texture inside while forming a slight crust on the outside.
Step 8: The Snowball Finish
Once out of the oven, allow the cookies to cool for 5 minutes. While still warm, roll them in powdered sugar for the first snow-like coat. After cooling completely, roll them again in powdered sugar for that thick, snowy appearance that makes these cookies irresistible.
How to Serve Melt-in-Your-Mouth Peanut Butter Chocolate Chip Snowball Cookies Recipe

Garnishes
For a little extra festive flair, sprinkle a pinch of finely chopped peanuts or a drizzle of melted chocolate over the cookies just before serving. It adds texture and heightens the peanuty, chocolaty charm of the cookies beautifully.
Side Dishes
Pair these snowball cookies with a glass of cold milk, creamy hot chocolate, or even a cup of strong coffee to complement their buttery sweetness. They’re excellent after-dinner treats or afternoon pick-me-ups alongside your favorite warm beverage.
Creative Ways to Present
Arrange the cookies in a festive tin or on a pretty platter dusted with edible glitter or extra powdered sugar for holiday gatherings. You could also stack them with wax paper in between for a charming homemade gift or cookie swap contribution that’s sure to wow friends and family.
Make Ahead and Storage
Storing Leftovers
These peanut butter chocolate chip snowball cookies keep beautifully in an airtight container at room temperature for up to a week. Be sure to keep them away from heat or moisture to preserve their tender texture and lovely powdered coating.
Freezing
If you want to prepare these cookies ahead of time, freeze the unbaked dough balls on a baking sheet before transferring them to a freezer-safe bag. Bake them straight from frozen, adding a minute or two to the cooking time. After baking, cool and dust with powdered sugar for that perfect snowball finish.
Reheating
For a just-baked feel, warm a cookie or two in the microwave for 10-15 seconds before enjoying. This brief warming revives the gooey peanut butter and melted chocolate goodness inside, making them taste fresh and indulgent every time.
FAQs
Can I use crunchy peanut butter instead of creamy?
Yes, you can! Using crunchy peanut butter will add a delightful texture to the cookies, giving them a little extra nutty crunch that works wonderfully with the soft cookie base.
Are these cookies gluten-free?
The original recipe uses all-purpose flour, which contains gluten. However, you can substitute with a gluten-free flour blend to make them safe for gluten-sensitive friends and still enjoy that melt-in-your-mouth magic.
Can I make these cookies nut-free?
Absolutely! Swap the peanut butter for sunflower seed butter to make a nut-free version without sacrificing flavor or texture. This makes for a great allergy-friendly holiday treat.
Do these cookies require eggs?
No eggs are needed in this recipe, which makes it ideal for those with egg allergies or anyone looking for an egg-free cookie option that still melts in your mouth.
What’s the best way to get the perfect snowball coating?
Rolling the cookies twice in powdered sugar—once while still warm and again after fully cooling—creates that thick, snowy coating that defines these snowball cookies. Don’t rush this step; it’s worth the extra dusting!
Final Thoughts
If you’re craving a cookie that combines simplicity with extraordinary flavor and texture, the Melt-in-Your-Mouth Peanut Butter Chocolate Chip Snowball Cookies Recipe should be your go-to. The way these cookies come together so effortlessly, then offer a tender, buttery experience bursting with peanut butter and chocolate chips, is nothing short of magical. Give this recipe a try and watch how quickly they become a beloved staple in your cookie rotation, perfect for sharing or savoring solo.
Print
Melt-in-Your-Mouth Peanut Butter Chocolate Chip Snowball Cookies Recipe
- Prep Time: 15 minutes
- Cook Time: 12 minutes
- Total Time: 27 minutes
- Yield: 24 cookies
- Category: Dessert
- Method: Baking
- Cuisine: American
- Diet: Vegetarian
Description
These Melt-in-Your-Mouth Peanut Butter Chocolate Chip Snowball Cookies are soft, buttery treats perfect for holiday cookie platters. Combining creamy peanut butter with mini chocolate chips and rolled in powdered sugar, these egg-free cookies offer a delightful blend of flavors and a snowy, festive appearance.
Ingredients
Cookie Dough
- 1/2 cup unsalted butter, softened
- 1/2 cup creamy peanut butter
- 1/4 cup powdered sugar (plus more for rolling)
- 1 teaspoon vanilla extract
- 1 cup all-purpose flour
- 1/4 teaspoon salt
- 1/2 cup mini chocolate chips
Instructions
- Preheat and Prepare: Preheat your oven to 350°F (175°C) and line a baking sheet with parchment paper to prevent sticking and ensure even baking.
- Cream Butter and Peanut Butter: In a large bowl, beat together the softened unsalted butter, creamy peanut butter, and 1/4 cup powdered sugar until the mixture is light and fluffy, ensuring a smooth base for the cookies.
- Add Vanilla Extract: Stir in the vanilla extract evenly to infuse the dough with sweet aroma and flavor.
- Incorporate Dry Ingredients: Add the all-purpose flour and salt to the wet mixture, stirring gently until a soft dough forms without overmixing to maintain tenderness.
- Fold in Chocolate Chips: Carefully fold the mini chocolate chips into the dough, distributing them evenly throughout for consistent chocolate pockets in every cookie.
- Shape Cookies: Scoop and roll the dough into 1-inch balls, spacing them about 1 inch apart on the prepared baking sheet to allow for slight spreading during baking.
- Bake: Bake the cookies for 10–12 minutes until the bottoms are just lightly golden, indicating they are cooked but still tender inside.
- First Powdered Sugar Roll: Remove from oven and let cool for 5 minutes until slightly warm. Roll each cookie in powdered sugar for an initial sweet coating.
- Final Cooling and Finishing: Let the cookies cool completely on the baking sheet or wire rack, then roll again in powdered sugar to create a thick, snowy coating that melts in your mouth.
Notes
- These cookies can be made ahead and frozen, then dusted with powdered sugar after thawing for fresh presentation.
- For a nut-free variation, substitute peanut butter with sunflower seed butter without affecting the texture significantly.
- The recipe is naturally egg-free, making it suitable for those with egg allergies.
- Perfect for holiday cookie platters or gifting during festive seasons.

