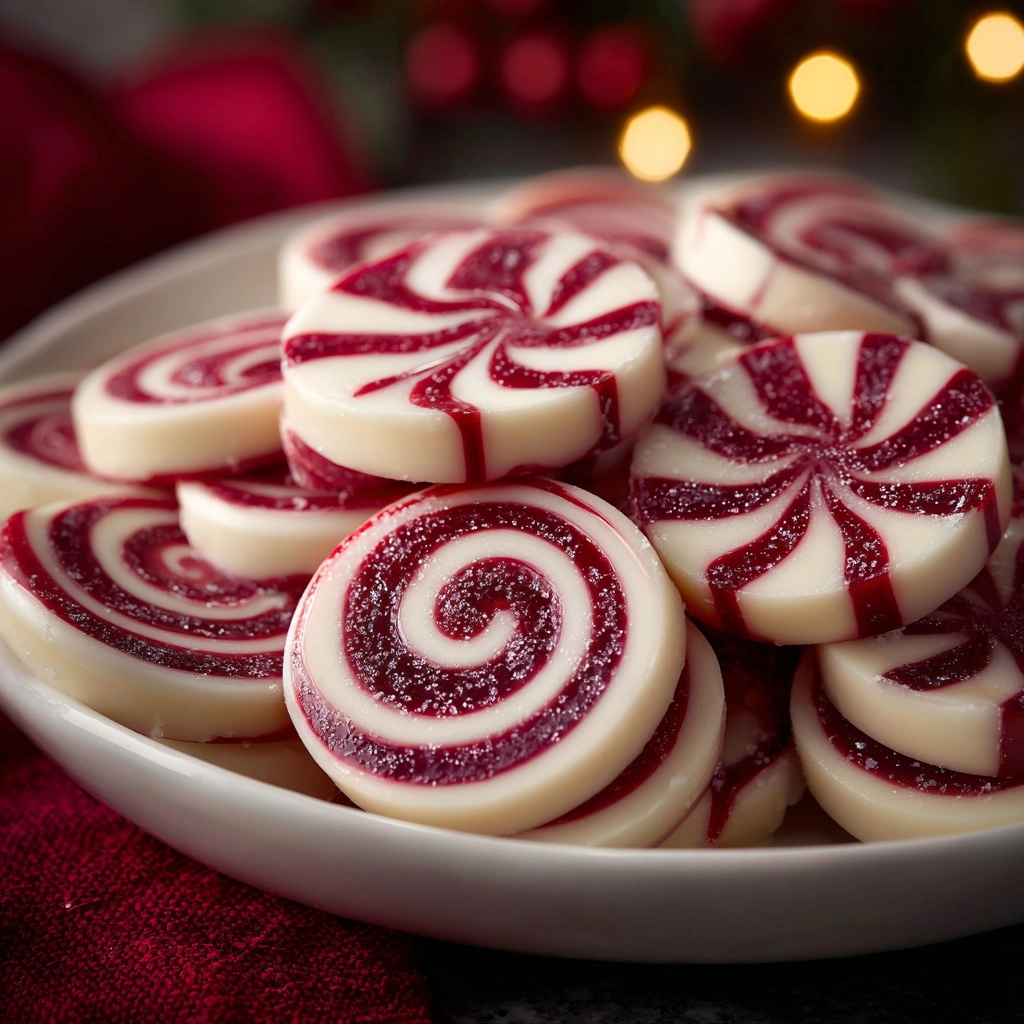
If you’re searching for a festive treat that is incredibly easy to make yet irresistibly delicious, this Soft Christmas Peppermints Recipe is exactly what you need. These vibrant red, green, and plain peppermint candies are soft, melt-in-your-mouth delights perfect for sharing with family and friends during the holidays. The combination of sweetened condensed milk and powdered sugar creates a luscious, chewy texture, while the refreshing peppermint extract gives that classic holiday flavor we all adore. Whether you’re new to candy-making or looking to add a new tradition to your Christmas celebrations, this recipe offers simplicity, beauty, and taste in every bite.

Ingredients You’ll Need
This Soft Christmas Peppermints Recipe uses just a handful of straightforward ingredients that come together to create an enchanting holiday treat. Each ingredient is crucial, from the rich sweetness of the condensed milk to the festive hues achieved with gel food coloring, all contributing to the flavor, texture, and look of your mints.
- Powdered sugar: Provides the perfect sweetness and structure to form a soft yet firm peppermint dough.
- Sweetened condensed milk: Delivers creaminess and moisture, making these candies perfectly chewy without baking.
- Peppermint extract: Infuses the candies with that unmistakable minty freshness essential for holiday mints.
- Vanilla extract: Adds a subtle warm undertone, balancing the sharp peppermint flavor beautifully.
- Salt: Enhances all the sweet flavors and keeps the profile well-rounded.
- Red and green gel food coloring: Brings your candies to life with festive colors that scream Christmas cheer.
- Extra powdered sugar for dusting: Prevents sticking and makes rolling the dough a breeze.
How to Make Soft Christmas Peppermints Recipe
Step 1: Mix the wet ingredients
Start by combining the sweetened condensed milk, peppermint extract, vanilla extract, and salt in a large bowl. Stir these together until the mixture is smooth and fragrant. This step is where the magic begins, as the peppermint and vanilla come alive in a creamy base that’s the heart of your candy.
Step 2: Incorporate the powdered sugar
Gradually add the powdered sugar to your wet mixture, stirring continuously. This will thicken the mixture into a soft, pliable dough. Don’t rush; allowing the sugar to blend fully will ensure the best texture — soft on the inside with a slight firm shell.
Step 3: Divide and color the dough
Once your dough has formed, split it evenly into three portions. Leave one portion plain for classic white mints, tint one batch with red gel food coloring and the other with green. You’ll love how these festive colors brighten up the candy tray and bring holiday spirit to your kitchen.
Step 4: Shape the candies
Dust your work surface lightly with powdered sugar to keep things from sticking. Pinch off small amounts of dough and roll them into 1-inch balls. Then gently flatten each ball either with your fingertips or the tines of a fork to create the traditional mint shape. This hands-on step is fun and satisfying, perfect for getting the whole family involved!
Step 5: Let the mints dry
Place your shaped candies on a baking sheet lined with parchment paper, spacing them slightly apart. Allow them to dry at room temperature for at least 12 hours. This patience pays off because the candies develop a slight firm exterior while keeping a deliciously soft center.
How to Serve Soft Christmas Peppermints Recipe

Garnishes
Although these Soft Christmas Peppermints are delightful on their own, you can dress them up with a light dusting of extra powdered sugar for a snowy effect. For an extra festive appeal, sprinkle some crushed candy canes on top before drying, adding a crunch and even more peppermint punch.
Side Dishes
These mints pair beautifully with warm drinks like hot cocoa or spiced tea, providing a refreshing counterbalance to rich flavors. They’re also a perfect finish after a holiday meal, cleansing the palate with their cool peppermint essence.
Creative Ways to Present
For gifting, arrange these brightly colored mints in decorative tins or glass jars tied with holiday ribbons. Layering reds, greens, and whites in clear containers not only looks stunning but beckons your guests to indulge in these homemade goodies. You might also creatively display them on cookie trays alongside other festive treats, adding a soft peppermint variety that everyone will crave.
Make Ahead and Storage
Storing Leftovers
Once dried and set, you can store your Soft Christmas Peppermints in an airtight container at room temperature. Keeping them sealed ensures they stay fresh and maintain their wonderful texture for up to two weeks, making it easy to enjoy them throughout the holiday season.
Freezing
If you want to prepare these mints well in advance, they freeze beautifully. Simply layer them between sheets of parchment paper in a freezer-safe container, and they can be frozen for up to three months. When ready to enjoy, allow them to thaw at room temperature; they will taste just as amazing as when freshly made.
Reheating
Since these mints are best enjoyed at room temperature to preserve their soft texture, reheating is not necessary. However, if you prefer them slightly softer, letting them sit for a few minutes at a warmer spot in your kitchen will do the trick nicely.
FAQs
Can I adjust the peppermint flavor in this Soft Christmas Peppermints Recipe?
Absolutely! If you love a stronger peppermint punch, feel free to add a few extra drops of peppermint extract during mixing. Just be careful not to add too much as it can become overpowering and affect the texture.
Are these candies gluten-free?
Yes, this Soft Christmas Peppermints Recipe is naturally gluten-free, making it a safe and delicious option for those with gluten sensitivities or celiac disease.
How soft are these peppermint candies?
These candies are wonderfully soft on the inside with a slight exterior firmness after drying. The texture is similar to soft fudge or melt-in-your-mouth taffy — quite different from hard peppermint candies.
Can I use other colors besides red and green?
Definitely! While red and green are traditional for Christmas, you can experiment with any gel food coloring to suit your occasion or personal preference. Just remember gel colors provide vibrant hues without adding moisture that could affect texture.
Do I need to refrigerate these soft peppermint candies?
Refrigeration is not necessary and can actually make the candies firmer than intended. Storing them in an airtight container at room temperature is best to keep their soft, chewy consistency intact.
Final Thoughts
There’s something truly special about making your own holiday treats from scratch, and this Soft Christmas Peppermints Recipe offers that experience with joyful simplicity and delicious results. Whether you’re gifting, celebrating, or simply craving a nostalgic taste of the season, these candies bring warmth and cheer to every bite. Trust me, once you try them, they’ll become your holiday favorite year after year.
Print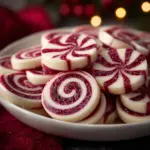
Soft Christmas Peppermints Recipe
- Prep Time: 20 minutes
- Cook Time: 0 minutes
- Total Time: 20 minutes active, plus 12 hours drying time
- Yield: About 60 mints
- Category: Candy, Dessert
- Method: No-Cook
- Cuisine: American
- Diet: Vegetarian, Gluten Free
Description
Soft Christmas Peppermints are a delightful no-bake holiday treat featuring a smooth, sweet peppermint-flavored dough that dries to a firm exterior and soft center. Perfect for festive gift boxes or cookie trays, these colorful candies bring seasonal cheer with a simple recipe that requires no cooking.
Ingredients
Main Ingredients
- 3 3/4 cups powdered sugar
- 1 can (14 ounces) sweetened condensed milk
- 1/2 teaspoon peppermint extract
- 1/4 teaspoon vanilla extract
- 1/4 teaspoon salt
- Red and green gel food coloring
- Extra powdered sugar for dusting
Instructions
- Mix Wet Ingredients. In a large bowl, combine the sweetened condensed milk, peppermint extract, vanilla extract, and salt, stirring until the mixture is smooth and well blended.
- Add Powdered Sugar. Gradually stir in the powdered sugar, mixing thoroughly until a soft, pliable dough forms that is workable but not sticky.
- Divide and Color Dough. Split the dough evenly into three portions. Leave one plain, tint one with red gel food coloring, and the other with green gel food coloring, kneading each to distribute the color evenly.
- Shape Candies. Lightly dust a clean surface with powdered sugar. Roll small pieces of dough into approximately 1-inch balls, then gently flatten them with your fingers or the tines of a fork to form mint shapes.
- Dry Candies. Arrange the shaped candies on a baking sheet lined with parchment paper. Allow them to dry at room temperature for at least 12 hours until they develop a firm exterior but remain soft inside.
- Store Properly. Once dried, store the peppermint candies in an airtight container to maintain freshness.
Notes
- Adjust the peppermint extract quantity to suit your preferred flavor intensity by adding a few extra drops.
- These peppermint candies add vibrant color and charm to holiday cookie trays and gift boxes.
- Ensure thorough drying time for the best texture between a firm outside and soft inside.


