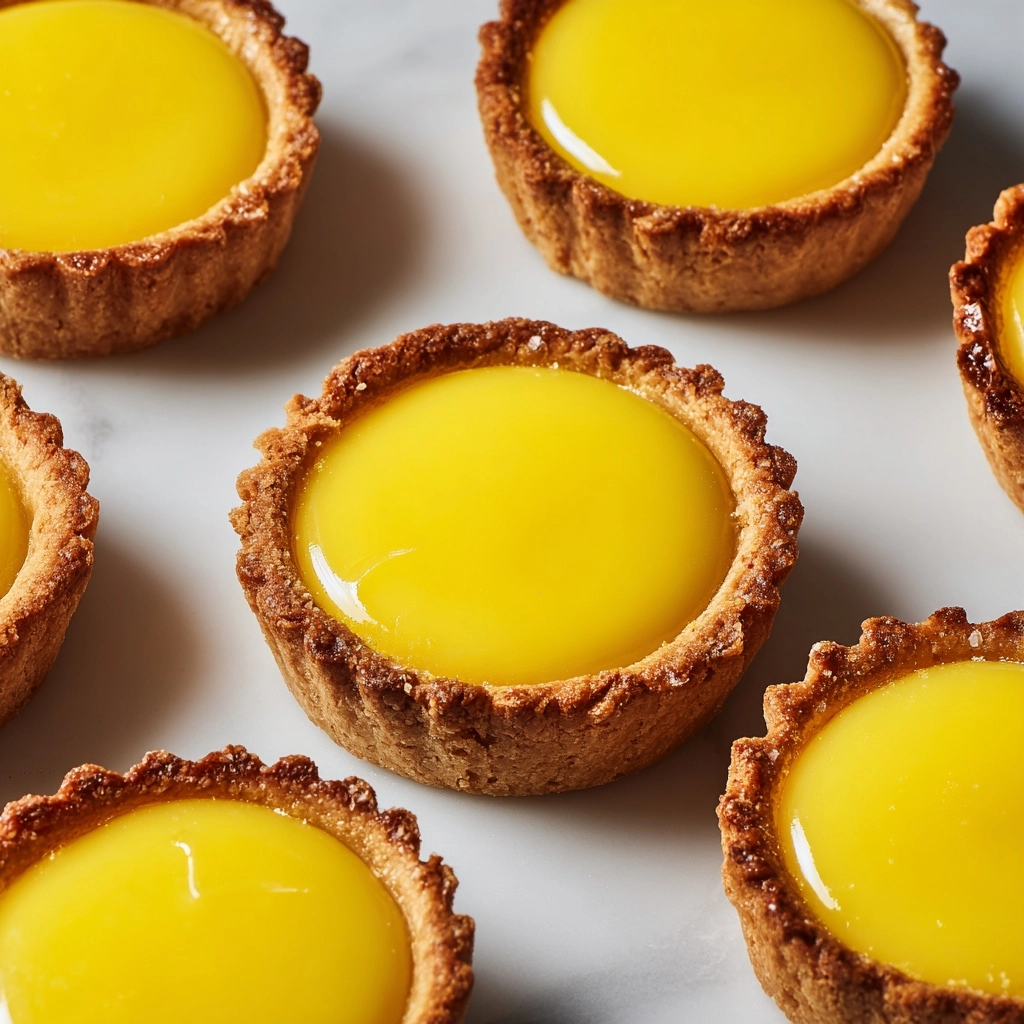
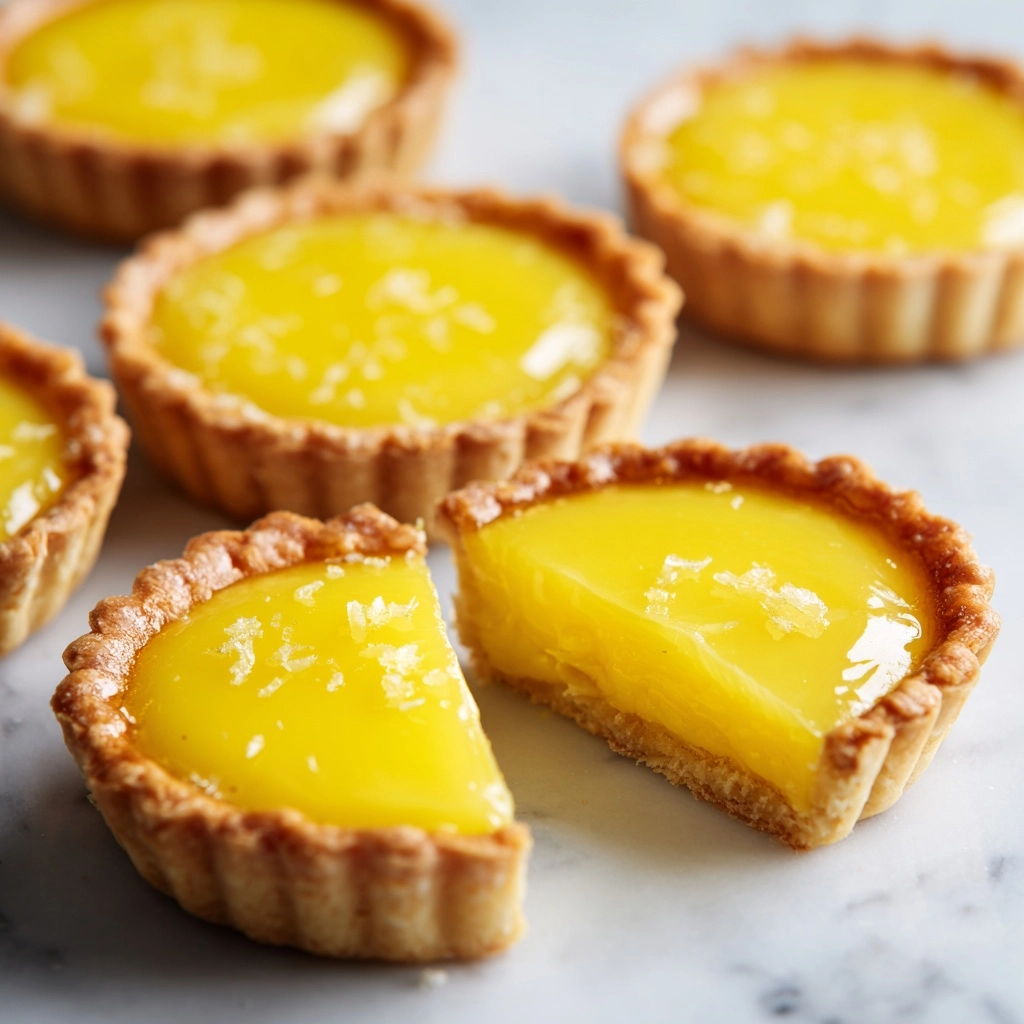
If you have a soft spot for delicate pastries with a luxuriously smooth filling, then this Hong Kong Egg Tart Recipe is going to become your new obsession! Originating from the vibrant streets of Hong Kong, these tarts offer a perfect balance of buttery, flaky crust and a velvety custard that melts in your mouth. Whether enjoyed as a dim sum treat or a teatime indulgence, each bite promises a nostalgic burst of comforting sweetness paired with a subtle vanilla aroma. This recipe brings that authentic taste straight to your kitchen, celebrating the art of traditional Chinese dessert making with an irresistible charm you will adore.
Ingredients You’ll Need
These ingredients might seem simple, but each one plays a crucial role in crafting that iconic texture and flavor of the Hong Kong Egg Tart Recipe. From the rich butter that ensures a flaky crust to the smooth evaporated milk that enriches the custard, every component works in harmony for a delightful treat.
- All-purpose flour (1 1/2 cups): The foundation of the tender and flaky tart crust.
- Unsalted butter, cold and cubed (1/2 cup): Adds richness and flakiness to the pastry shell.
- Powdered sugar (2 tablespoons): Sweetens the crust gently without graininess.
- Egg yolk (1): Binds the dough and contributes to a tender texture.
- Cold water (2 to 3 tablespoons): Helps bring the dough together without making it tough.
- Granulated sugar (1/2 cup): Sweetens the custard filling beautifully.
- Hot water (3/4 cup): Dissolves the sugar to make a smooth syrup for custard.
- Evaporated milk (1/3 cup): Creams the custard, making it velvety and luscious.
- Large eggs (2): Provide structure and richness to the custard.
- Vanilla extract (1/2 teaspoon): Adds aromatic warmth and depth to the filling.
How to Make Hong Kong Egg Tart Recipe
Step 1: Prepare the Tart Dough
Start by combining the flour and powdered sugar in a mixing bowl. Cut in the cold, cubed butter using a pastry cutter or your fingers until the mixture resembles coarse crumbs—this technique is key to creating that perfect flaky texture. Next, add the egg yolk and cold water, a tablespoon at a time, mixing gently until a soft dough forms. Wrap it tightly in plastic wrap and let it chill in the fridge for 30 minutes; this step firms up the butter and makes the dough easier to handle.
Step 2: Shape the Tart Shells
After chilling, preheat your oven to 375°F (190°C). Roll out the dough on a lightly floured surface and press it into tart molds, being careful to trim any excess for clean edges. This sturdy yet tender crust will provide the perfect vessel for that luscious custard to come.
Step 3: Make the Custard Filling
In a heatproof bowl, dissolve the granulated sugar in hot water and allow it to cool completely; this ensures the sugar integrates smoothly without graininess. Then, whisk together the eggs, evaporated milk, and vanilla extract until blended. Slowly stir in the cooled sugar syrup, and finally, strain the mixture through a fine sieve to remove any bubbles or bits of cooked egg, guaranteeing a silky custard.
Step 4: Fill and Bake
Pour the custard mixture gently into the prepared tart shells, filling them just below the rim to avoid spillover. Bake in the preheated oven for 25 to 30 minutes or until the custard is just set and the crust turns a golden shade. Keep a close eye towards the end so you don’t overbake—the custard should be firm yet tender without puffing up or cracking. Let your tarts cool before carefully removing them from the molds.
How to Serve Hong Kong Egg Tart Recipe

Garnishes
Though these tarts are irresistibly perfect on their own, a light dusting of powdered sugar or a small sprig of fresh mint adds a lovely contrast in both presentation and flavor. If you’re feeling adventurous, a few fresh berries can add a burst of color and subtle tartness that complements the creamy custard exquisitely.
Side Dishes
The Hong Kong Egg Tart Recipe shines when paired with traditional dim sum dishes like steamed dumplings, barbecued pork buns, or a refreshing cup of jasmine tea. The lightly sweet tart is a welcome balance to savory bites and offers a delightful finish to any meal.
Creative Ways to Present
For a modern twist, try serving egg tarts in mini tartlet pans garnished with edible flowers or alongside a drizzle of caramel or chocolate sauce. Presenting them on an elegant dessert platter with colorful linen napkins will wow guests and make your homemade egg tarts feel like a sophisticated treat.
Make Ahead and Storage
Storing Leftovers
If you have leftovers, they should be stored in an airtight container in the refrigerator for up to two days. This keeps the custard fresh and the crust from becoming soggy. Just be sure to bring them to room temperature before enjoying.
Freezing
While not ideal, you can freeze unbaked tart shells for convenience—just thaw before filling and baking. Avoid freezing fully baked egg tarts as the custard texture can become watery upon thawing.
Reheating
To revive the freshly baked feel, warm your egg tarts in a preheated oven at 300°F (150°C) for about 5 to 7 minutes. This helps the crust regain flakiness without drying out the custard. Avoid microwaving as this can make the crust chewy and the filling rubbery.
FAQs
Can I use regular milk instead of evaporated milk for the custard?
You can substitute regular milk, but evaporated milk gives the custard its distinct creamy richness and concentration, so using regular milk might result in a less silky texture.
How do I prevent the custard from cracking when baking?
Make sure not to overbake your egg tarts and avoid rapid temperature changes. Turning off the oven and allowing the tarts to cool gradually inside for a few minutes can help prevent cracks.
Is it possible to make the dough ahead of time?
Absolutely! The dough can be prepared and refrigerated for up to 24 hours or frozen for up to a week. Just make sure to let it thaw in the fridge before rolling it out.
Can I make mini egg tarts using this recipe?
Yes, this recipe works perfectly for mini tarts. Just adjust the baking time to about 18-22 minutes since smaller tarts cook faster.
What is the best way to reheat leftover egg tarts?
The best way is to use a low-temperature oven to warm them gently, preserving the crust’s flakiness and the custard’s smoothness without drying them out.
Final Thoughts
There is something truly magical about mastering the Hong Kong Egg Tart Recipe at home. From the buttery, melt-in-your-mouth crust to the silky custard that dances on your palate, each step of the process delivers both joy and delicious satisfaction. I promise that once you’ve tasted these charming little tarts fresh from your oven, they’ll quickly become a beloved classic in your dessert repertoire. So go ahead, give them a try and bring a bit of Hong Kong’s sweet culinary heritage right to your kitchen!
Print
Hong Kong Egg Tart Recipe
- Prep Time: 30 minutes
- Cook Time: 30 minutes
- Total Time: 1 hour
- Yield: 10 to 12 small tarts
- Category: Dessert
- Method: Baking
- Cuisine: Chinese
- Diet: Vegetarian
Description
Hong Kong Egg Tart is a classic Chinese dessert featuring a buttery, flaky pastry crust filled with a smooth, silky egg custard. This delightful treat is traditionally served at dim sum and is loved for its melt-in-your-mouth texture and lightly sweet flavor. Perfect as a warm or room temperature dessert, these tarts combine simple ingredients to create a nostalgic and elegant treat.
Ingredients
Pastry Dough
- 1 1/2 cups all-purpose flour
- 1/2 cup unsalted butter, cold and cubed
- 2 tablespoons powdered sugar
- 1 egg yolk
- 2 to 3 tablespoons cold water
Custard Filling
- 1/2 cup granulated sugar
- 3/4 cup hot water
- 1/3 cup evaporated milk
- 2 large eggs
- 1/2 teaspoon vanilla extract
Instructions
- Prepare the Dough: In a mixing bowl, combine the all-purpose flour and powdered sugar. Cut in the cold, cubed unsalted butter using a pastry cutter or your fingers until the mixture resembles coarse crumbs.
- Form the Dough: Add the egg yolk and 2 to 3 tablespoons of cold water, one tablespoon at a time, mixing gently until a soft dough forms. Avoid overworking to maintain flakiness.
- Chill the Dough: Wrap the dough in plastic wrap and refrigerate for 30 minutes to rest and firm up, which will make it easier to roll out.
- Preheat the Oven: Set your oven to 375°F (190°C) to prepare for baking.
- Roll and Shape: On a lightly floured surface, roll out the chilled dough to about 1/8 inch thick. Press the dough into tart molds, trimming any excess to create even edges.
- Prepare the Custard: Dissolve granulated sugar in the hot water and allow the mixture to cool completely to prevent cooking the eggs prematurely.
- Mix Custard Ingredients: In a separate bowl, whisk together the eggs, evaporated milk, and vanilla extract until smooth.
- Combine and Strain: Stir the cooled sugar water into the egg mixture. Strain the custard through a fine sieve to remove bubbles and ensure a silky texture.
- Fill Tart Shells: Pour the strained custard into prepared tart shells, filling just below the rim to allow for slight expansion during baking.
- Bake: Place the tarts in the preheated oven and bake for 25 to 30 minutes, or until the custard is set and the crust is golden brown.
- Cool and Serve: Allow the tarts to cool in the molds before removing. Serve warm or at room temperature for the best flavor and texture.
Notes
- Straining the custard mixture before baking ensures a smooth and silky texture without bubbles.
- Avoid overbaking to prevent the custard from puffing up too much or cracking on the surface.
- Chilling the dough before rolling helps achieve a flaky crust.
- Use tart molds with straight sides if possible for classic tart shape.


