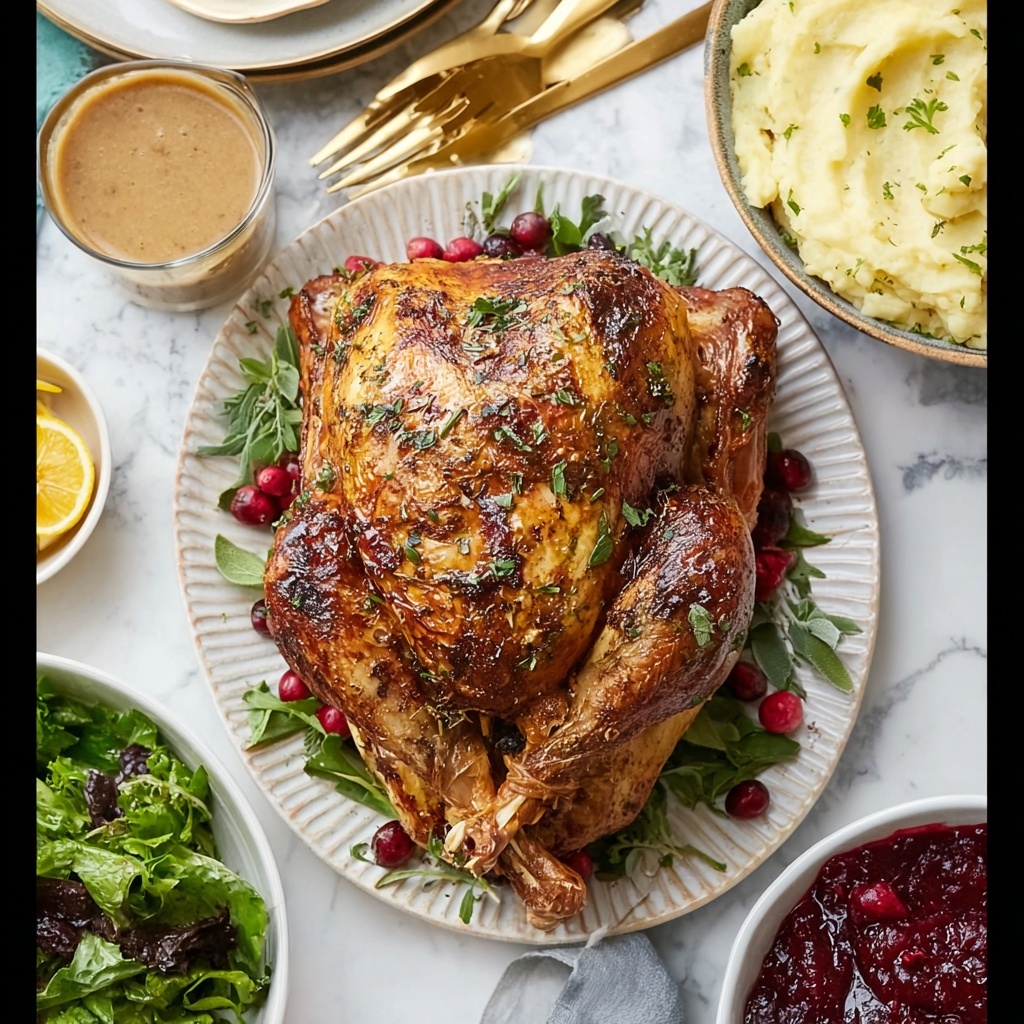
The Dry Brined Roast Turkey with Garlic Butter and Herb Aromatics Recipe is a game changer for your holiday feasts and special occasions. This method transforms your turkey into a juicy, flavorful centerpiece with perfectly crisp skin and aromatic herbs infused throughout the meat. The magic lies in the dry brining process combined with a rich garlic butter spread and fresh herb aromatics that elevate every bite with deep, savory notes. Once you try this Dry Brined Roast Turkey with Garlic Butter and Herb Aromatics Recipe, you’ll never settle for anything less on your holiday table.
Ingredients You’ll Need
Gathering these simple yet essential ingredients is the first step toward making an unforgettable turkey. Each element brings something special to the dish, whether it be moisture, flavor, or that beautiful golden color.
- 1 lemon, halved: Adds bright citrus aromatics that lighten the richness of the turkey meat.
- Fresh herbs like rosemary, sage, & thyme: These herbs infuse the bird with layers of earthy and fragrant notes.
- 12-16 pound whole minimally processed turkey*: Choose a quality bird for the best texture and flavor results.
- 1/4 cup kosher salt: The key to dry brining, salt draws out moisture and then reabsorbs it for juicy, tender meat.
- 1 teaspoon dried thyme: Provides a subtle herbal boost mixed with the salt for the brine.
- 8 tablespoons unsalted butter, room temperature: Creates a luscious garlic butter spread that bastes the bird during roasting.
- 1 head garlic: A head of garlic gives you cloves to incorporate into your butter and aromatics for deep, savory flavor.
How to Make Dry Brined Roast Turkey with Garlic Butter and Herb Aromatics Recipe
Step 1: Prepare Your Turkey Ahead of Time
Start up to two days before roasting by removing your turkey from its packaging and patting it completely dry. This dryness is essential for producing beautifully crisp skin. Place the bird breast side up on a wire rack set over a sheet pan to catch any drips and ensure air circulation.
Step 2: Apply Salt and Thyme for Dry Brining
Mix kosher salt and dried thyme, then gently loosen the skin over the breast meat to rub a generous amount directly onto the turkey flesh. Sprinkle the remaining salt mixture all over the exterior. This dry brine penetrates the meat as it rests in the fridge, enhancing flavor and moisture retention.
Step 3: Refrigerate and Air-Dry
Cover your turkey loosely with plastic wrap and refrigerate if you’re brining more than 24 hours. At least a day before cooking, remove the plastic wrap to let the skin dry out in the cold air, crucial for that golden, crunchy finish.
Step 4: Prepare for Roasting
An hour before roasting, take the turkey out of the fridge. Resist the urge to rinse off the salt—simply brush away any excess with a paper towel to maintain all the flavor benefits.
Step 5: Preheat Your Oven
Set your oven to 425ºF, positioning your racks low in the oven to accommodate the whole turkey properly.
Step 6: Make the Garlic Butter Mixture
Peel and mince 3 to 4 garlic cloves, about a tablespoon, and mix them thoroughly into the softened butter. This garlic butter will be your weapon for mouthwatering turkey skin and juicy meat. Hold on to the remaining garlic cloves for stuffing the bird cavity later.
Step 7: Butter the Turkey
Transfer the turkey to a roasting rack. Loosen the breast skin again and spread a couple of tablespoons of garlic butter directly on the meat, then close the skin. Slather the rest evenly over the entire turkey, covering breasts, legs, and wings to lock in flavor and moisture.
Step 8: Tuck in the Wings
While optional, tucking in the wing tips helps the turkey cook more evenly and prevents wing tips from burning. Fold the tip behind and under the bird so it stays neatly tucked out of the way.
Step 9: Add Aromatics to the Cavity
Fill the turkey cavity with halved lemon, fresh herbs, and the smashed garlic cloves. These aromatics will release fragrant steam from inside the bird, intensifying flavor as it roasts.
Step 10: Tie the Legs
Use kitchen twine or the provided plastic clip to secure the legs together. This ensures even cooking and keeps the bird’s shape intact for a more attractive presentation.
Step 11: Start Roasting at High Heat
Place the turkey in the oven and roast at 425ºF for 15 minutes to crisp the skin.
Step 12: Continue Roasting
Reduce the heat to 325ºF and cook until the turkey reaches an internal temperature of 170ºF in the thickest parts of the breast and thigh. This usually takes under three hours for a 13-pound bird, but use a meat thermometer to be certain.
Step 13: Rest Before Carving
Remove the turkey from the oven and allow it to rest at least 30 minutes. This resting period locks in juices, yielding moist, tender slices to enjoy.
How to Serve Dry Brined Roast Turkey with Garlic Butter and Herb Aromatics Recipe
Garnishes
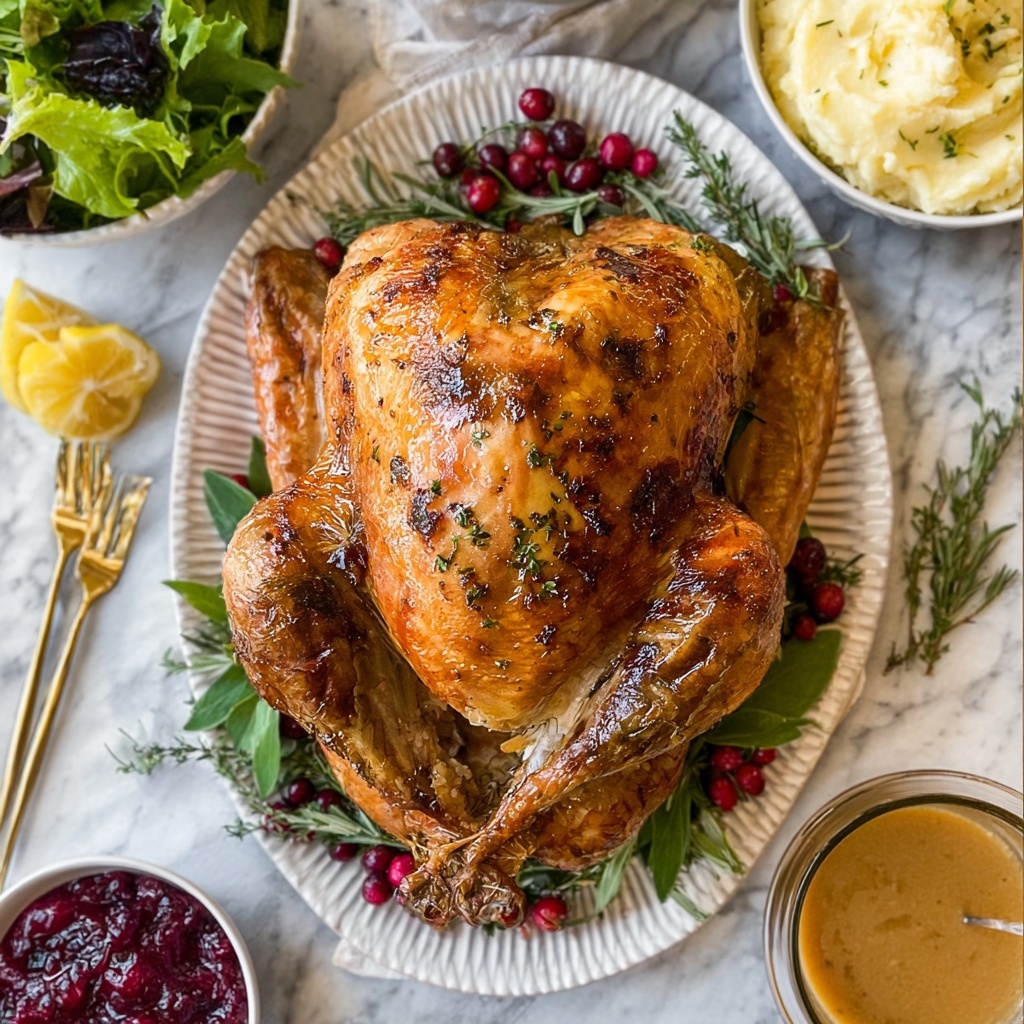
Fresh herb sprigs, lemon wedges, and a drizzle of pan juices make lovely garnishes that not only add color but also complement the aromatic flavors developed during roasting.
Side Dishes
Pair this turkey with classic sides like creamy mashed potatoes, roasted root vegetables, and a tart cranberry sauce to bring a well-rounded plate bursting with holiday spirit and comfort.
Creative Ways to Present
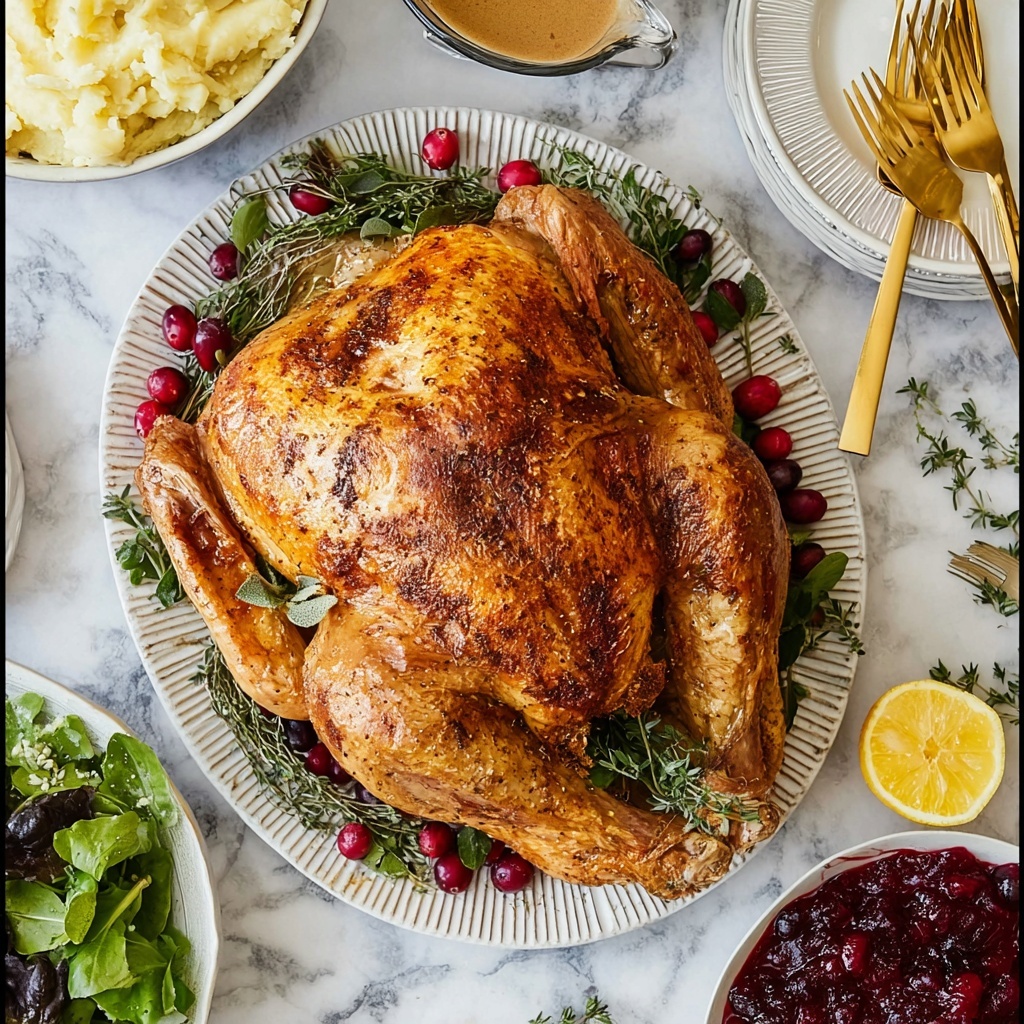
For a stunning tablescape, place the whole turkey on a large platter surrounded by roasted garlic cloves and herb sprigs. You can also slice the breast meat in thick, rustic cuts and fan them out over a bed of wilted greens for a fresh twist on presentation.
Make Ahead and Storage
Storing Leftovers
Wrap leftover turkey tightly in foil or store in airtight containers and refrigerate within two hours of cooking. Proper storage will keep the meat flavorful and moist for up to four days.
Freezing
Slice leftover turkey before freezing for easy portioning. Use freezer-safe bags or containers and label with the date. Frozen cooked turkey maintains quality for up to three months when stored correctly.
Reheating
To prevent drying out, reheat your turkey gently in the oven at 325ºF wrapped in foil or with a splash of broth. Microwave reheating works but be cautious to avoid chewy edges.
FAQs
What is dry brining, and why is it better than wet brining?
Dry brining involves rubbing salt directly on the turkey and letting it rest, which enhances flavor and moisture without adding extra water weight. It’s less messy and results in crispier skin than traditional wet brining.
Can I use regular salt instead of kosher salt?
It’s best to use kosher salt because its coarse grains distribute more evenly and are less salty by volume than table salt. If you must use table salt, reduce the amount by about half to avoid oversalting.
How long should I let the turkey rest after roasting?
Rest your turkey for at least 30 minutes after cooking. This allows the juices to redistribute and makes carving easier without juice loss.
Is it necessary to butter under the skin?
Applying garlic butter under the skin adds richness and helps keep the breast meat moist while infusing it with fantastic flavor. It’s highly recommended if you want that extra depth.
Can I prepare the turkey the same day as roasting?
While possible, the dry brining step needs time to work its magic. At minimum, brine overnight. Two full days allow for the juiciest and most flavorful results.
Final Thoughts
You’ve just discovered the secret to a show-stopping Dry Brined Roast Turkey with Garlic Butter and Herb Aromatics Recipe that will impress your family and friends like never before. The combination of dry brining, savory garlic butter, and fresh herbs makes every bite a celebration. Give this recipe a try, and watch it become your new holiday tradition!
Print
Dry Brined Roast Turkey with Garlic Butter and Herb Aromatics Recipe
- Prep Time: 48 hours (2 days) including brining time
- Cook Time: 3 hours
- Total Time: 51 hours (including brining and resting time)
- Yield: 8 servings
- Category: Main Course
- Method: Roasting
- Cuisine: American
Description
This Dry Brined Turkey recipe delivers a juicy, flavorful bird with crispy skin thanks to a simple yet effective dry brining process. Using kosher salt, dried thyme, fresh herbs, lemon, and a garlic butter mixture, this method enhances natural turkey flavors and ensures a tender, well-seasoned result. The turkey is brined up to two days in advance, then roasted in the oven for a perfectly cooked holiday centerpiece.
Ingredients
Turkey and Brine
- 1 whole minimally processed turkey, 12-16 pounds
- 1/4 cup kosher salt
- 1 teaspoon dried thyme
Herbs and Aromatics
- 1 lemon, halved
- Fresh herbs: rosemary, sage, and thyme, several sprigs each
- 1 head of garlic
Butter Mixture
- 8 tablespoons unsalted butter, room temperature
- 3–4 cloves garlic, peeled and minced (about 1 tablespoon)
Instructions
- Prepare the Turkey: Up to two full days before roasting, remove the turkey from its packaging and place it breast side up on a wire rack set inside a sheet pan or roasting pan. Pat the turkey dry thoroughly with paper towels.
- Make the Dry Brine: In a small bowl, mix kosher salt and dried thyme. Gently loosen the skin over the turkey breasts and sprinkle a few tablespoons of the salt mixture directly on the meat, then lay the skin back down. Sprinkle the remaining salt mixture evenly over the entire turkey surface.
- Refrigerate to Brine: If brining more than 24 hours ahead, cover the turkey and rack loosely with plastic wrap and refrigerate. About 24 hours before cooking, remove the plastic wrap and refrigerate uncovered to dry the skin for crispiness.
- Remove and Inspect: One hour before cooking, take the turkey out of the fridge. Do not rinse the bird. If excess salt or liquids are visible, gently brush them off with a paper towel.
- Preheat Oven: Preheat your oven to 425ºF (220ºC). Place the oven racks low in the oven to accommodate the turkey.
- Prepare Garlic Butter: Mince 3-4 garlic cloves to yield about 1 tablespoon and mix with the softened butter until well combined. Set aside. Smash remaining garlic cloves from the head if you plan to stuff aromatics inside the turkey.
- Apply Butter: Transfer the turkey to a roasting rack. Gently lift the skin on the breasts and spread a couple of tablespoons of garlic butter directly on the meat; close the skin. Then spread the remaining butter evenly over the entire outside of the turkey, covering breasts, legs, and wings.
- Tuck the Wings: (Optional) To help the turkey cook evenly, tuck the wing tips behind the bird by bending each wing tip back toward the neck and securing it underneath the turkey.
- Add Aromatics: (Optional) Place halved lemon, fresh herb bunches, and smashed garlic cloves inside the turkey’s cavity for extra flavor.
- Truss the Legs: Use kitchen twine or the turkey’s plastic leg holder to cross and tie the legs securely to promote even cooking.
- Start Roasting: Place the turkey in the oven and roast at 425ºF for 15 minutes to start browning the skin.
- Lower Heat and Continue Cooking: Reduce the oven temperature to 325ºF (160ºC). Continue roasting for approximately 3 hours total for a 13-pound bird, adjusting time based on weight. The turkey is done when an internal thermometer reads 170ºF in the thickest part of breast and thigh.
- Rest and Serve: Remove the turkey from the oven and let it rest for at least 30 minutes before carving to allow juices to redistribute. Carve and enjoy!
Notes
- Do not rinse the turkey after dry brining to preserve the seasoning and skin dryness.
- Dry brining time can vary from 24 to 48 hours; longer brining yields more flavorful and tender meat.
- Tuck wings and truss legs for even roasting and a neat presentation.
- Use a reliable meat thermometer to ensure the turkey is safely cooked without overcooking.
- Resting the turkey after roasting is important for moist and tender slices.
- Butter can be flavored with additional herbs or spices based on preference.


