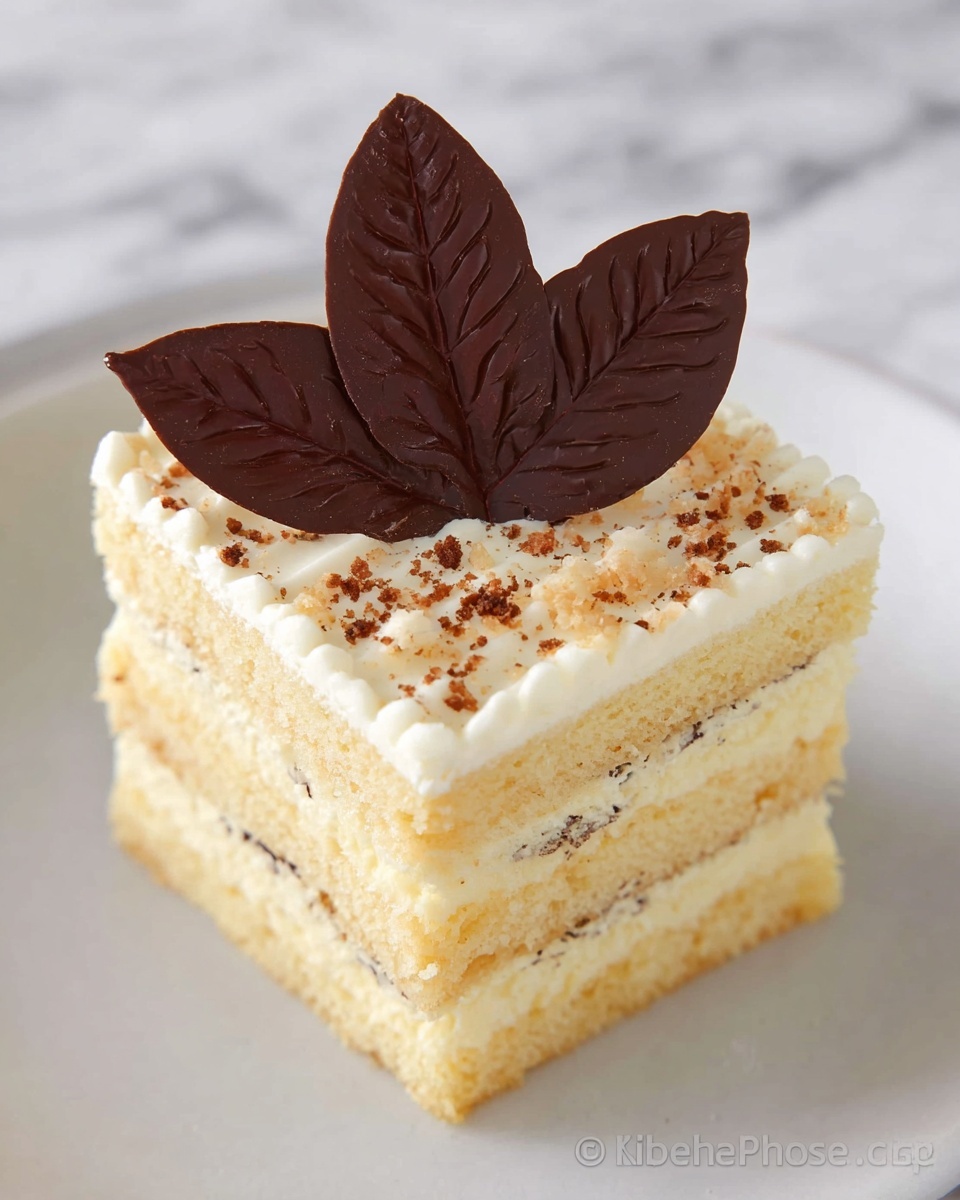
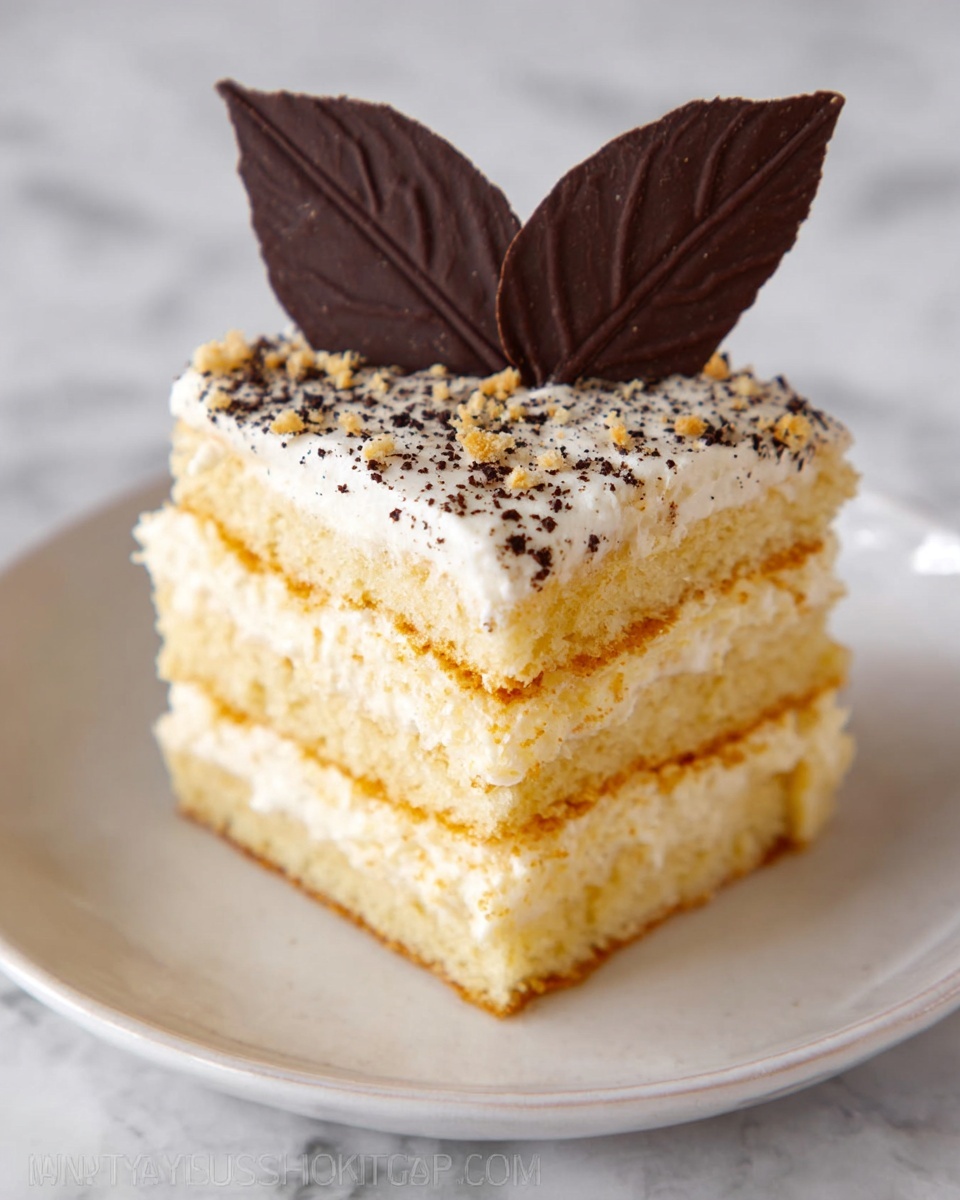
If you love adding a touch of natural elegance to your desserts, the Chocolate Leaf Decorations Recipe is an absolute game changer. This simple yet eye-catching technique transforms everyday leaves into stunning edible art by coating them with glossy chocolate that captures every delicate vein and curve. Whether you’re aiming to impress guests at a dinner party or just want to elevate your homemade cakes and pastries with something unique, these chocolate leaves are a joyful way to bring beauty and flavor together in one delightful bite.
Ingredients You’ll Need
Ingredients You’ll Need
The magic of the Chocolate Leaf Decorations Recipe lies in its simplicity, relying on just a few key ingredients that come together quickly but beautifully. Each ingredient is chosen not only for taste but also for how it helps the chocolate set with a perfect sheen and texture.
- 1/2 cup chocolate: Choose a high-quality chocolate for best flavor and smooth melting—dark, milk, or white chocolate all work wonderfully.
- Fresh, non-toxic leaves: Opt for smooth-edged leaves such as magnolia, rose, or bay leaves, as they hold chocolate well and can be safely removed afterwards.
How to Make Chocolate Leaf Decorations Recipe
Step 1: Melt the Chocolate
Start by melting about 1/2 cup of your chosen chocolate in a microwave-safe bowl. Make sure to melt it gently, stopping every 15 seconds or so to stir, so your chocolate doesn’t burn and stays silky smooth. This step is all about patience, setting the foundation for shiny, flawless leaves.
Step 2: Dip the Leaves
Once the chocolate is melted, pick up a fresh leaf and dip one side generously into the warm chocolate. The goal is to cover the leaf entirely in a luscious, even layer that will highlight the intricate leaf veins when it hardens, creating a natural-looking textured effect.
Step 3: Chill the Leaves
Carefully place the chocolate-covered leaves, chocolate side up, on a plate. Slide them into the refrigerator to set for about 10 to 15 minutes. Cooling is key here—this step ensures the chocolate hardens smoothly without cracking and that your decoration keeps its delicate shape.
Step 4: Peel Off the Leaves
Once the chocolate is fully set and firm to the touch, gently and slowly peel away the leaf from the chocolate. If done carefully, the chocolate will retain the leaf’s imprint beautifully, resulting in a stunning, edible leaf-shaped decoration ready to add a touch of nature-inspired glamour to any dessert.
How to Serve Chocolate Leaf Decorations Recipe
Garnishes
Chocolate leaves make exquisite garnishes for cakes, cupcakes, and even elegant mousse dishes. Their delicate veining and glossy finish instantly elevate desserts, adding both texture and a hand-crafted feel without overwhelming sweetness.
Side Dishes
Try pairing your chocolate leaves alongside fresh berries or lightly whipped cream. The freshness and creaminess complement the rich chocolate beautifully, while the leaves add a visual wow factor that guests will admire.
Creative Ways to Present
Arrange chocolate leaves scattered artfully over a dessert platter or cluster them around the edges of a cake for a woodland-inspired look. For a striking centerpiece, assemble a bouquet-style decoration by sticking the leaves on edible skewers and placing them atop desserts for height and drama.
Make Ahead and Storage
Storing Leftovers
Chocolate leaf decorations can be stored in an airtight container at room temperature for up to 3 days. Keep them away from heat and moisture to preserve their crisp texture and shiny appearance.
Freezing
If you want to keep your decorations longer, you can freeze them in a sealed container. When ready to use, thaw slowly at room temperature to prevent condensation, which could dull the chocolate’s shine or cause it to bloom.
Reheating
Since these decorations are best enjoyed as is, reheating isn’t usually necessary and can risk melting the chocolate. Instead, allow frozen or chilled leaves to return gently to room temperature before serving for the best experience.
FAQs
Can I use any type of leaves for this recipe?
It’s best to use clean, non-toxic leaves with smooth surfaces like magnolia, bay, or rose leaves. Avoid leaves from plants that may be harmful or have strong flavors that could interfere with the chocolate.
What kind of chocolate works best?
High-quality dark, milk, or white chocolate all work well. Just make sure it melts smoothly and evenly. Dark chocolate offers a dramatic look while white chocolate gives a lighter, more delicate appearance.
How do I prevent the chocolate from cracking when peeling off the leaves?
Chill the chocolate-covered leaves thoroughly before peeling, and remove the leaves very slowly and carefully. The chocolate should be fully hardened but not brittle.
Can these decorations be eaten?
Absolutely! The chocolate leaves are edible, but remember the leaves themselves are not. Peel away the leaf before enjoying the chocolate to ensure safety.
How long will the decorations keep their shine and texture?
Stored properly in a cool, dry place, the chocolate leaves maintain their glossy finish and crisp texture for up to three days. Humidity and heat will affect their quality, so storage conditions matter.
Final Thoughts
There is something genuinely magical about transforming simple leaves into beautiful, edible decorations that bring a fresh natural elegance to any dessert. The Chocolate Leaf Decorations Recipe is not only easy to make but incredibly rewarding, perfect for anyone who loves combining creativity with delicious results. Next time you want to impress, try this delightful technique—it might just become your new favorite way to elevate your sweet treats!
Print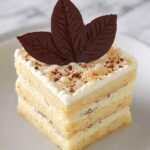
Chocolate Leaf Decorations Recipe
- Prep Time: 30 minutes
- Cook Time: 5 minutes
- Total Time: 35 minutes
- Yield: Approximately 10-12 chocolate leaves depending on leaf size
- Category: Dessert Decoration
- Method: No-Cook
- Cuisine: International
- Diet: Vegetarian
Description
This simple and elegant recipe teaches you how to create beautiful chocolate leaves by coating real leaves in melted chocolate. Perfect for decorating desserts or adding a natural touch to your sweet treats, these chocolate leaves are easy to make and add a charming detail to any occasion.
Ingredients
Ingredients
- 1/2 cup chocolate (dark, milk, or white chocolate, based on preference)
- Fresh, clean leaves with distinct veining (such as mint or raspberry leaves, non-toxic and edible varieties)
Instructions
- Melt the Chocolate: Melt about 1/2 cup of chocolate in a microwave-safe bowl, heating in short bursts and stirring in between to ensure smooth melting without burning. Follow the chocolate package instructions for best results.
- Dip the Leaves: Generously dip one side of each leaf into the melted chocolate, making sure to coat the entire surface with the chocolate for clear vein detail.
- Refrigerate to Harden: Place the chocolate-coated leaves chocolate side up on a plate and refrigerate them until the chocolate has fully hardened. This typically takes about 5 minutes.
- Peel Off the Leaves: Once the chocolate is firm, carefully peel the natural leaves away from the chocolate mold to reveal delicate chocolate leaves perfect for dessert decoration.
Notes
- Use non-toxic, edible leaves such as mint, raspberry, or grape leaves. Avoid poison ivy or other harmful plants.
- Make sure leaves are dry and clean before dipping to ensure chocolate adheres well.
- You can use dark, milk, or white chocolate based on your flavor preference.
- Store the finished chocolate leaves in a cool place or refrigerator to prevent melting.
- This technique works well for decorating cakes, cupcakes, or dessert plates.


