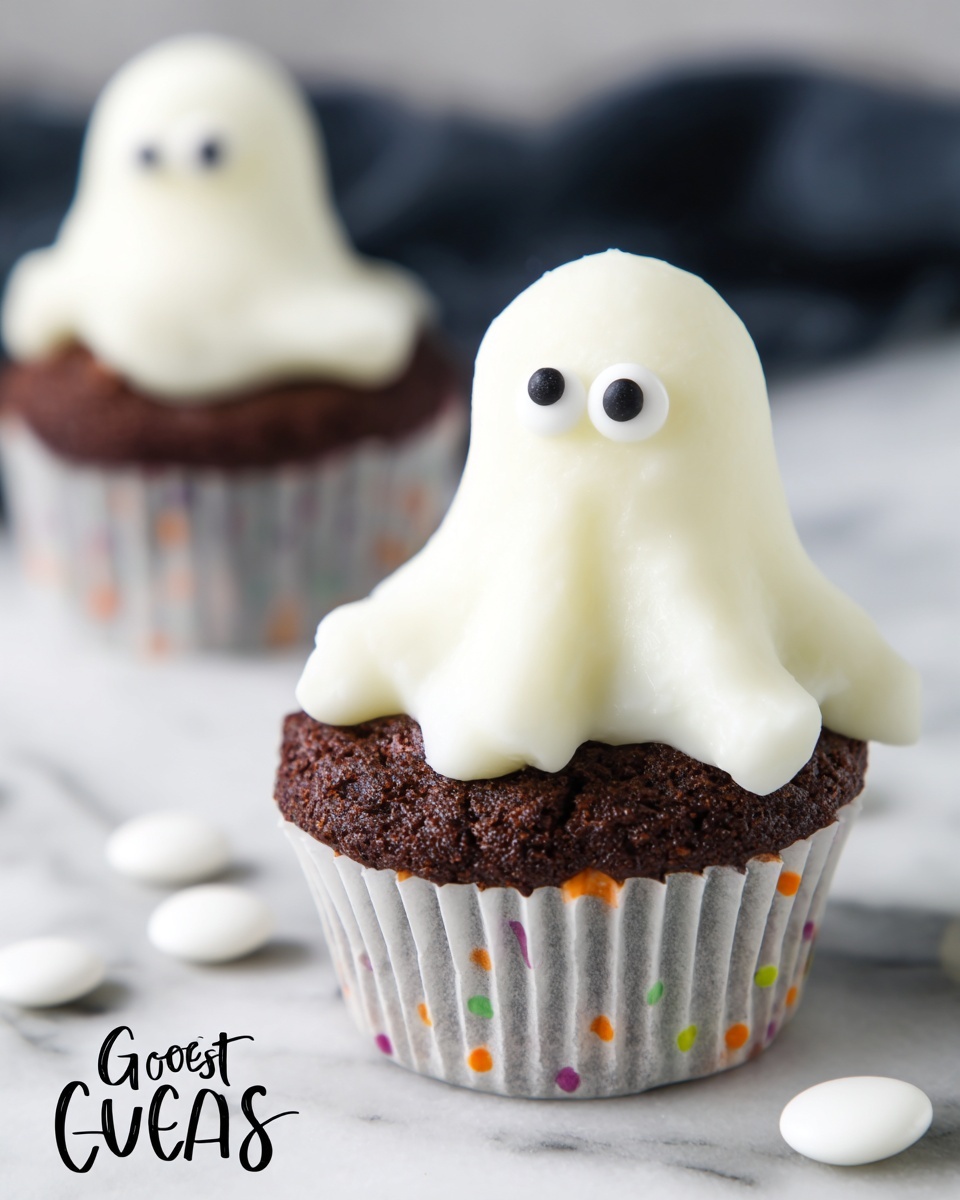
If you’re looking for a delightful way to celebrate the spooky season, this Halloween Ghost Cupcakes Recipe is an absolute must-try! These cupcakes combine rich chocolate goodness with fluffy, ghostly marshmallow toppers that are as fun to make as they are to eat. Every bite offers a perfect balance of moist cake, creamy frosting, and whimsical chilling charm — perfect for parties, treat tables, or just a festive family baking day. Trust me, once you make these, they’ll become a seasonal favorite everyone asks for year after year.

Ingredients You’ll Need
The beauty of this Halloween Ghost Cupcakes Recipe is how straightforward the ingredients are, yet each plays a crucial role in building layers of flavor, texture, and appearance. From soft butter to rich cocoa powder and fluffy marshmallows, everything works together to create sheer magic.
- 1 1/3 cups all-purpose flour: Provides the perfect structure for soft, tender cupcakes.
- 1/4 teaspoon baking soda: Helps the cupcakes rise nicely for a light crumb.
- 2 teaspoons baking powder: Adds extra lift to keep the cupcakes airy.
- 3/4 cup unsweetened cocoa powder: Gives the cupcakes that deep, chocolatey flavor that pairs perfectly with the ghost theme.
- 1/8 teaspoon salt: Balances the sweetness and enhances the chocolate notes.
- 3 tablespoons butter (softened): Adds richness and moisture to the batter.
- 1 1/2 cups white sugar: Sweetens the cupcakes and helps achieve that tender texture.
- 2 eggs: Bind the ingredients together and contribute to the cupcake’s structure.
- 3/4 teaspoon vanilla extract: Adds a warm, inviting aroma.
- 1 cup milk: Keeps the cupcakes moist and soft.
- 1 cup butter (softened) for frosting: The base for creamy, fluffy frosting.
- 3-4 cups icing sugar: Sweetens and thickens the frosting to just the right consistency.
- 2 teaspoons vanilla extract (for frosting): Boosts the flavor in the frosting for a luscious finish.
- Pinch salt: Balances the sweetness in the frosting.
- 2-3 tablespoons milk or heavy cream: Adjusts the frosting for smooth spreading or piping.
- 1 cup white candy melts: Creates the shiny ghostly coating over marshmallows for that classic spooky look.
- 1 tablespoon shortening or vegetable oil: Keeps the candy melts smooth and glossy.
- 24 large marshmallows: The body of each adorable little ghost perched atop the cupcakes.
- 48 candy eyes: Fun and easy way to give each ghost its playful personality.
How to Make Halloween Ghost Cupcakes Recipe
Step 1: Prepare Your Cupcake Batter
Start by preheating your oven to 375 degrees F and lining a muffin pan with festive-themed cupcake liners to create a fun base. In a large bowl, sift together the flour, baking powder, baking soda, cocoa, and salt to evenly distribute the dry ingredients. In another bowl, cream the softened butter with sugar until it’s light and fluffy — this step makes the cupcakes wonderfully tender. Add the eggs one at a time, beating thoroughly after each to build structure, then stir in vanilla extract for warmth.
Step 2: Combine Ingredients and Bake
Now, alternately add the dry mixture and milk into the butter and sugar bowl, beginning and ending with the flour mixture. Beat well after each addition, creating a smooth, buttery batter. Fill your muffin cups about three-quarters full so the cupcakes will rise perfectly without overflowing. Pop them into the oven and bake for 15 to 18 minutes — you’ll know they are done when a toothpick inserted comes out clean. Let them cool completely before moving on to the decorating.
Step 3: Make the Frosting and Add the Ghosts
For the frosting, combine softened butter with 2 cups of icing sugar and beat until fluffy. Mix in heavy cream and vanilla extract to make it creamy. Add the remaining icing sugar slowly until you reach a smooth yet pipeable consistency — perfect for swirling atop cupcakes. Using a piping bag fitted with no tip or a circular tip, swirl generous amounts of frosting on each cooled cupcake to create a soft bed for your ghosts.
Step 4: Craft the Ghostly Toppers
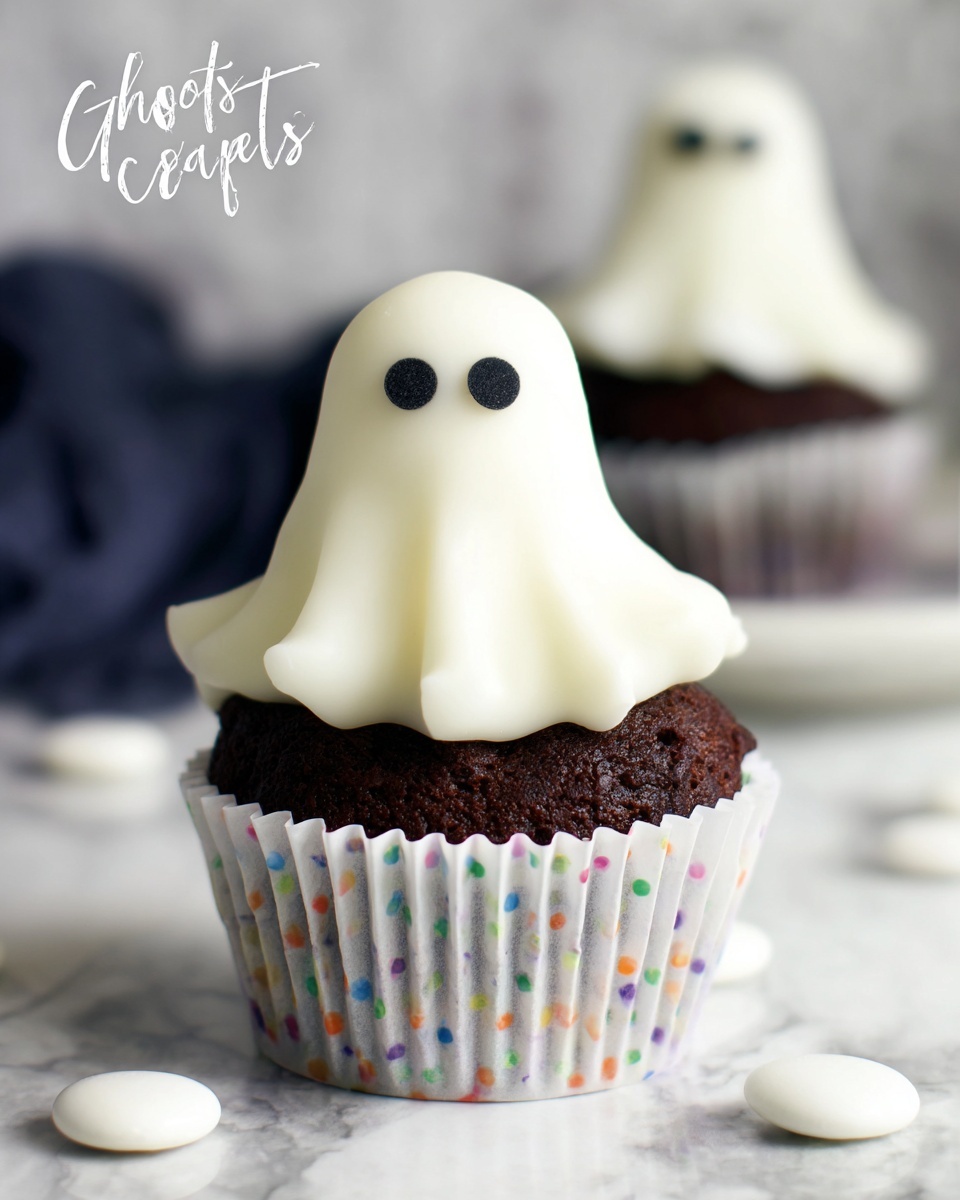
Melt the white candy melts with shortening for about 25 seconds, stirring well and reheating if needed to maintain a smooth texture. Place a large marshmallow right in the center of each frosted cupcake, then spoon 1 to 2 tablespoons of the warm candy melts over the marshmallow, spreading gently with the back of a spoon to cover it evenly. Allow the coating to set for about 5 minutes before attaching two candy eyes to each marshmallow ghost. If the candy melts are still too soft, give them a bit longer to dry — patience is key to perfect haunting faces!
How to Serve Halloween Ghost Cupcakes Recipe
Garnishes
Adding simple garnishes can really elevate your Halloween Ghost Cupcakes Recipe. You can sprinkle a few edible glitter flecks or tiny orange and black sprinkles around the ghost toppers to give them an extra festive flair. A light dusting of cocoa powder around the base of the cupcake also adds a subtle, spooky shadow effect that’s sure to impress your guests.
Side Dishes
These cupcakes shine on their own, but pairing them with a warm drink like spiced pumpkin latte or rich hot chocolate makes for a cozy, complete Halloween treat experience. You might also serve them alongside a fresh fruit platter or caramel popcorn to offer a balance of sweet and wholesome nibbles.
Creative Ways to Present
Presentation makes a world of difference! Arrange your Halloween Ghost Cupcakes Recipe on a tiered serving tray shaped like a haunted house or spider web for dramatic effect. Place faux cobwebs and mini pumpkins around the display to bring the theme alive. For a fun party trick, hide small Halloween-themed treats under the cupcake liners so guests discover surprises with each cupcake they pick up.
Make Ahead and Storage
Storing Leftovers
Once decorated, store your cupcakes in an airtight container at room temperature for up to two days. If your kitchen is warm, a cool spot or refrigerator will keep them fresh longer without melting the candy coating.
Freezing
You can freeze the baked cupcakes (without frosting and decorations) in a sealed container or freezer bag for up to three months. When ready to use, thaw completely at room temperature before frosting and decorating to maintain texture and flavor.
Reheating
Because these cupcakes are best enjoyed at room temperature, avoid reheating the decorated ones directly. If you froze the cupcakes unfrosted, warming them gently in the microwave for 10-15 seconds can bring back softness before adding frosting and ghost toppers.
FAQs
Can I use pre-made frosting for this Halloween Ghost Cupcakes Recipe?
Absolutely! While homemade frosting offers that fresh-from-the-kitchen charm, a good-quality store-bought buttercream works just fine and can save time without sacrificing taste.
What if I can’t find candy eyes?
Don’t worry — you can make your own by piping tiny dots of melted chocolate or black icing onto parchment paper, letting them set, and then gently transferring them to the marshmallows. Alternatively, mini chocolate chips work well too.
Is it possible to make these gluten-free?
Yes, you can substitute all-purpose flour with a gluten-free flour blend in the same amount. Just be sure to check that your baking powder and other ingredients are gluten-free as well.
Can I make these cupcakes vegan?
This recipe includes dairy and eggs, so converting it to vegan requires several swaps like using plant-based milk, vegan butter, and an egg replacer. Vegan marshmallows and candy melts should also be sourced to keep the recipe fully vegan-friendly.
What is the best way to transport these cupcakes?
Use a cupcake carrier with secure lids and compartments to keep the ghosts intact during travel. If you don’t have one, place them in a shallow box lined with parchment and make sure they’re snug so they don’t shift.
Final Thoughts
If you want a festive, delicious dessert that everyone can’t stop talking about, this Halloween Ghost Cupcakes Recipe is your perfect go-to. It combines simple ingredients with playful creativity to bring a smile (and maybe a little spook) to your Halloween celebrations. Get baking — your ghosts are waiting!
Print
Halloween Ghost Cupcakes Recipe
- Prep Time: 15 minutes
- Cook Time: 15 minutes
- Total Time: 30 minutes
- Yield: 24 cupcakes
- Category: Dessert
- Method: Baking
- Cuisine: American
Description
These Halloween Ghost Cupcakes are festive and fun treats perfect for spooky celebrations. Rich cocoa cupcakes are topped with a fluffy vanilla buttercream swirl, then transformed into ghostly figures with marshmallows dipped in white candy melts and decorated with candy eyes for a charming and delicious dessert.
Ingredients
Cupcakes
- 1 1/3 cups all-purpose flour
- 1/4 teaspoon baking soda
- 2 teaspoons baking powder
- 3/4 cup unsweetened cocoa powder
- 1/8 teaspoon salt
- 3 tablespoons butter, softened
- 1 1/2 cups white sugar
- 2 eggs
- 3/4 teaspoon vanilla extract
- 1 cup milk
Frosting
- 1 cup butter, softened
- 3–4 cups icing sugar
- 2 teaspoons vanilla extract
- 2 tablespoons heavy cream or milk
- Pinch salt
Ghost Decorations
- 1 cup white candy melts
- 1 tablespoon shortening or vegetable oil
- 24 large marshmallows
- 48 candy eyes
Instructions
- Preheat and Prepare: Preheat your oven to 375°F (190°C) and line a muffin pan with Halloween-themed cupcake liners to get started.
- Mix Dry Ingredients: In a large bowl, sift together the all-purpose flour, baking powder, baking soda, cocoa powder, and salt to ensure an even texture for your cupcakes.
- Cream Butter and Sugar: In another large bowl, cream the softened butter and sugar together until light and fluffy, about 2 minutes, incorporating air into the mixture.
- Add Eggs and Vanilla: Beat in the eggs one at a time, fully incorporating each before adding the next, then stir in the vanilla extract for flavor.
- Combine Wet and Dry: Alternately add the dry flour mixture and milk to the butter mixture, starting and ending with the dry ingredients. Beat well to form a smooth batter.
- Fill and Bake: Spoon the batter into the prepared muffin cups, filling each about three-quarters full. Bake for 15 to 18 minutes, or until a toothpick inserted into the center comes out clean.
- Prepare the Frosting: For the buttercream, beat softened butter and 2 cups of icing sugar in a bowl. Add heavy cream (or milk) and vanilla extract, then gradually add the remaining icing sugar in half-cup increments until you achieve your desired frosting consistency.
- Pipe Frosting: Spoon the frosting into a piping bag fitted with a circular tip or no tip, and swirl it onto the cooled cupcakes to create a smooth, snow-like base for the ghosts.
- Melt Candy Coating: Melt the white candy melts with shortening by heating in 25-second intervals, stirring in between until smooth and pourable.
- Create Ghosts: Place a large marshmallow in the center of each frosted cupcake, then spoon 1 to 2 tablespoons of the melted candy coating over each marshmallow, using the back of a spoon to distribute the coating and shape the ghost figure.
- Add Eyes: After the candy coating has set for about 5 minutes, carefully attach two candy eyes to each ghost. If the coating is still too soft, allow it a few more minutes to firm up before retrying.
Notes
- Make sure the cupcakes are completely cooled before frosting to prevent melting.
- If your candy melts harden too much while working, gently reheat in short bursts in the microwave.
- You can use milk instead of heavy cream in the frosting to lighten it up slightly.
- For extra stability when attaching eyes, use a small dab of melted candy as glue.
- Store cupcakes in a cool, dry place to keep the candy coating firm.
